
Black Friday And Holiday Deals for Gun Guys/Gals
It’s that time of year. Black Friday. Cyber Monday. Christmas is right around the corner. What does that mean? Lots of sales. Whether you’re looking for something new for yourself or a gift for that gun person in your life, now is the time to snag a deal.
Here is a list of various items and companies that are currently running Black Friday/Cyber Monday deals. Some of them started at the beginning of November; others start on Black Friday; and some last through the end of the year.
Barrel Blok - An absolutely essential dry fire tool. I have several of them and use them in my dry fire practice sessions. They are running a 20% off sale right now when you use the code bf2025 at checkout.
The Barrel Blok is a great tool to show that your firearm is unloaded and cleared. Fantastic for dry fire practice sessions. And it’s available in multiple calibers.
Dry Fire Journal - While you’re at it, pick up a copy of my Dry Fire Journal to help with logging your practice sessions and track your progress.

The book I created for logging your practice sessions.
Bear Creek Arsenal - There are lots of Glock clones out there these days. This one will cost you less than three bills. They sent me one for review last year, and it seems to be pretty decent. Optics-ready right out of the box and takes Glock magazines, sights, and parts. Not too shabby.
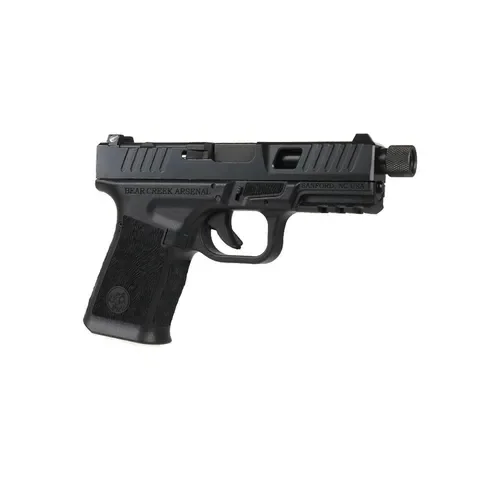
The Bear Creek Arsenal Grizzly 102 is an affordable optics-ready pistol that takes glock magazines.
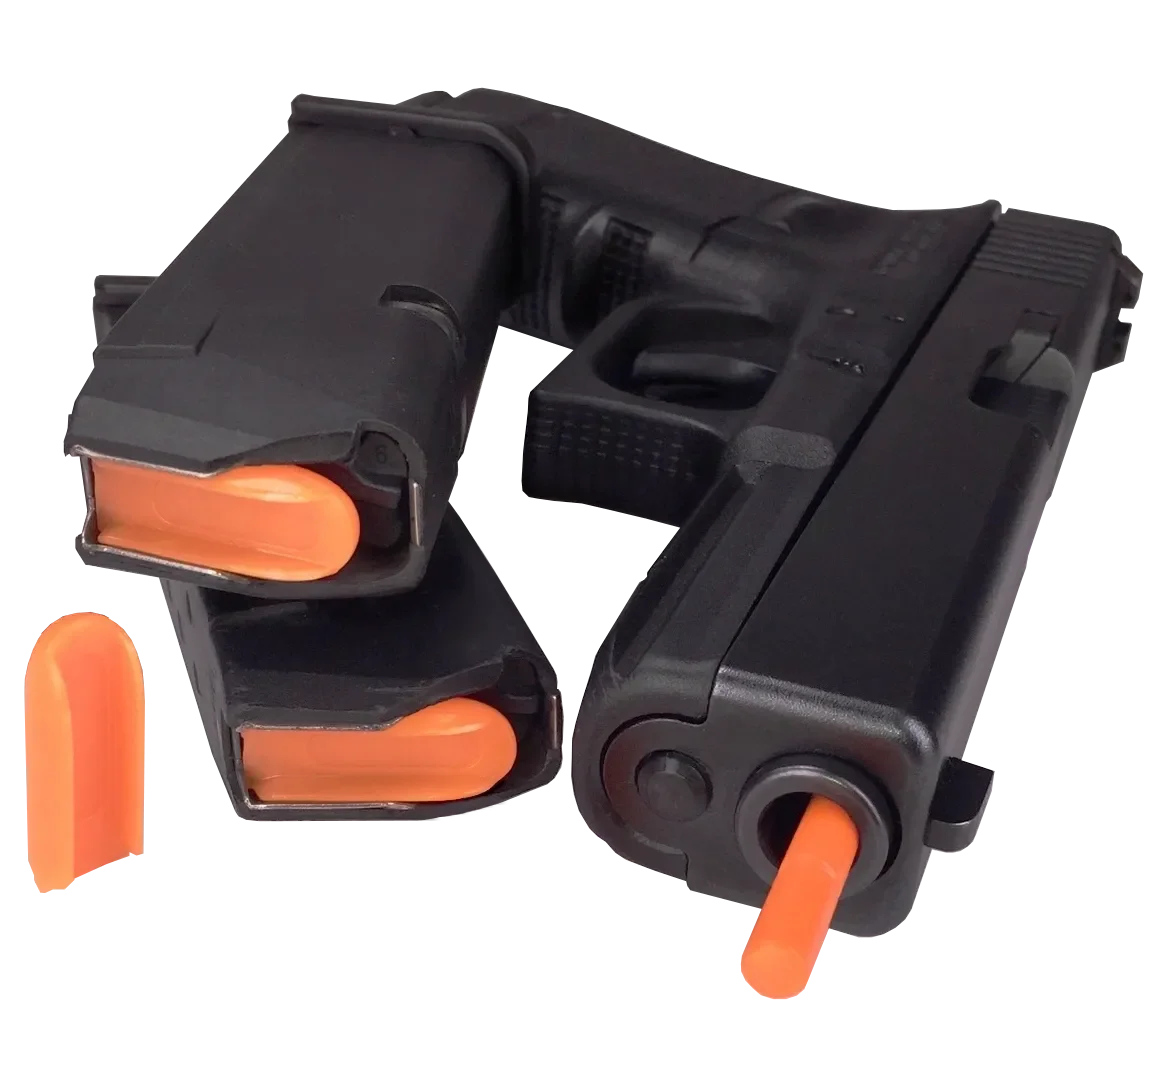
DryFire Mag - Another great dry fire tool. This one allows you to have repeated trigger presses without having to rack the slide each time. They also make a version with a laser if you want the visual feedback. Currently 15% off. Use code AffordableArmoryQ4 for an additional 10% savings through the end of the year.
Need repeated trigger presses in your dry fire routine? The DryFireMag is your answer.
Palmetto State Armory - They are running a TON of deals. Have a look and you’ll likely find something you want or need, or a great gift. Here is a decent optic AND a set of iron sights for your AR for just over 2 bills.
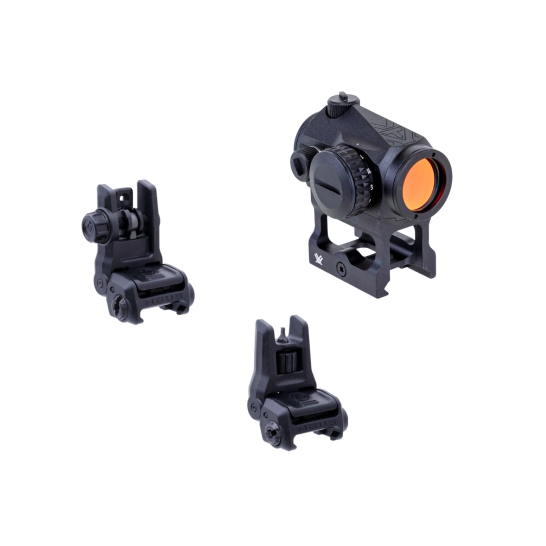
Building a budget AR-15 setup? This isn’t a bad option for sights.
Eberlestock - The Bando Bag, my current favorite fanny pack, is 30% off right now. I have two of them, the standard and the XL. I use the standard for EDC when I can’t carry IWB such as trips to the gym or jiu jitsu (Gis don’t have pockets). The XL is packed with a few extras for outdoor activities.
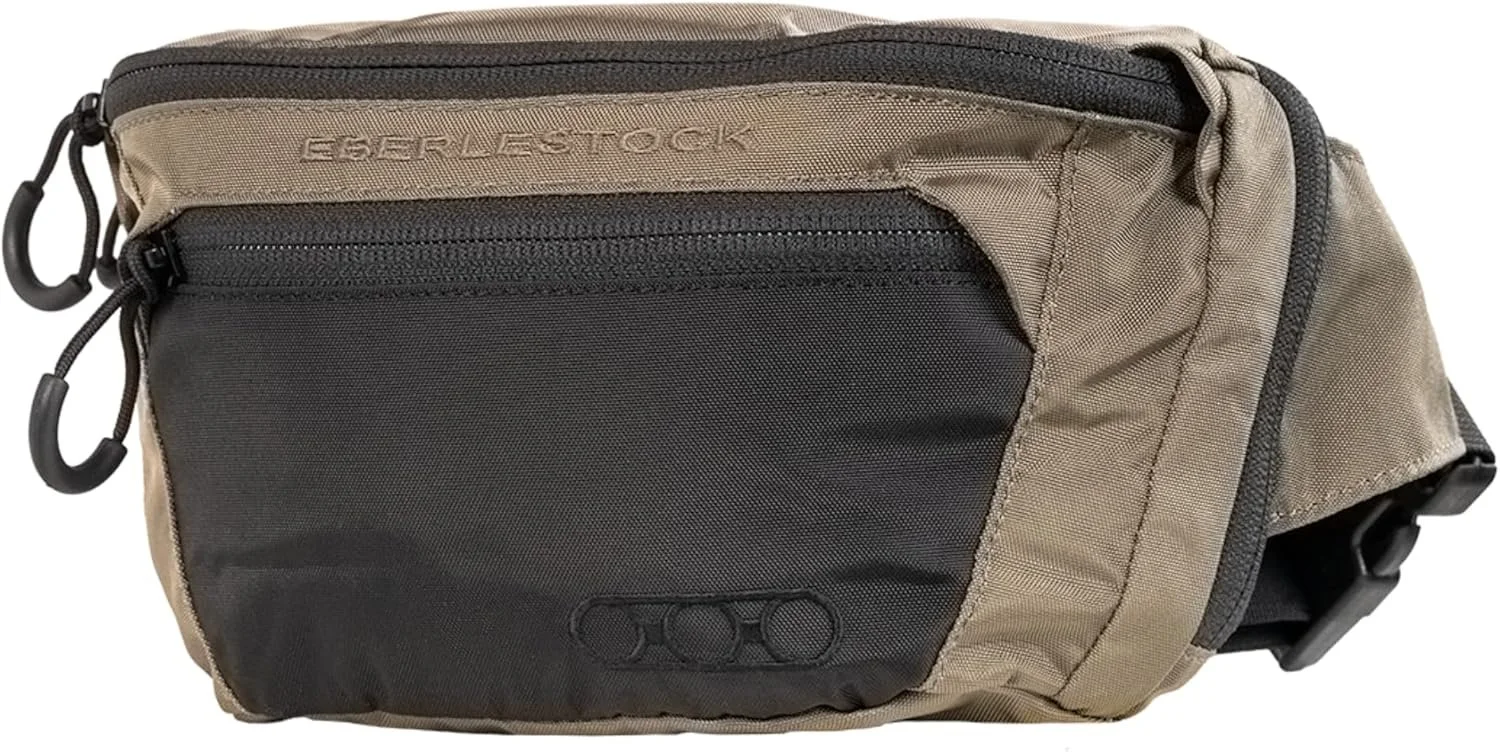
My alternate EDC fanny pack of choice.
POM Pepper Spray - I will be picking up this bundle from POM. I carry the clip model POM pepper spray every day, as do many of my peers and mentors. Code BF20 saves you 20% off all POM products.
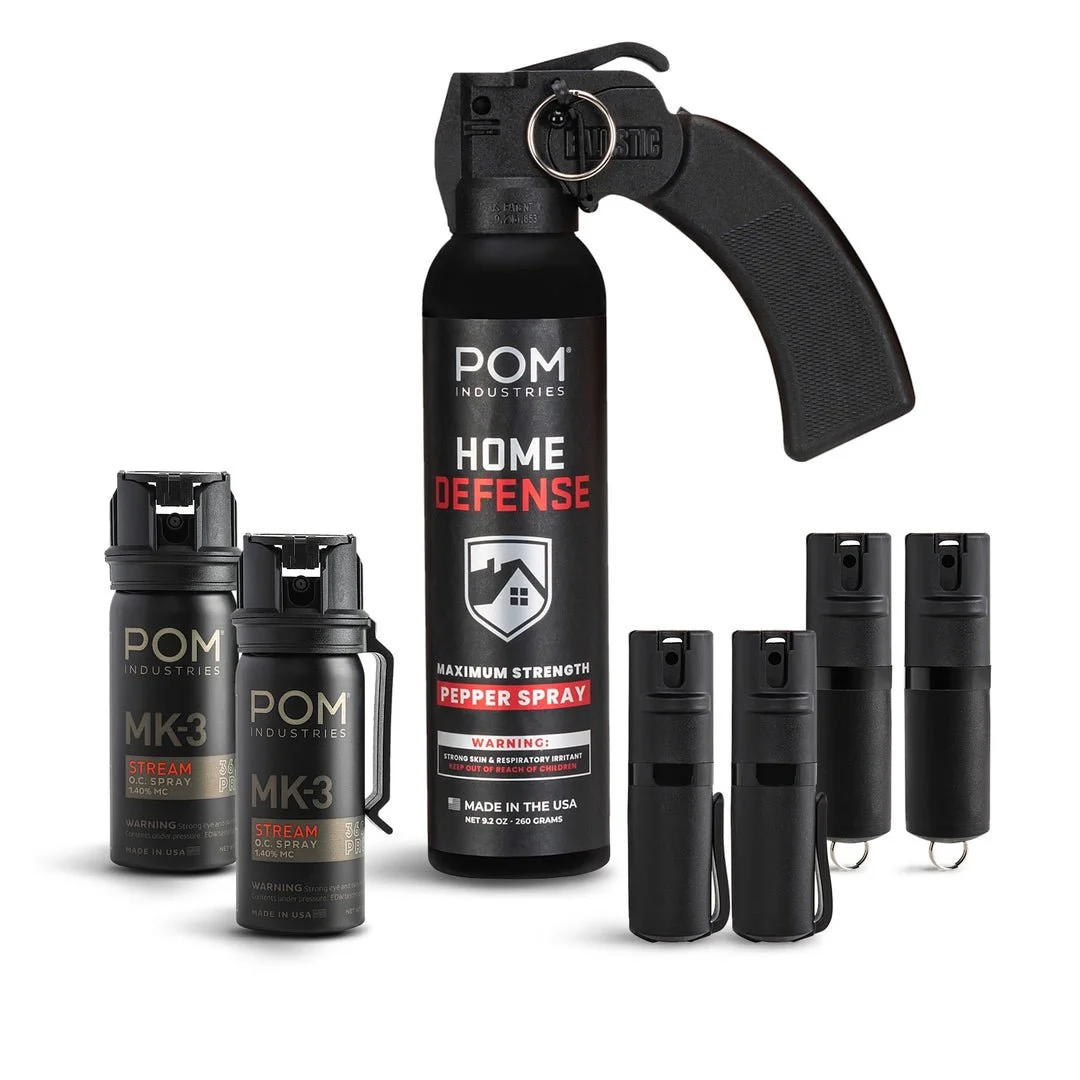
A nice variety of POM pepper spray products.
Shivworks - I have carried the Clinch Pick and the El Nino push dagger interchangeably for the last several years. I will soon be ordering their newly released El Loco and Little Loco knives. BF2025 saves you 15% right now.
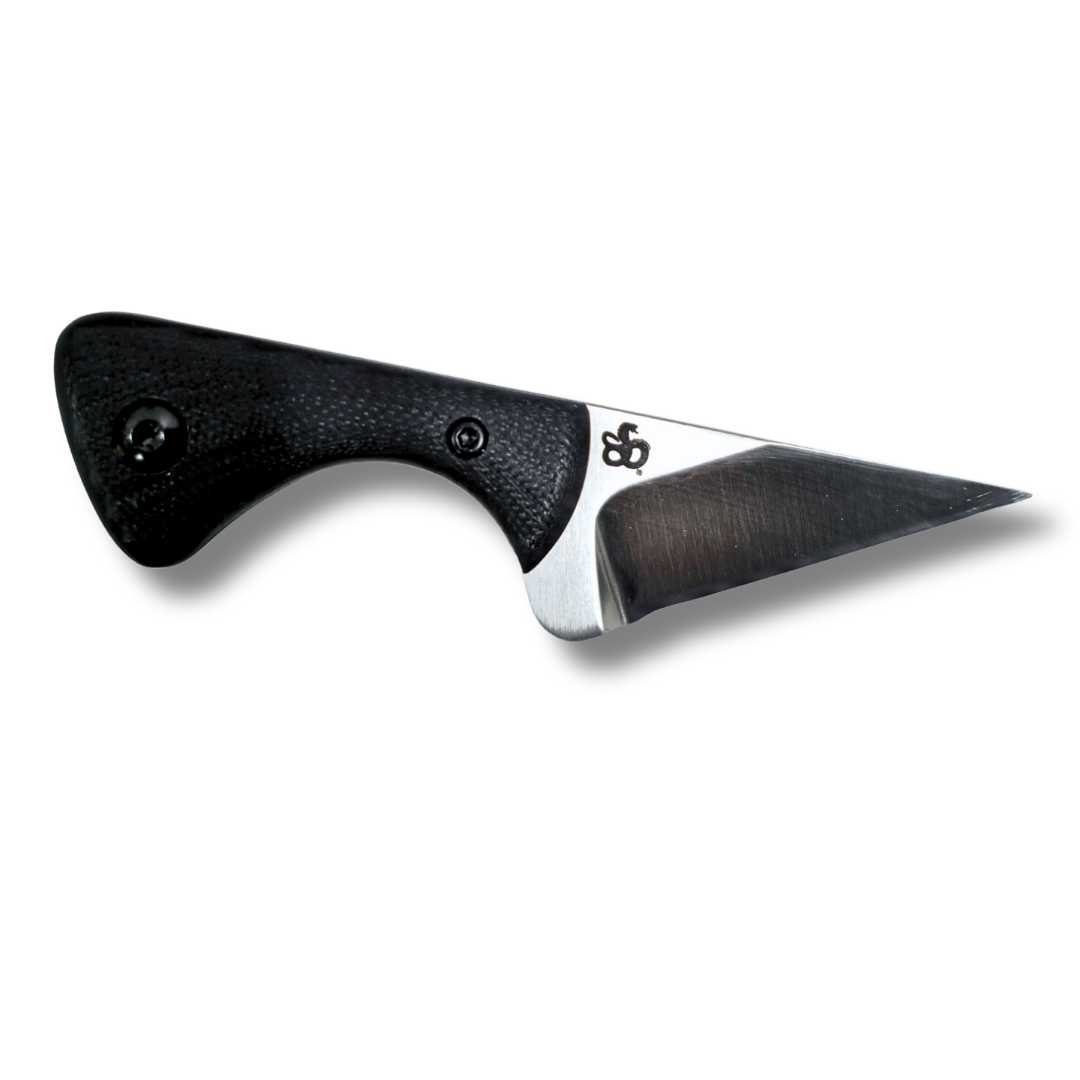
The El Loco (pictured here) and Little Loco will make great deep concealment knives.
NiteCore - They recently sent me one of their flashlights for review, and I believe they have some decent options. Especially at 33% off.

This is the model they sent me. Slim frame fits nicely in the pocket and turbo mode is 3000 lumens!
Phlster Holsters - They are running a sale through the end of the month. I have carried a j-frame quite a bit in their city special, and the Enigma is great for deep concealment.
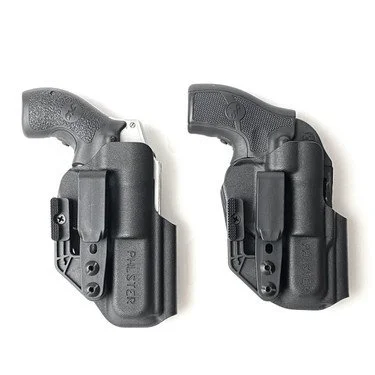
The City Special is a solid choice if you’re looking for a holster for your Smith & Wesson J-Frame or Ruger LCR. Their Enigma is fantastic for deep concealment or carrying without a belt.
Active Response Training - Greg Ellifritz usually posts a list of Amazon deals on his blog when they run big sales. You should be subscribed to his blog anyway. If not, fix that now.
Amazon - Lastly, don’t forget about my Amazon storefront. I’ve listed a bunch of items I own and use on a regular basis.
Modifying the Taurus 856 UltraLite
The Taurus 856 UltraLite is a 6-shot .38 special; and it’s a great, slightly more affordable, competitor to the classic Smith & Wesson 5-shot Airweight J-frames. It has the added bonus of having an additional round capacity (856 = Model 85 with 6 rounds).
Out of the box, the 856 UltraLite is a pretty good small frame revolver. Its light weight makes it easy to carry. And holsters and speedloaders are readily available for it. My only complaint is the exposed hammer makes it less than ideal for pocket carry, but that’s a minor thing. Aside from that, we’re going to look at two changes I decided to make to the gun.
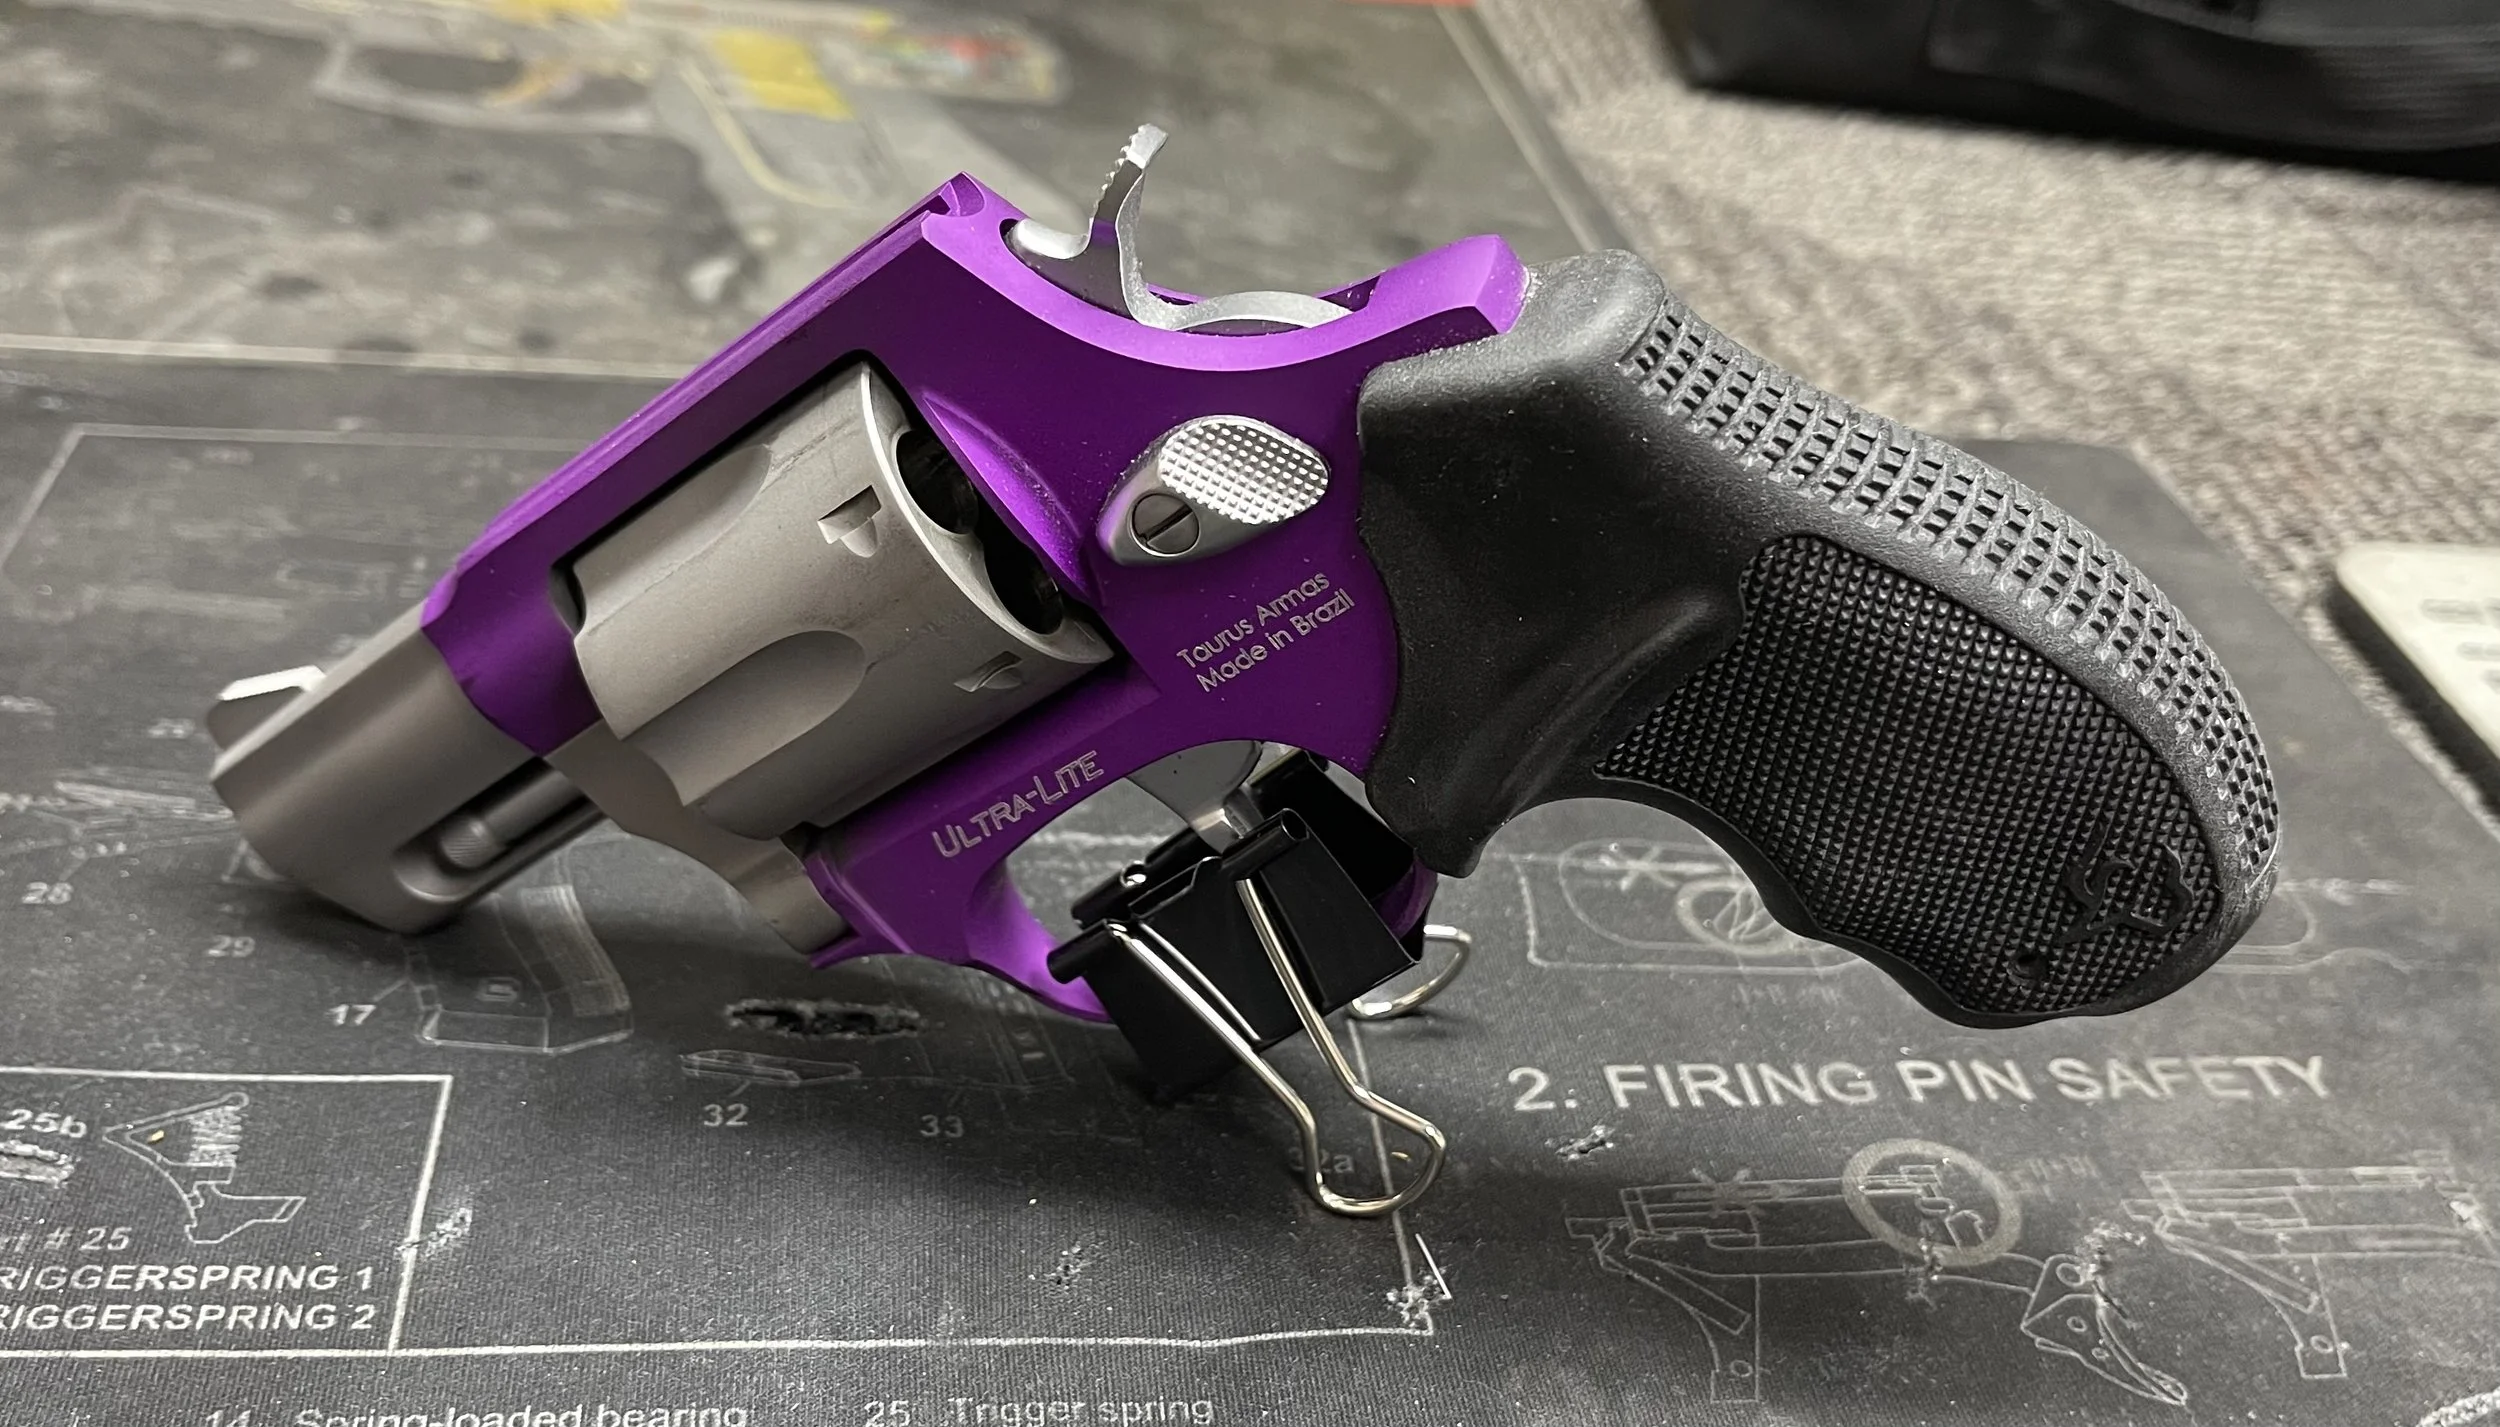
The Taurus 856 UltraLite, as it comes. (Yes, I own a purple gun. I also own a pink one. So what?)
The first modification we’re going to look at is the stocks (or grips, as they are commonly called). The stocks that come on the gun are okay. They have lots of good texturing and checkering on the back and sides that enables a good purchase. However, there are a few issues I have with them.
The first issue is that they are a single piece, wraparound style that leaves a gap at the top of the backstrap. You can see that gap in the above picture. While it may not be a problem for everyone, I found that it was uncomfortable and often caught the web of my hand when establishing a high grip on the gun.
The second issue is the shelf on either side of the stocks. It juts outward from the side on both sides of the stocks. When I shoot revolvers, I use a tucked thumb grip, and this shelf interferes with that pretty severely.
Removing the factory stocks is as simple as driving out a roll pin with a hammer and punch and then pulling or sliding them off the bottom of the gun.
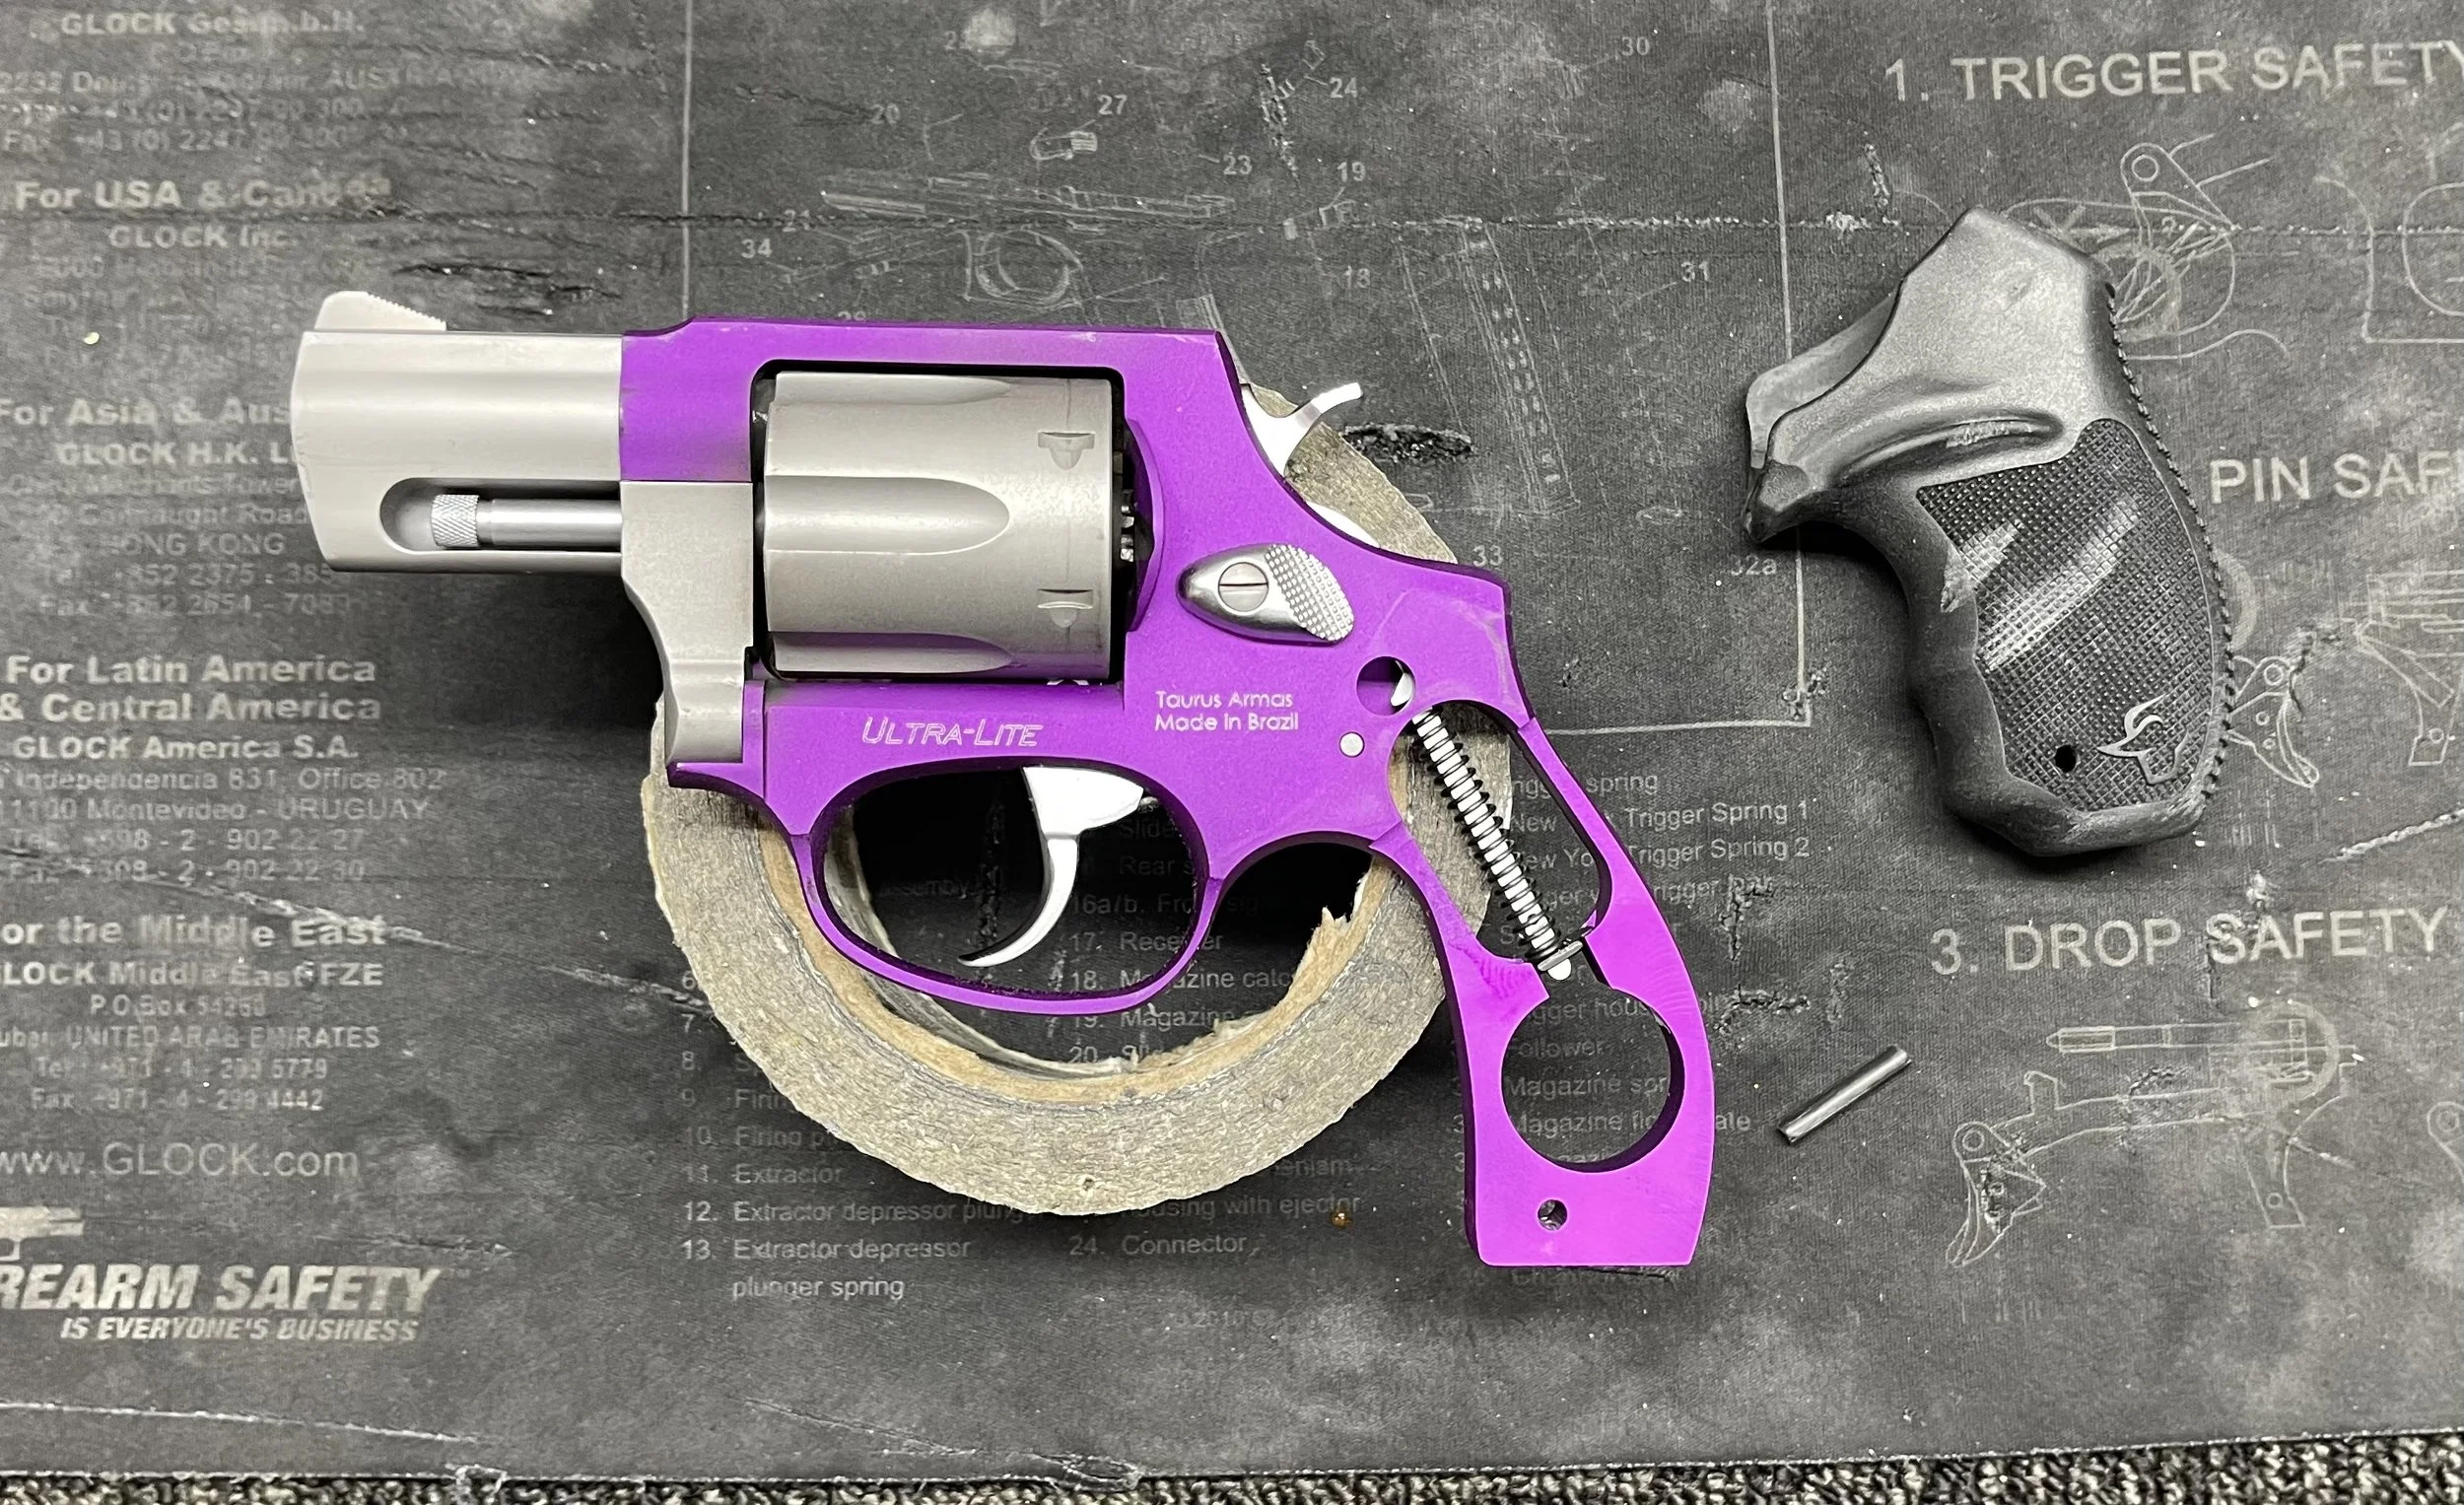
Thankfully, swapping stocks on the Taurus 856 UltraLite is fairly easy, and there are plenty of options out there. VZ makes several versions in G10, with or without texturing. But my favorite stocks (I have them on Taurus, Smith & Wesson, and Ruger small frame revolvers) are made by Hamre Forge (pronounced Ham-ree, but everyone calls them Hammer Forge). I get them with the Hamre Hook, but you can also order them standard or as a full set.

The Hamre Forge stocks with Hamre Hook, installed on the Taurus 856 UltraLite. Note the fully exposed backstrap.
While the Hamre Forge stocks have less texturing (actually, none really) than the factory ones, I find that they fit my hand better. They have a rounded contour that fills the palm of the hand. The now exposed backstrap allows me to get a higher purchase on the gun with no discomfort. And the Hamre Hook allows for the ability to carry it IWB without a holster in a pinch. They are also easily installed by connecting the two sides with the included screw.
The second modification we’re going to look at is the sights. I have seen worse sights on a handgun (the Ruger LCP comes to mind), but there is definitely room for improvement. The front sight is a plain Jane ramp style sight. No coloring, and unfortunately on my model, not replaceable. Newer versions have a replaceable front sight, in which case I would recommend XS Sights in either orange or green. I have them on another Taurus revolver, a Ruger LCR, and a Smith & Wesson J-Frame. They are fantastic.
Since the front sight cannot be replaced on this gun, I decided to paint it. This is a fairly simple and relatively inexpensive modification. You will need a few things: model paint, some form of degreaser to clean the front sight, and a brush. I used this kit, which includes several different colors as well as a sight cleaning solution. You could also use model paint from Hobby Lobby; I’ve also heard of people using nail polish.
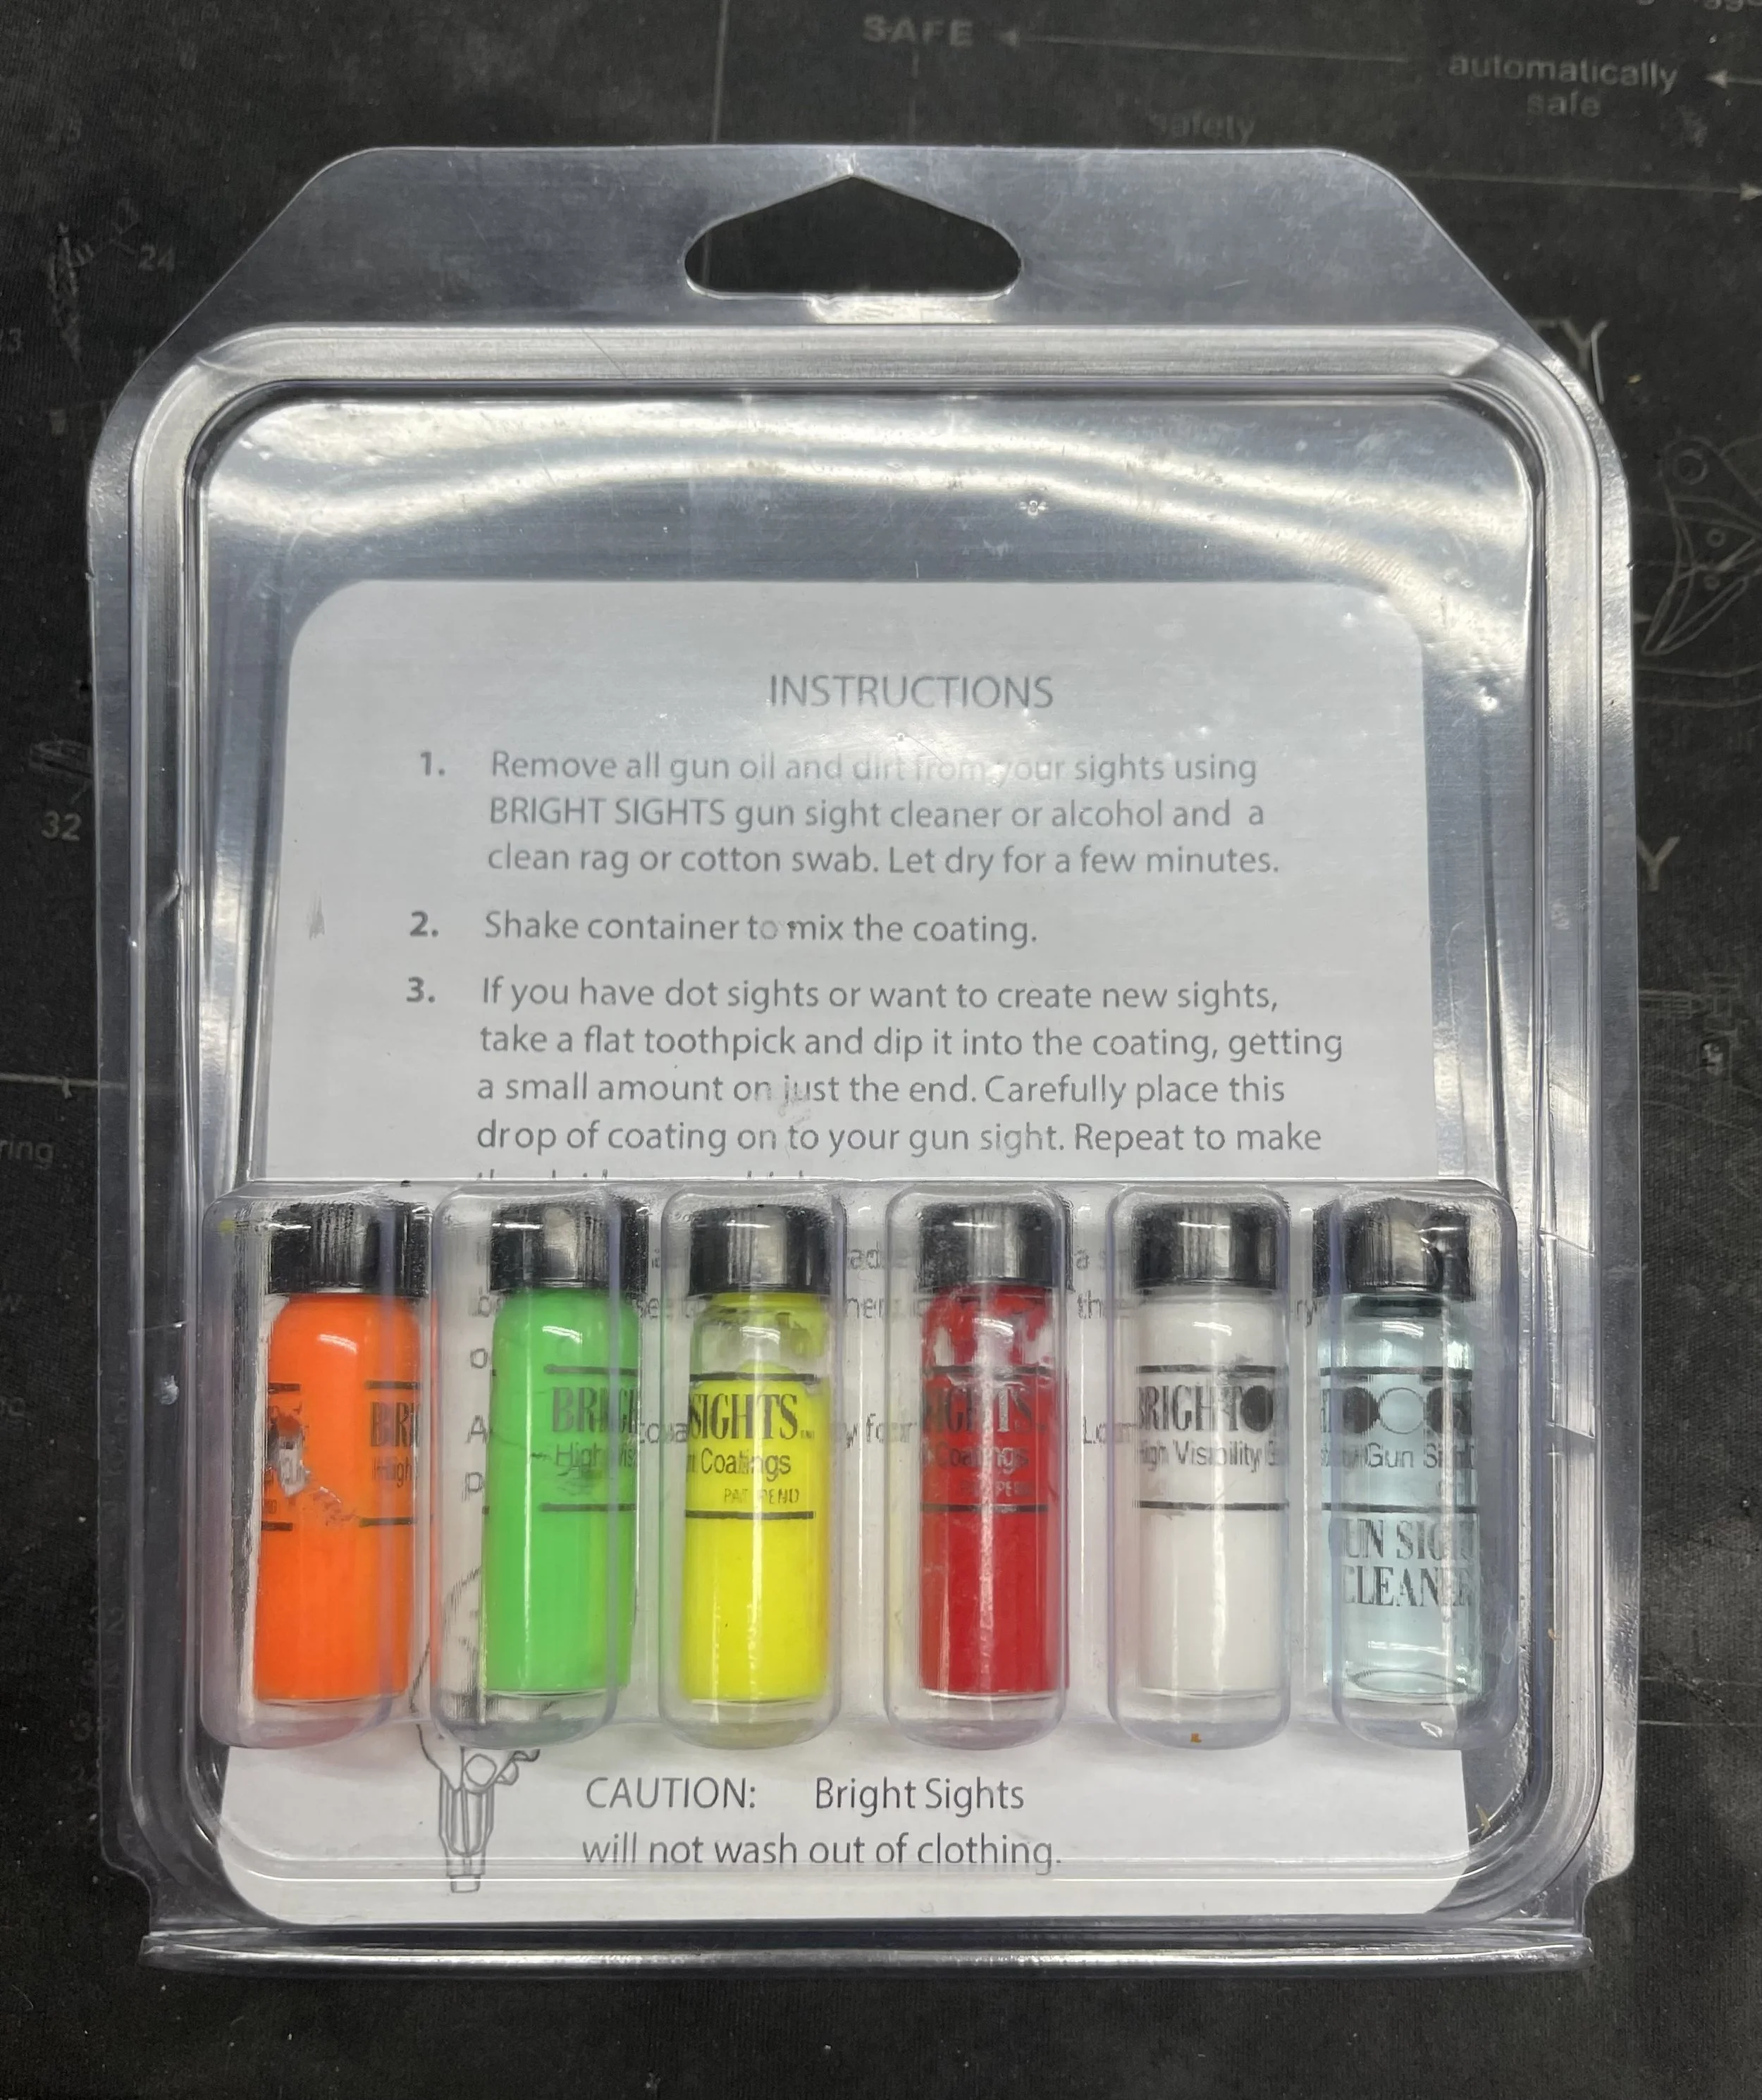
The Bright Sights kit has everything you need, minus the brush.
As to what color to paint the front sight, pick something that can easily be seen. I went with green because it is the easiest color for the human eye to see. Other commonly used colors are bright orange or bright yellow.
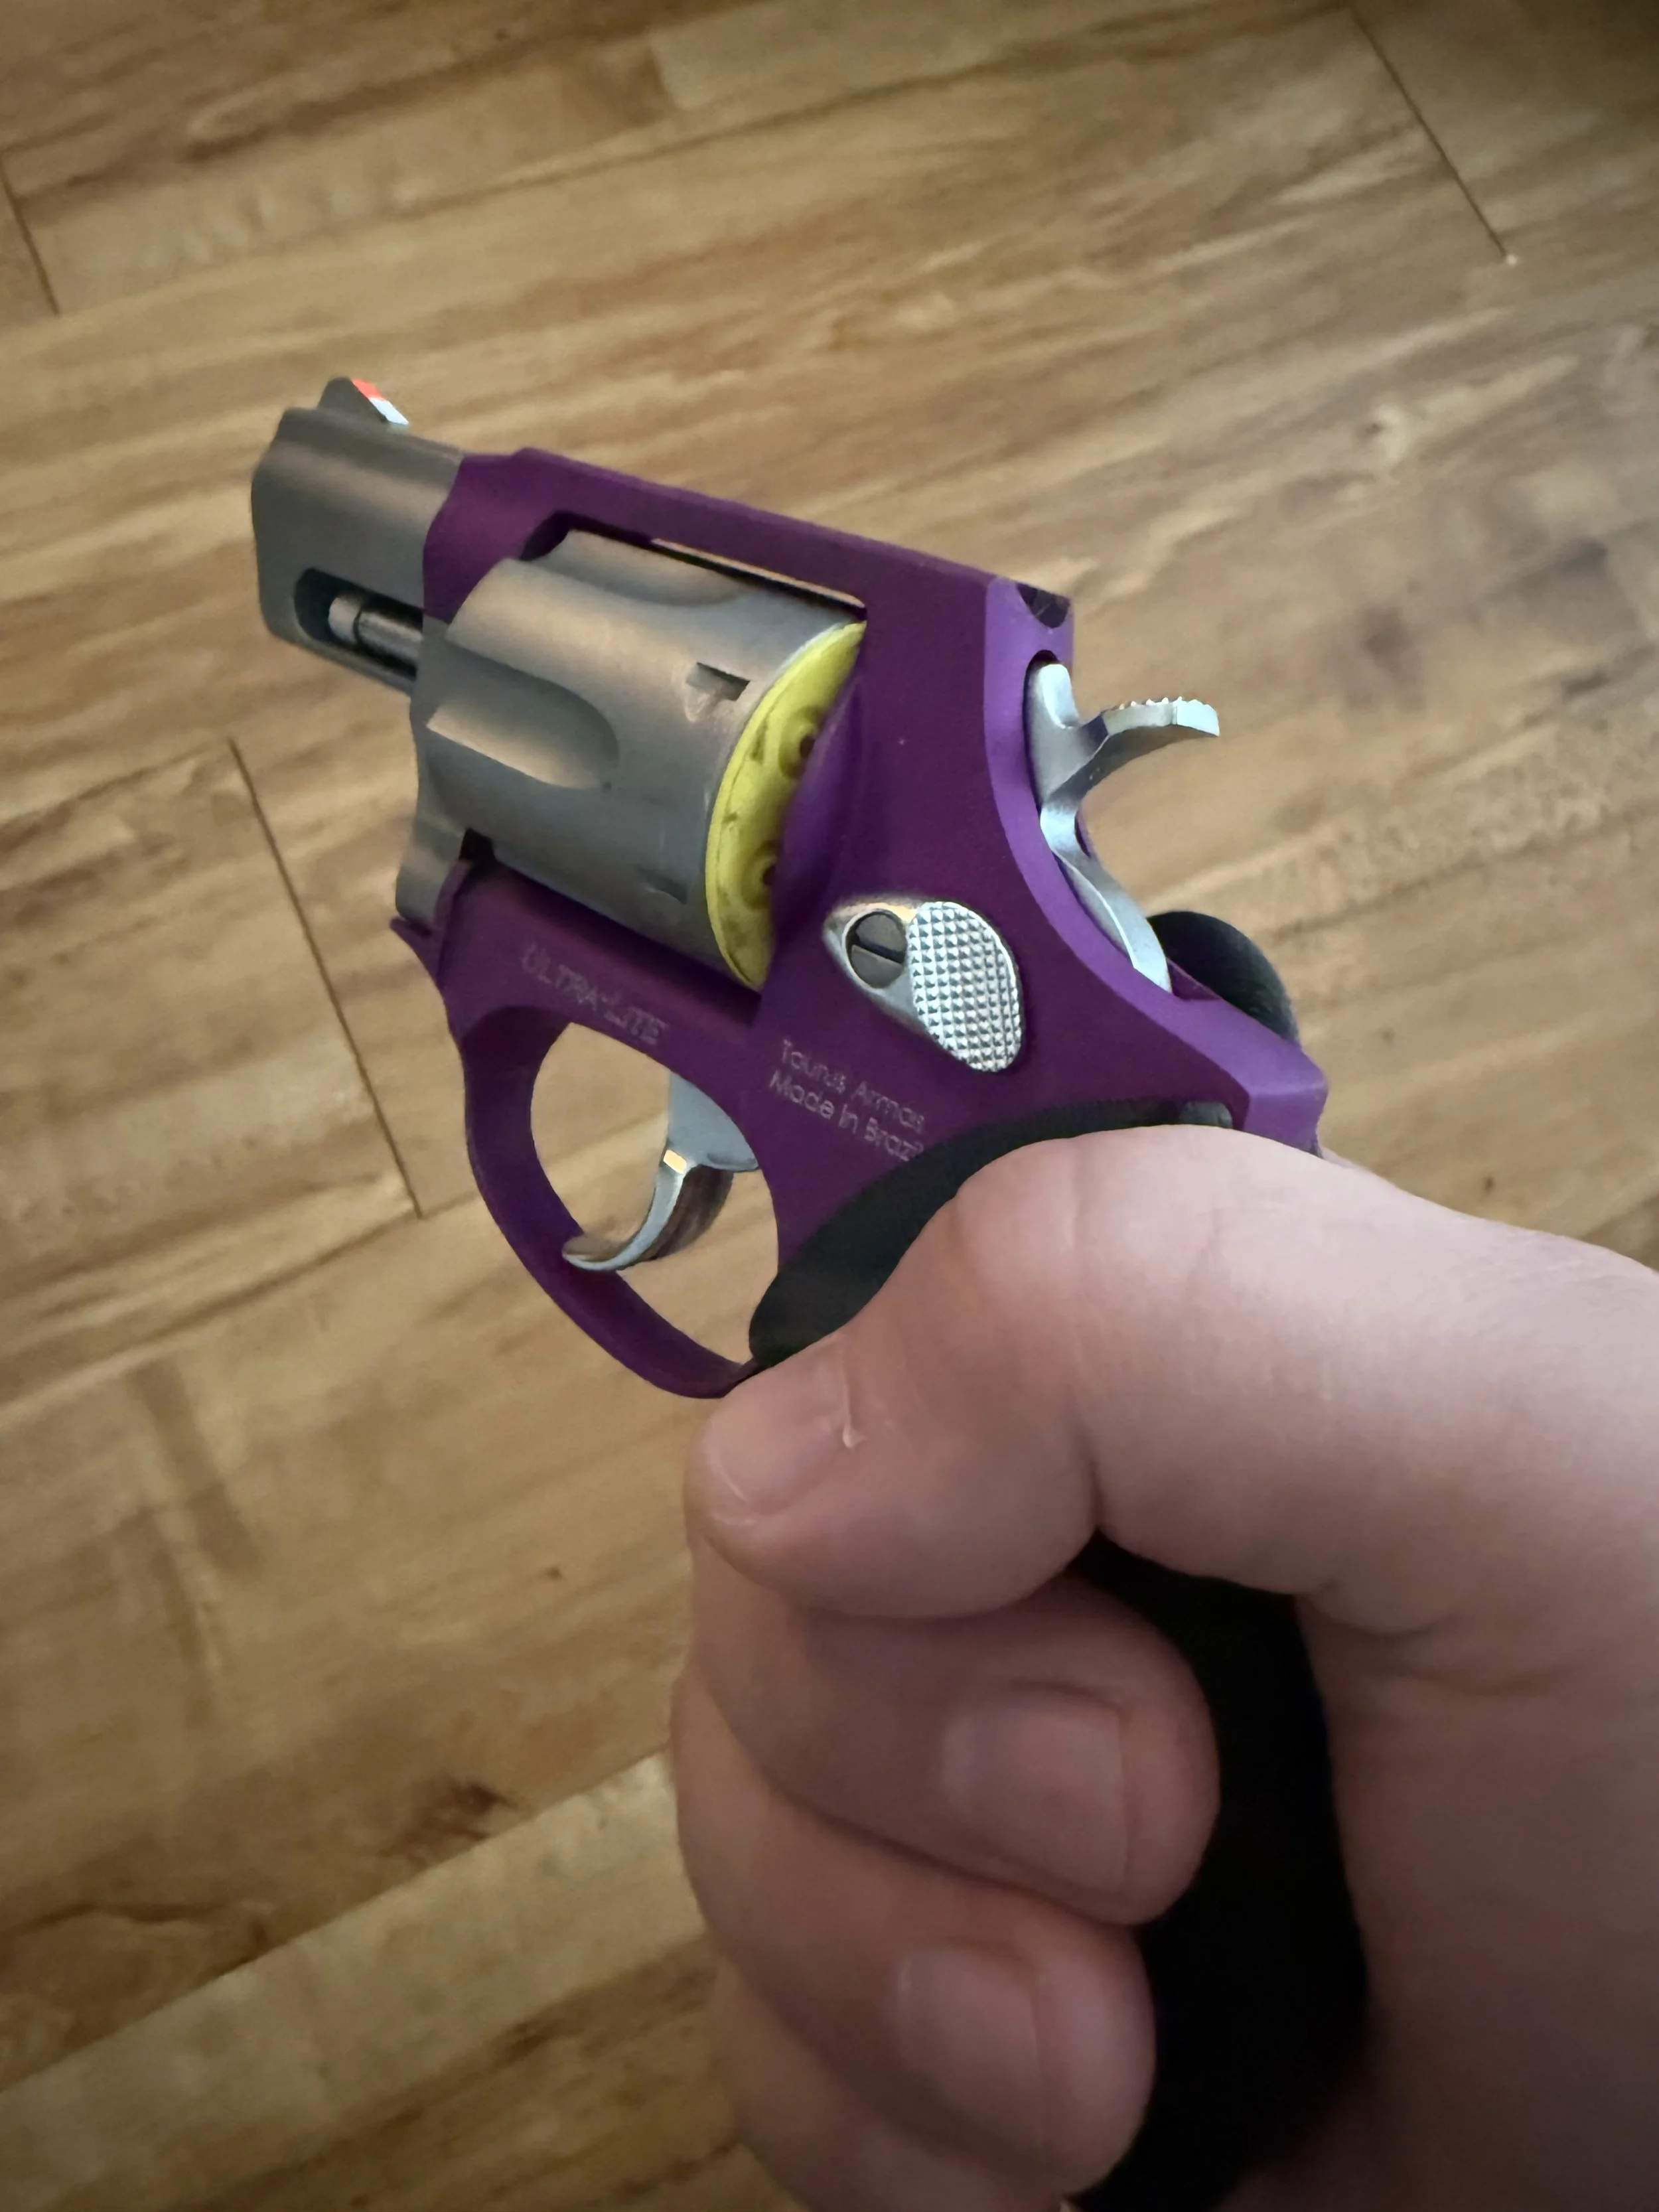
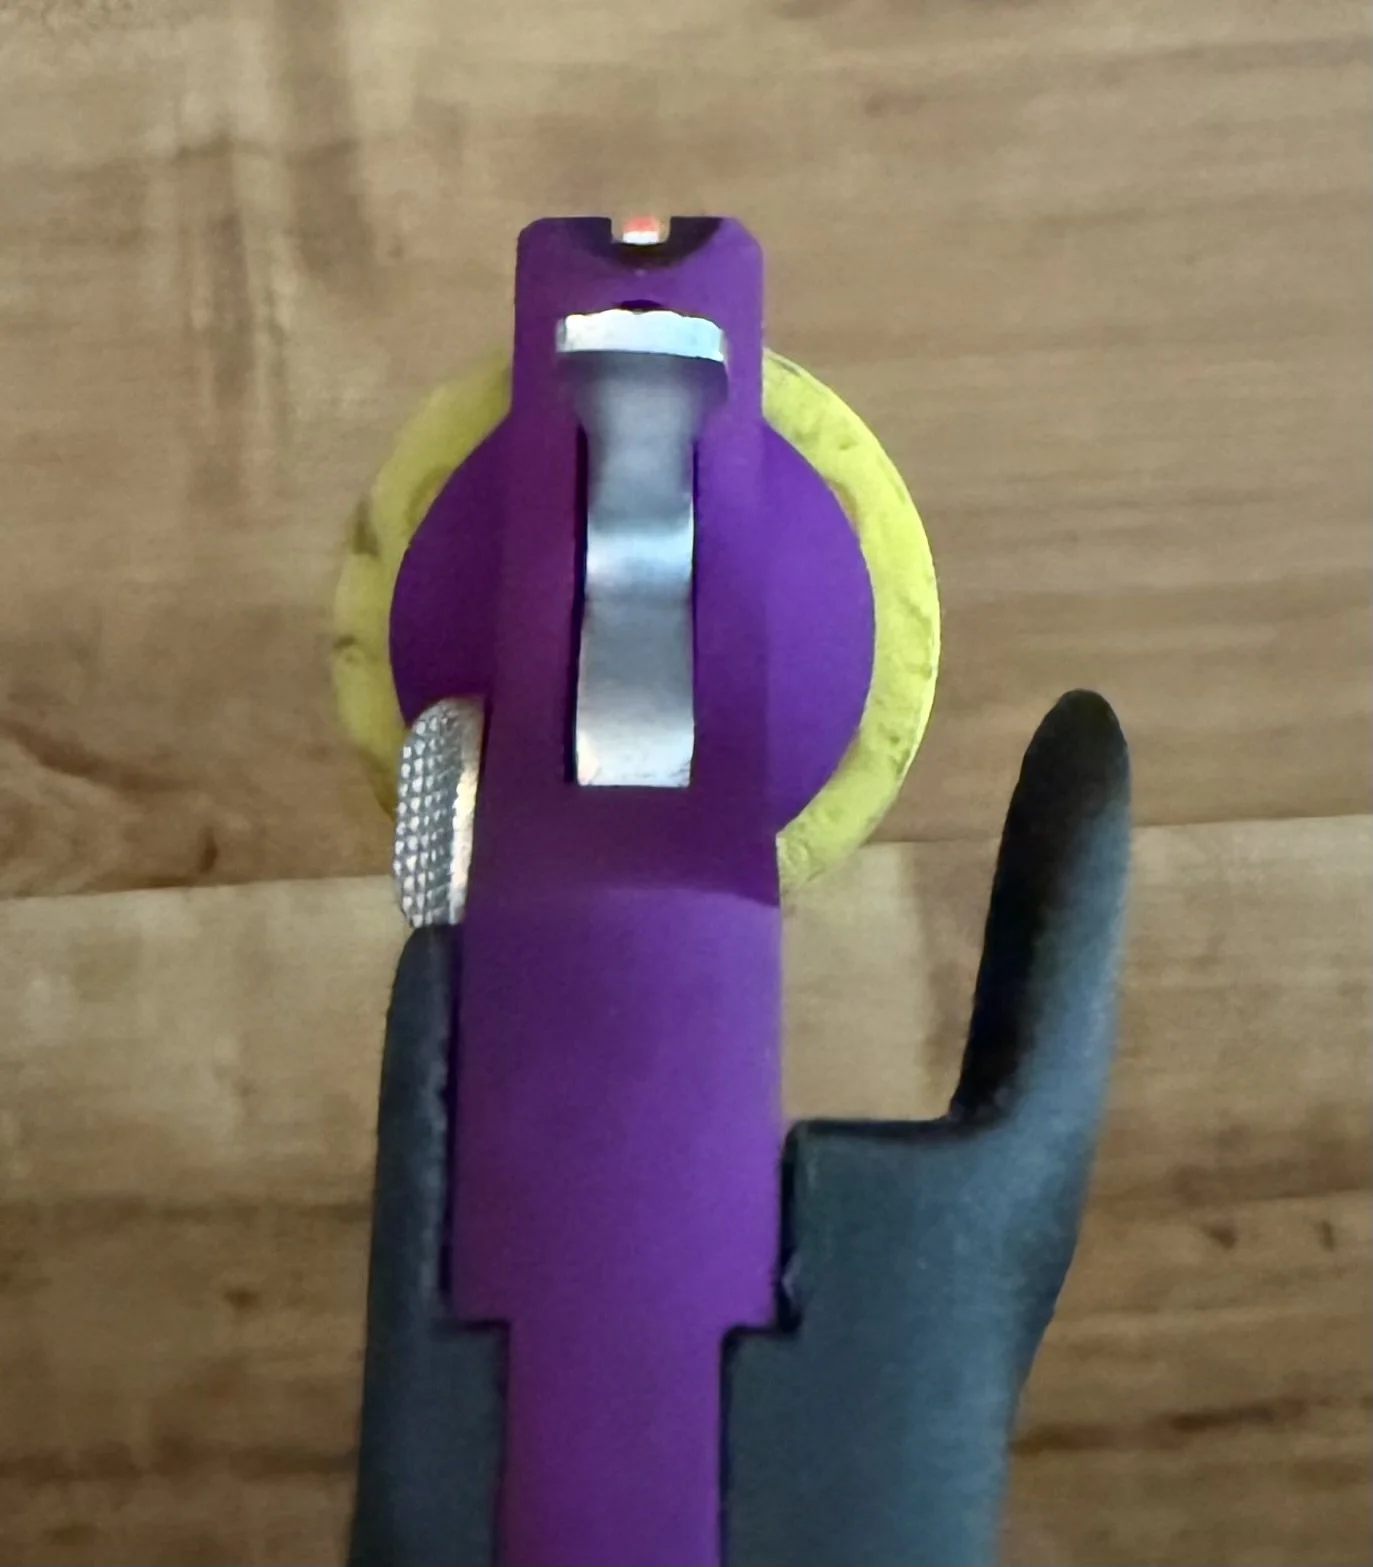
For the rear sight, I wanted to add a bit more contrast. I used a black sharpie to outline the notch in the rear of the frame. This aids in getting a quick sight picture, similar to using blacked-out rear sights on a semiautomatic pistol.

The new sight picture, post modification. Also note the contours of the Hamre Forge grips.
Overall, this was a fun project and the gun is much more shootable as a result. However, the story doesn’t end here. There are two things I would do differently if I was to do this again.
Number one: use a real brush. I was lazy and used q-tips to dip and spread the paint. While it worked (eventually), it was a time-consuming process to get the paint to spread evenly and not glob up.
Number two: do a base layer in white. I don’t know why I skipped this step (again, probably just being lazy), but I ended up having to do several layers of the green in order for it not to look transparent. After the first two layers, I could still see the grayish color of the metal underneath the green paint.
Here’s where it gets fun. I have mentioned him on the blog before, but Claude Werner, AKA the Tactical Professor is a fantastic resource. Here is one of many articles he has written on the topic. But you should really subscribe to his Patreon for even more info.
Story Time! A while back, Claude posted some articles on his Patreon about some revolver comparisons he was doing. Someone asked him if he would do the same testing compared to a Taurus UltraLite. He said he would, but he didn’t have access to one. At that particular time, I was signed up for an upcoming class with Claude, so I messaged him and told him I would bring mine to him and let him borrow it for the testing.
Since we were both attending TacCon 2025, we agreed that would be the easiest way for him to return the revolver to me. We met up at the conference and he said, “I have your heater.” He returned it to me in better condition than I gave it to him. It was in a zip-up case and he had placed one of his Zeta6 SafeSnaps in the cylinder so it could easily be seen that the gun was unloaded. And the kicker… He painted the sights! I now have bragging rights that Claude Werner personally modified one of my guns for me.
In the above image, you can see Claude’s orange and white paint scheme, as well as the Zeta6 SafeSnap.
It’s tough to get a photo, but essentially when the white disappears, you have the ideal sight picture.
Gear Check #1 - AR-15 Iron Sights
If you own an AR-15, it’s likely that you have some sort of iron sights on it, either as a backup to an optic or as a primary sighting system. For me, they are a backup system. But, it’s important not to let that become an afterthought.
Case in point: On my Sig Sauer M400, the handguard does not have any picatinny rails; it has M-Lok slots all around it. So, in order to mount a front sight, it requires the addition of a picatinny rail.
Here is what it looked like when I initially mounted the front sight:

Notice how high the front sight sits above the handguard
If I left it like this and simply relied on the optic, I would’ve had a rude awakening if the optic ever went down. When I went to zero the iron sights, I ran out of real estate. The front sight post simply would not turn any further and the rounds were still printing well above where they needed to be.
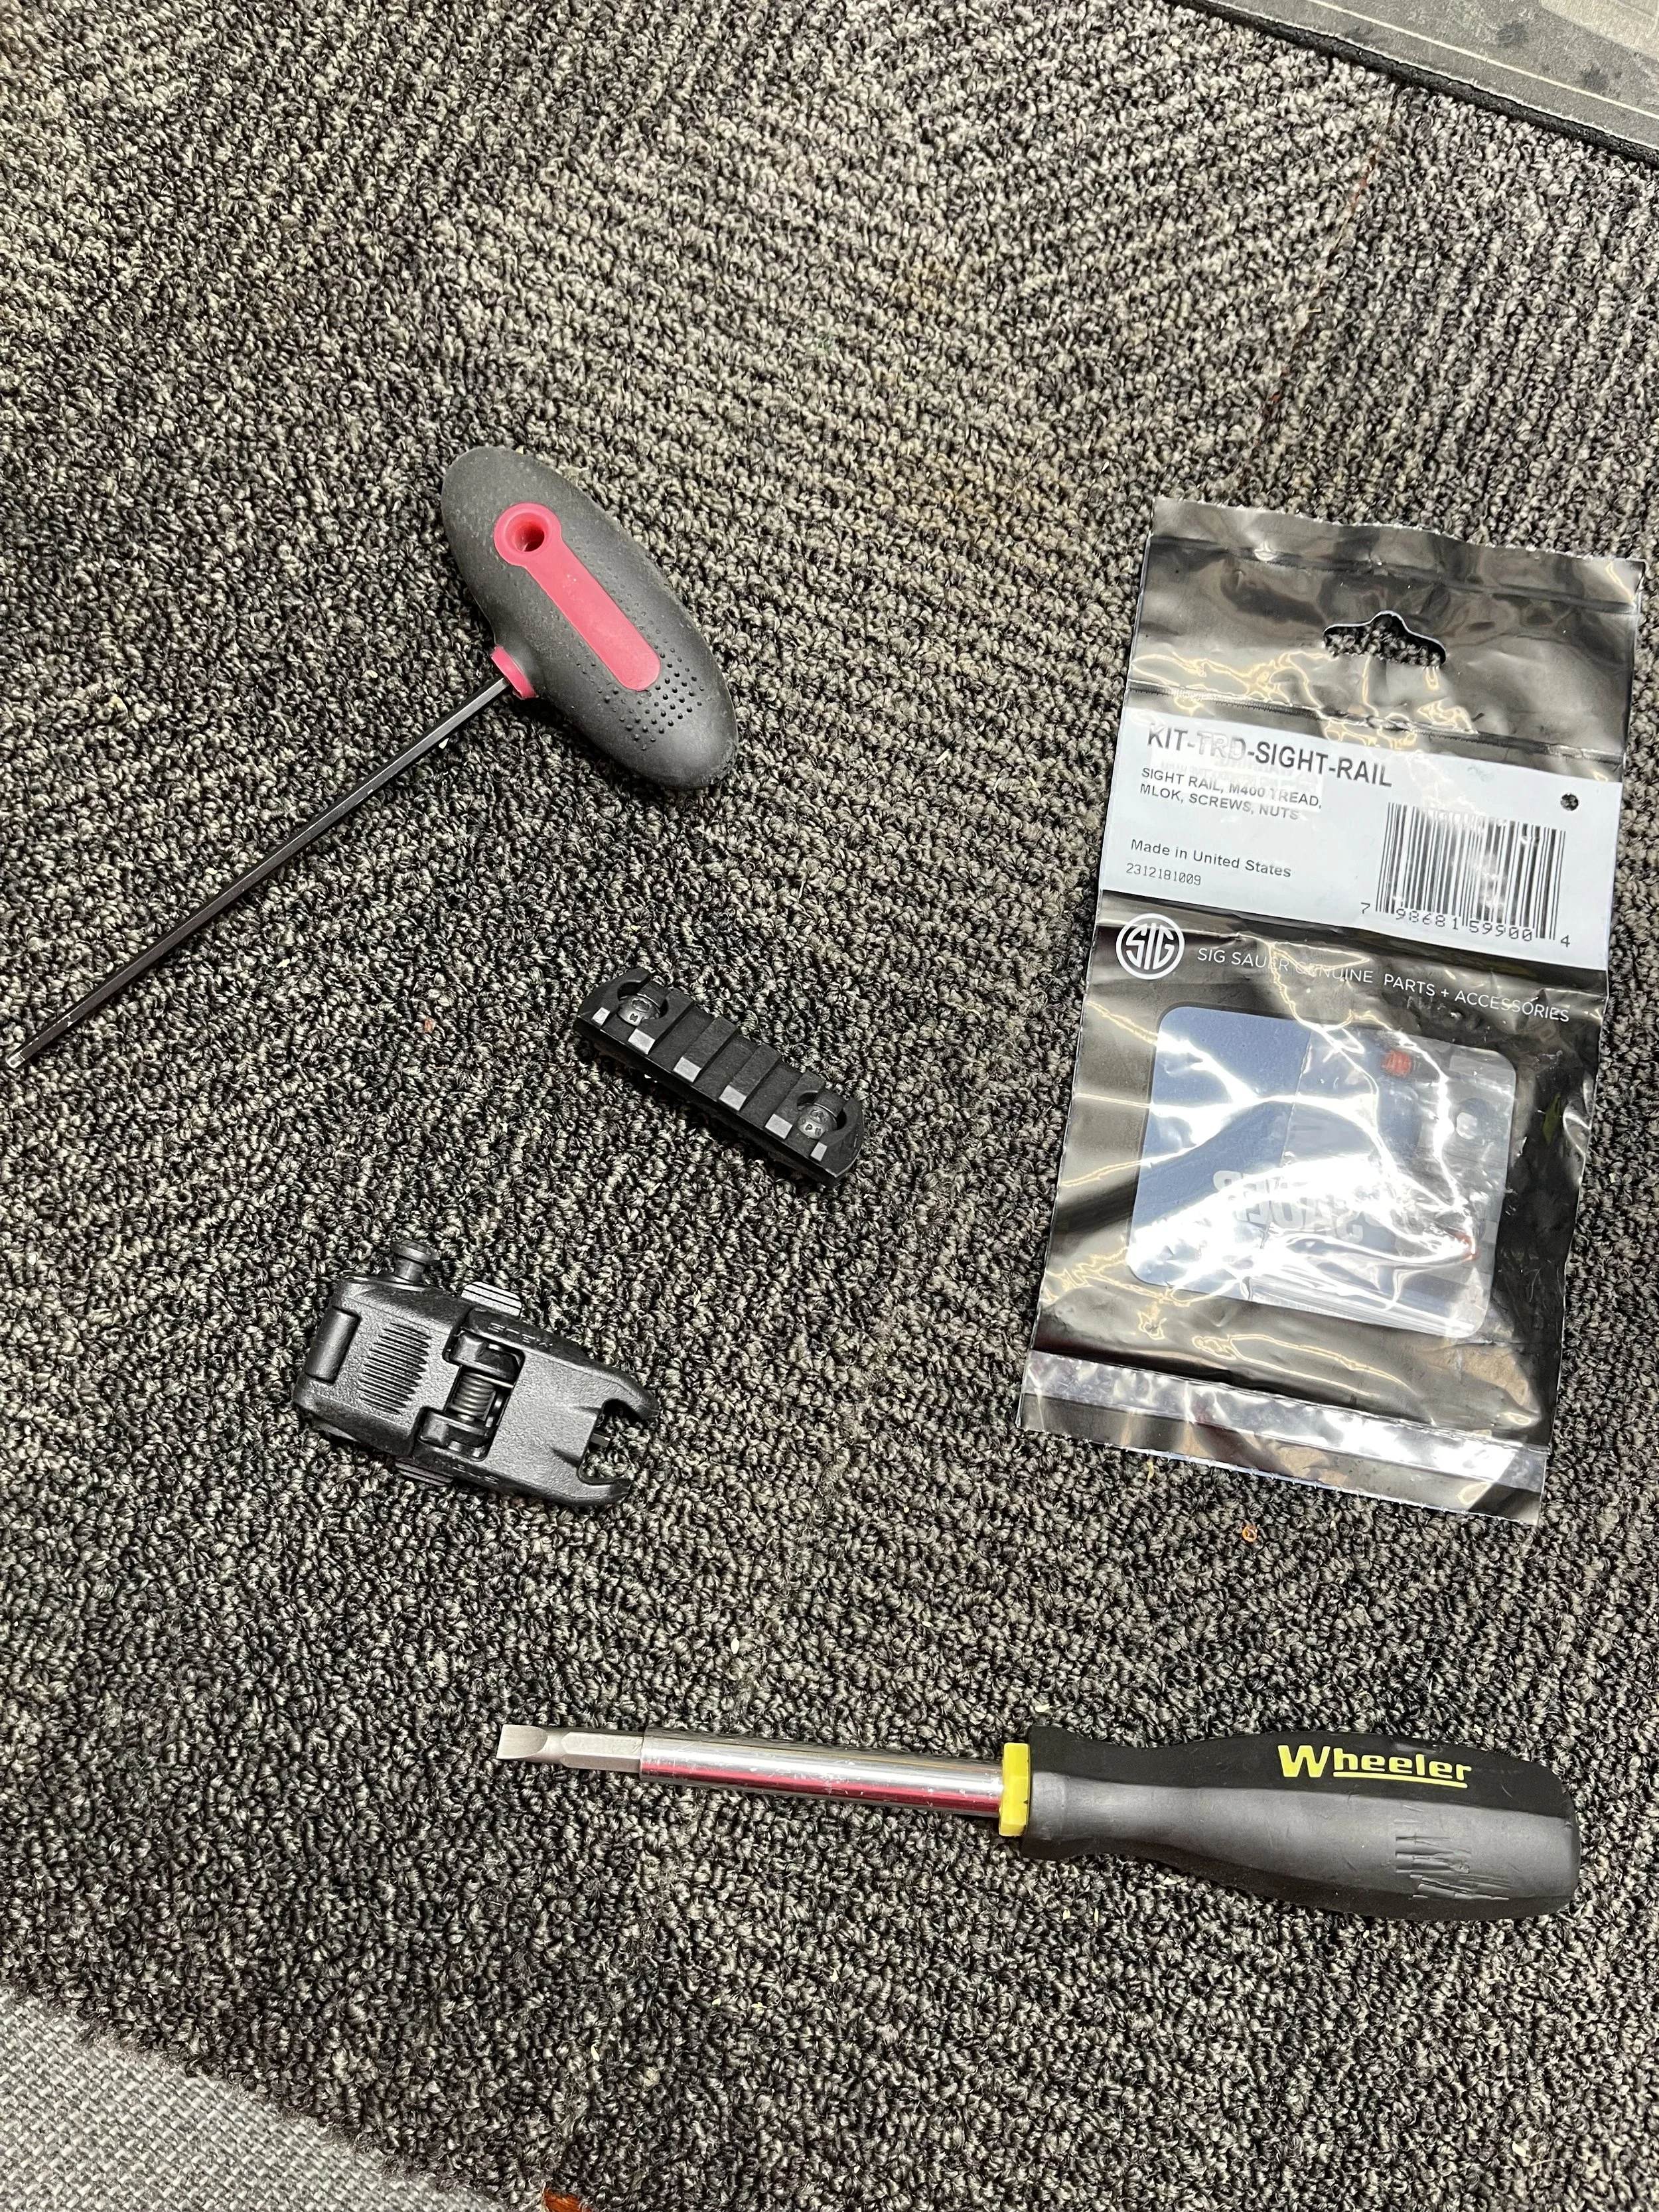
A new proprietary sight rail, the Magpul front sight, and the tools for mounting/adjusting it.
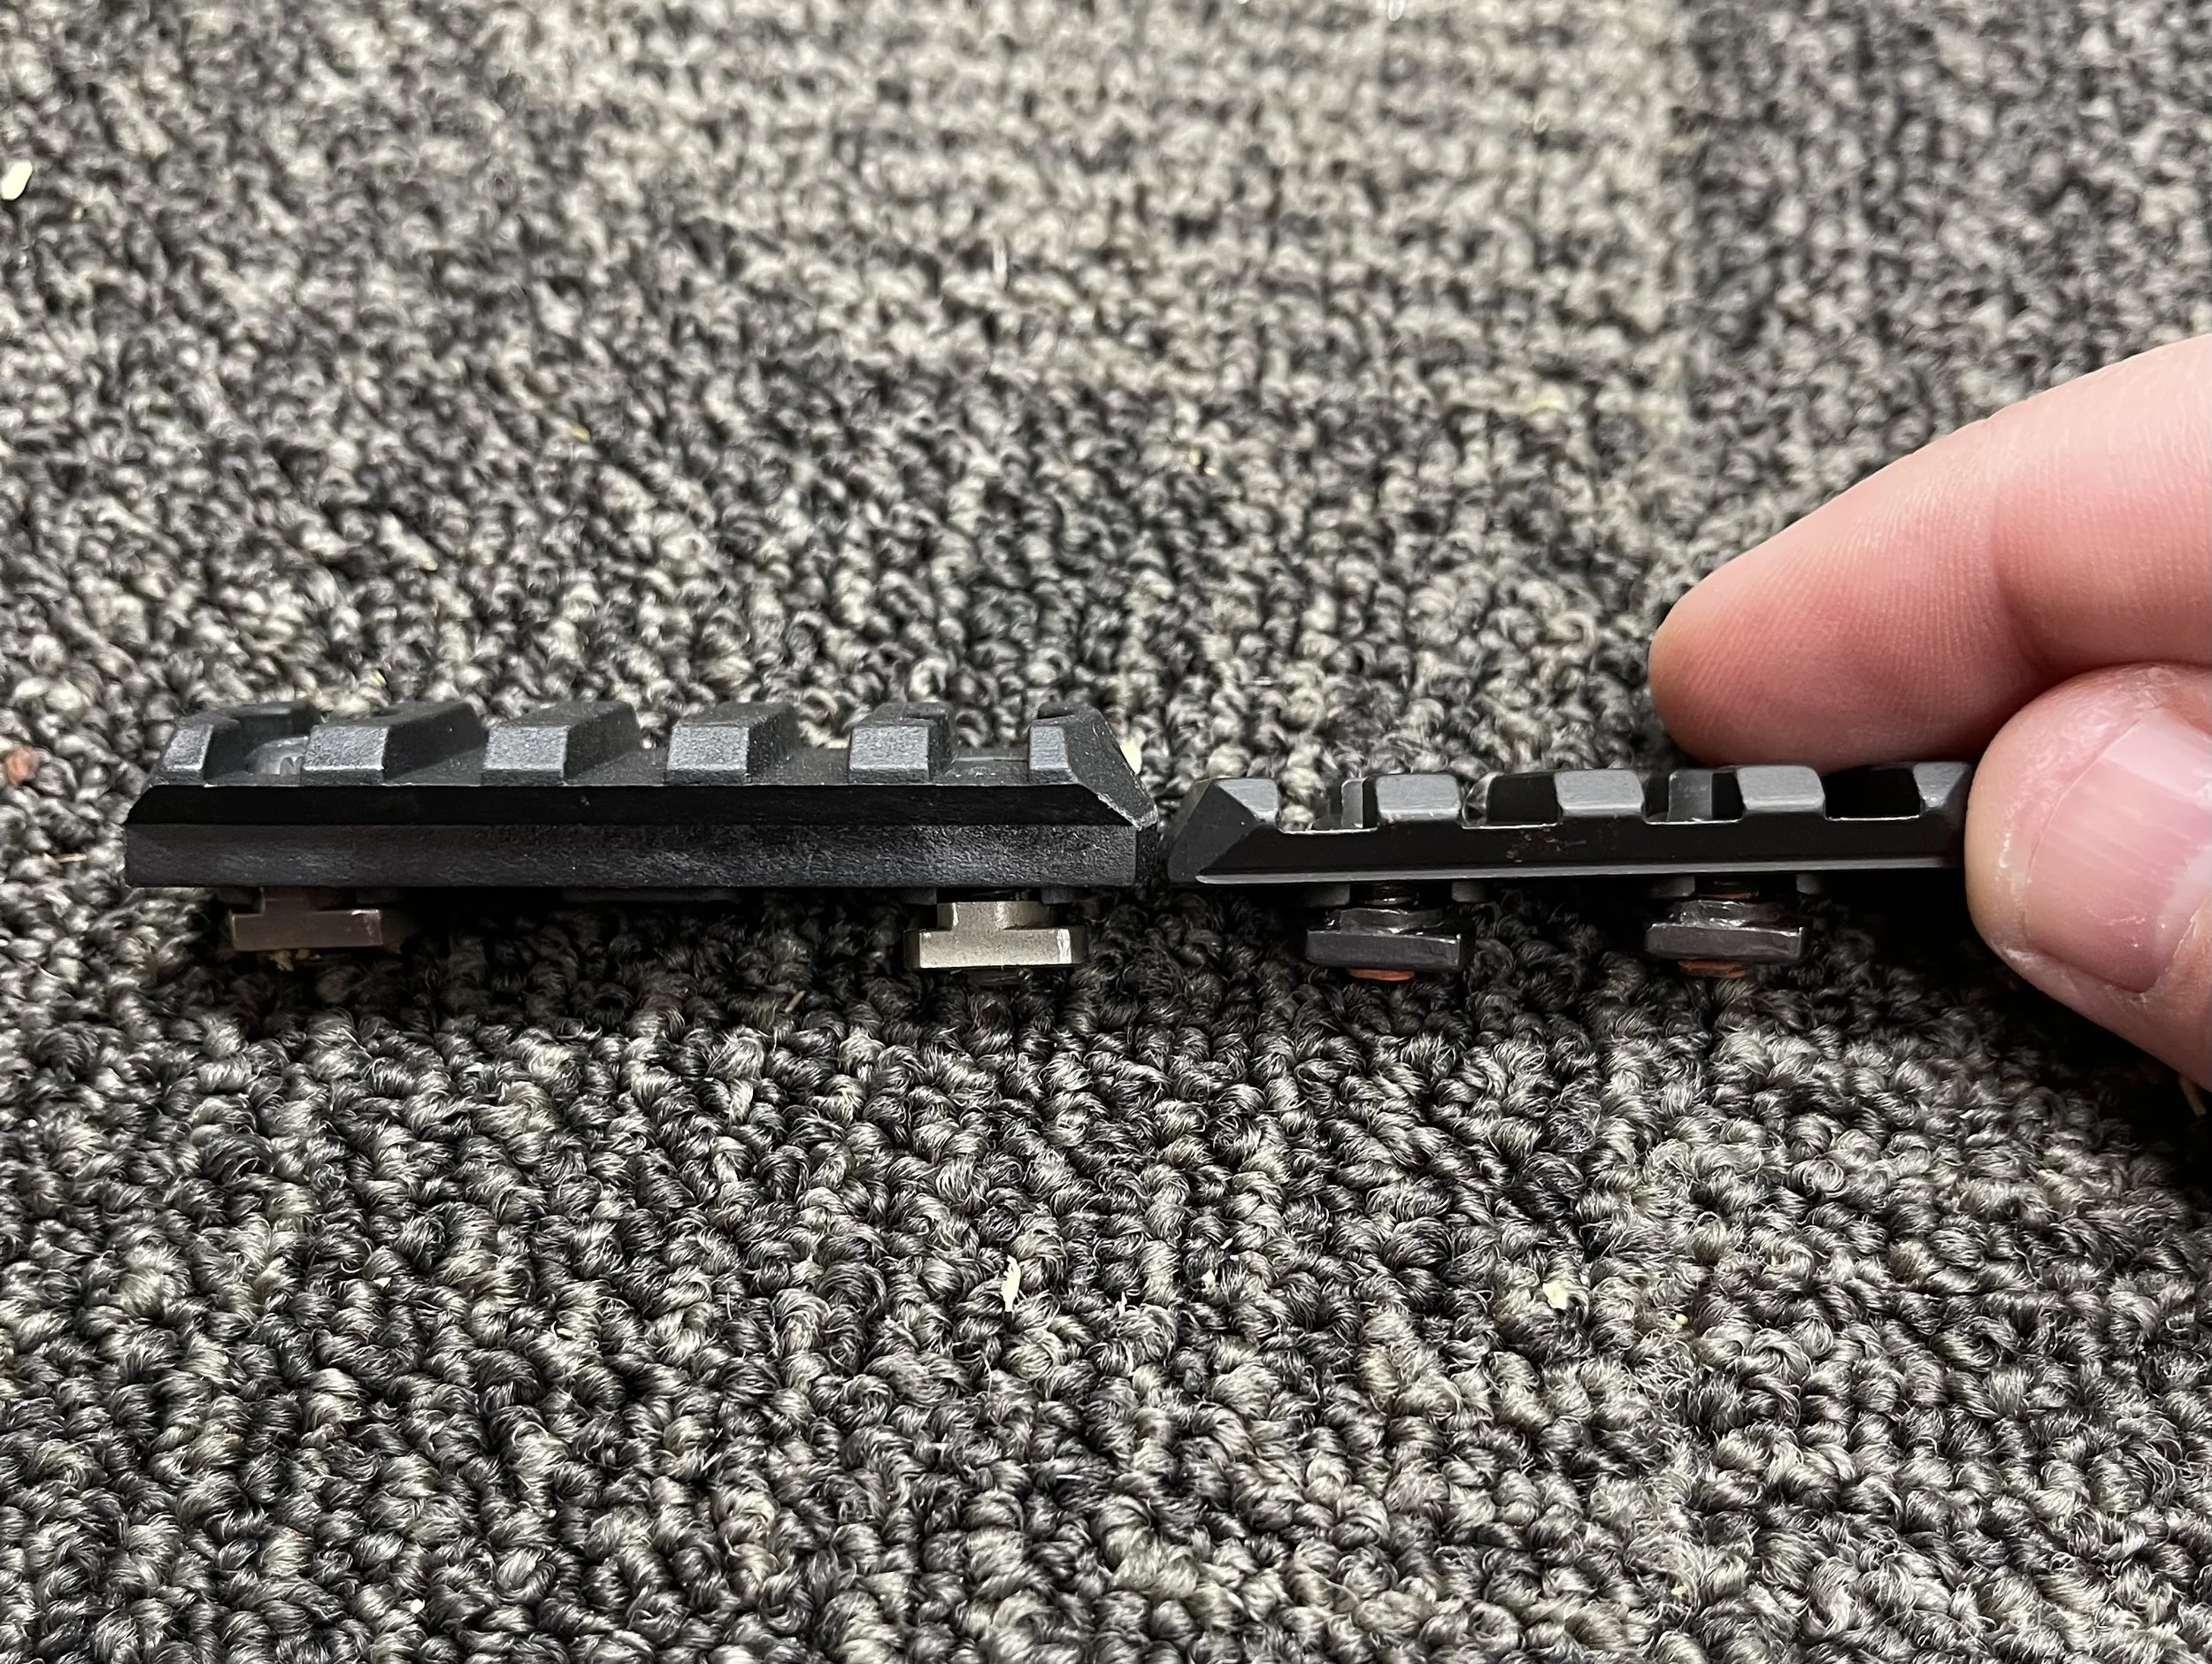
A Magpul rail section on the left and the proprietary Sig Sauer rail section on the right. Notice how much thinner it is.
Fortunately, Sig Sauer has a fix for this. They make a proprietary rail designed specifically for the Tread M400 rifle. The rail is much thinner and sits lower than a standard rail section. A simple swap of the rails gave me the clearance needed to adjust the sights appropriately and get the rifle zeroed.

Notice how much lower the front sight sits now, as compared to the first image.
There you go. Check your gear, folks. Don’t just buy it and call it good. Make sure it works. Make sure it’s in spec. Then get out and train to test your setups.
Get Started With Dry Fire
If you want to improve your skills with a firearm, you should be doing dry fire (or dry practice, as it’s sometimes called). Dry fire simply means any practice done with your firearm that does not include actually firing the gun. It can include things like practicing building your grip, practicing your trigger press, working on your draw stroke, pressing the gun out and aligning your sights, and so much more. It could also include vision drills to help you process information more quickly and mental exercises designed to develop your cognitive abilities to enhance decision-making skills.
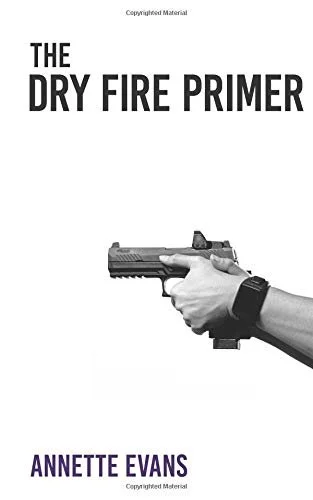
The benefit of dry practice is that you can do it at home, on your own time, without having to go to the range. All you’re missing is the “bang” (and probably recoil, but there are solutions for that). But before you get started, I highly recommend you read this book, the Dry Fire Primer by Annette Evans. It’s a quick read and lays the foundation for establishing a safe dry fire area and some best practices.
A great resource to get your started with dry fire. Add it to your library today.
Whatever your dry practice looks like, you will likely need some tools along the way. At a bare minimum, you need your unloaded and cleared firearm and a target. You likely already have the firearm, so let’s first talk about targets.
You could use the same target you shoot at when you’re at the range. But that would take up a lot of space on your wall. Instead, I recommend you use scaled targets that can be easily printed at home. With scaled targets, you can simulate distance. For example, a 1:6 scaled target means that for every one foot of distance you stand from the target, you are simulating 6 feet of distance in real life. A 1:3 scaled target would mean for every foot of distance, you are simulating 3 feet, or 1 yard, of real world distance. This is especially handy if you don’t have a lot of space to work with.
Here are some links to pre-made scaled targets:
Citizens Safety Academy is a fantastic resource. If you haven’t trained with Aq and Tiff, you’re missing out.
Memphis Beech is another great resource. In addition to being a great instructor and shooter, he has become a good friend. He has also done online Dry Fire Seminars in the past; highly recommended!
The guys at Concealed Carry also have quite a few pre-made targets for you. The Concealed Carry Podcast is also great listening material, and their blog is full of educational material.
That should get you going. You really don’t NEED anything else; need being the keyword. But you will likely WANT to add a few other things along the way. Now that you’ve established best practices, you have your firearm, and you’ve hung some targets on the wall, let’s get into some recommended additional tools.
If you are using a semiautomatic firearm, I highly recommend the use of a Barrel Blok. Barrel Bloks are available in various handgun calibers, and they make one for rifles as well. It serves two purposes. First, it ensures that no live ammunition can be inserted into the chamber. And second, it’s a visual indicator that the gun is unloaded. I have several of them and use them regularly in my own dry practice sessions.
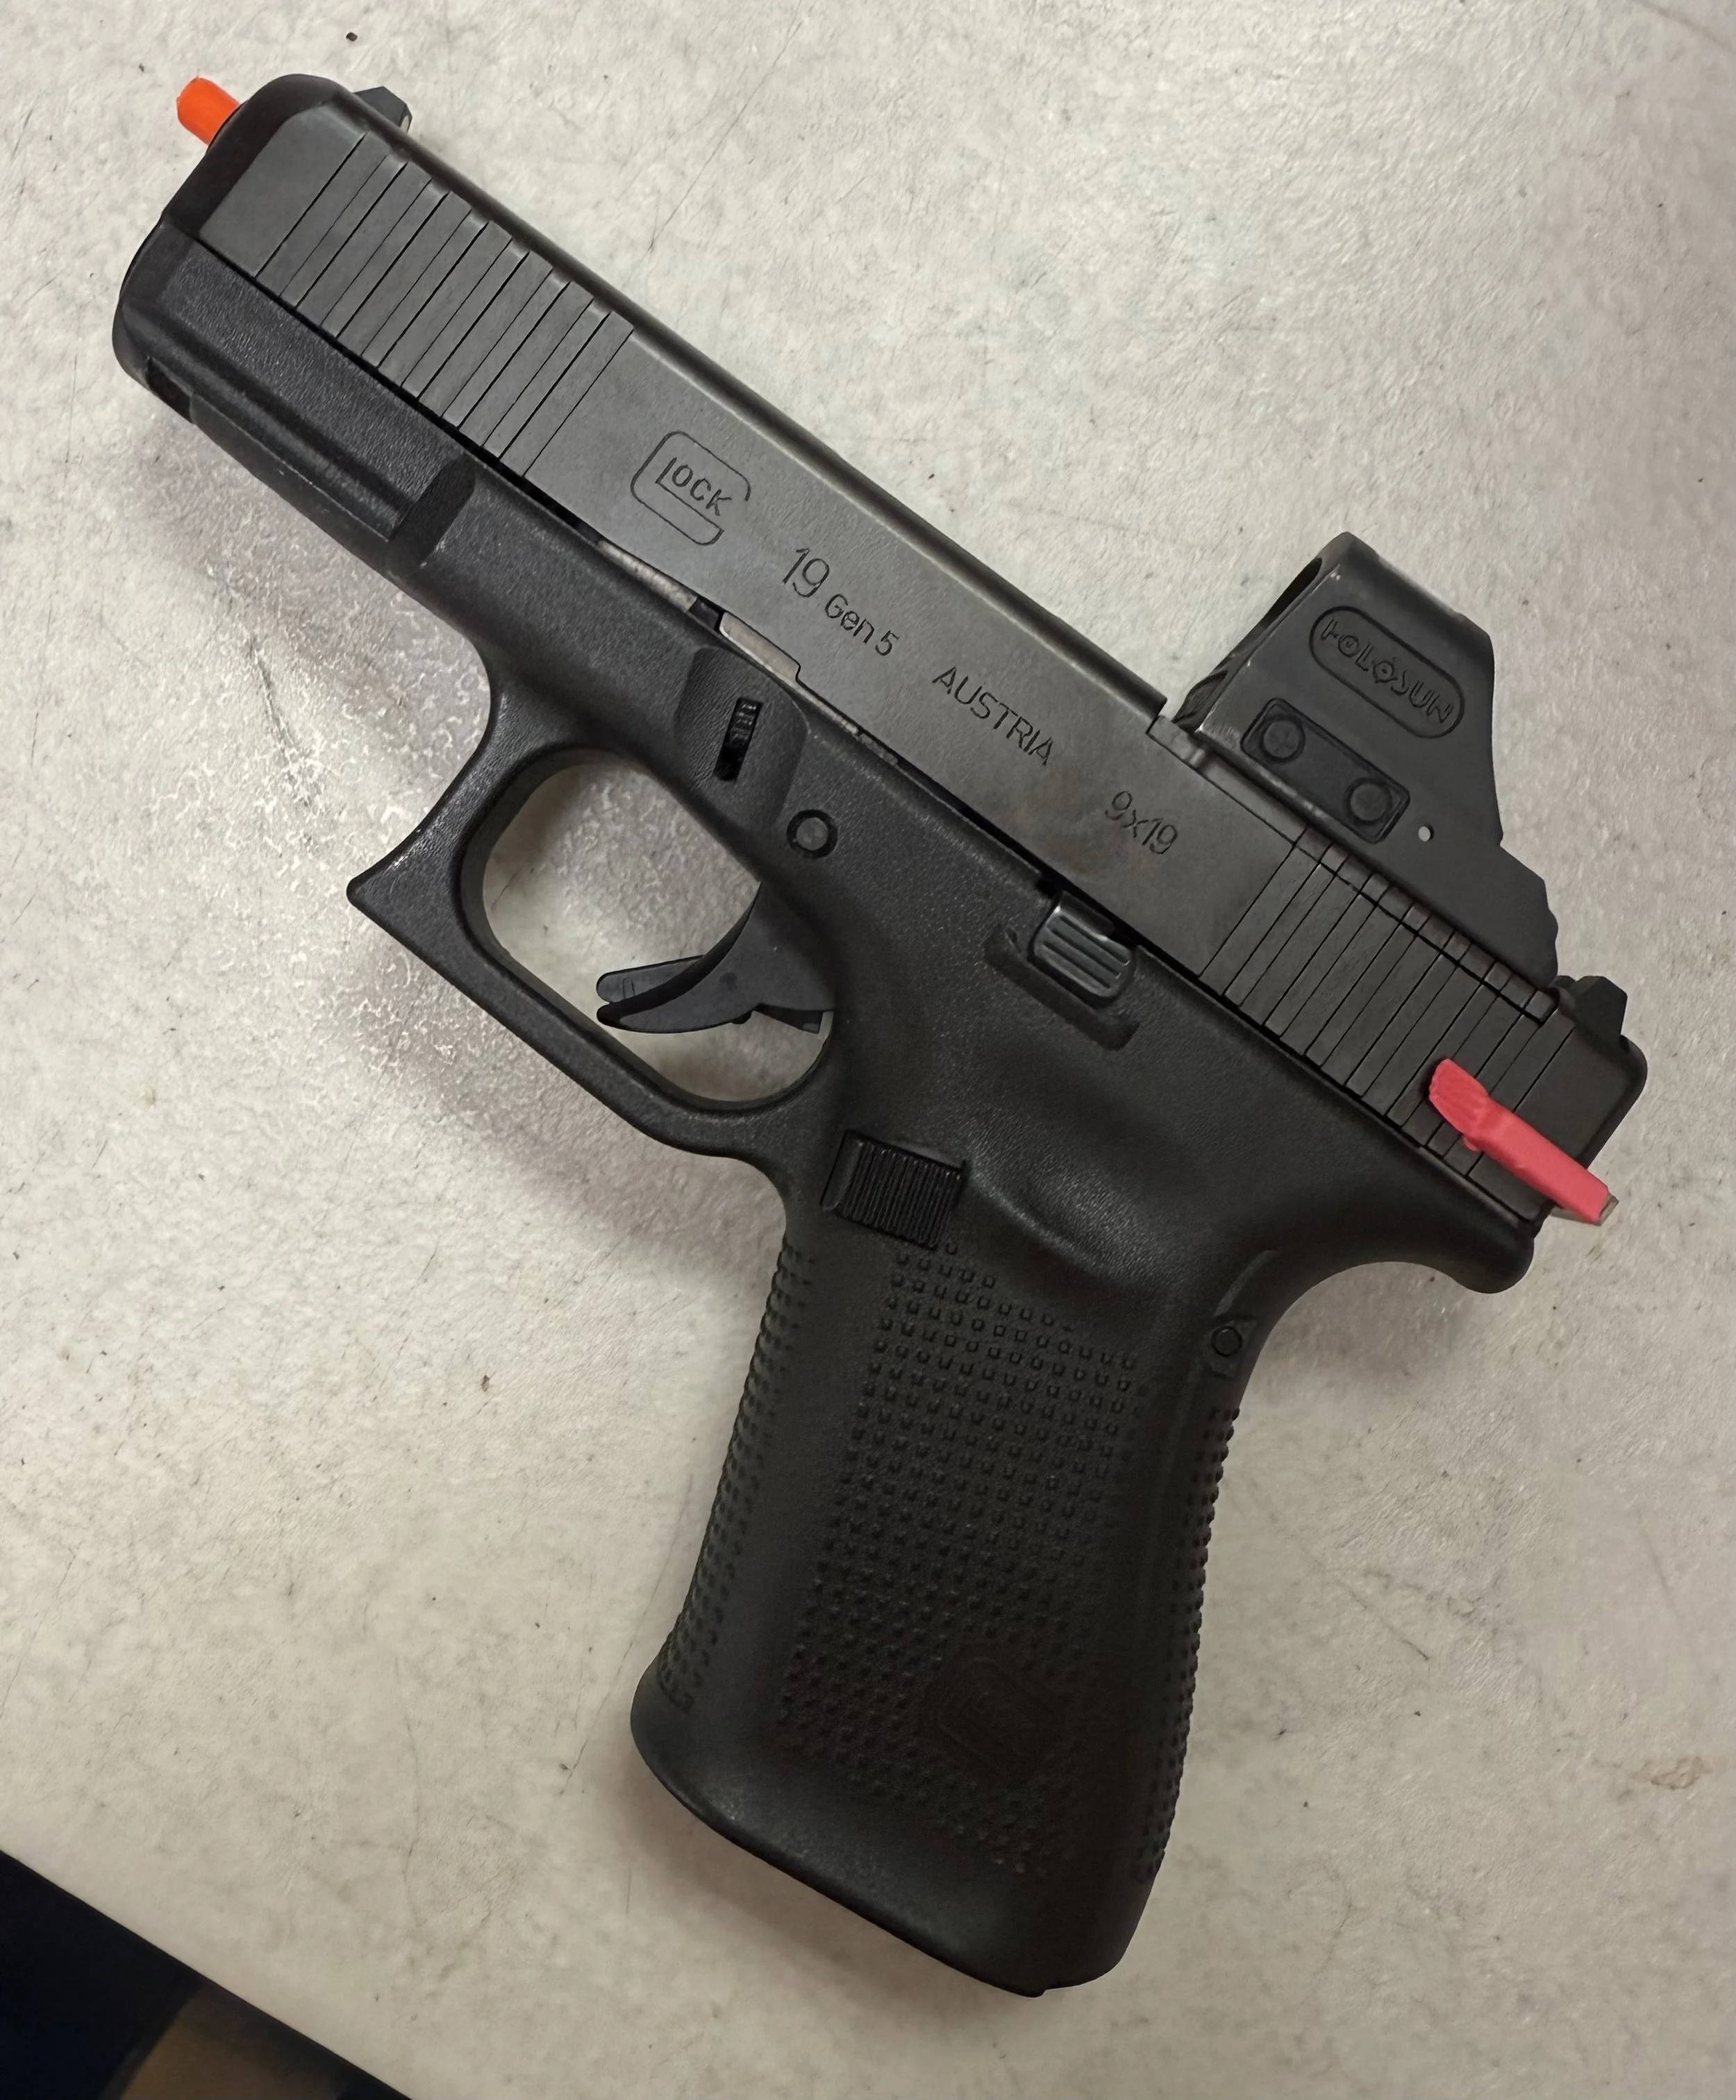
A Barrel Blok, trimmed to size, in my Glock 19. The red thing at the back of the slide is the Glock E-Trainer which allows the trigger to move freely instead of having to reset it each time.
If you are using a revolver, then I recommend the Zeta6 SafeSnap Dry Fire Training Disc. It serves the same two purposes as the Barrel Blok. It comes in 2-packs and is available for 5-shot Smith & Wesson J-Frames, 6-shot K-Frames, and 5-shot Ruger LCRs. That covers quite a few of the most commonly available revolvers. And it will fit others as well. For example, last year, I loaned my Taurus 856 UltraLite to Claude Werner, a.k.a. The Tactical Professor, for some testing. When he returned it to me, it had a 6-shot SafeSnap in it, so it’s not limited to Smith & Wesson wheelguns.
(Quick side note: Claude Werner also helped develop the SafeSnap with Zeta6. And his blog is a tremendous resource. But you should also subscribe to his Patreon for even more awesome and educational content.)
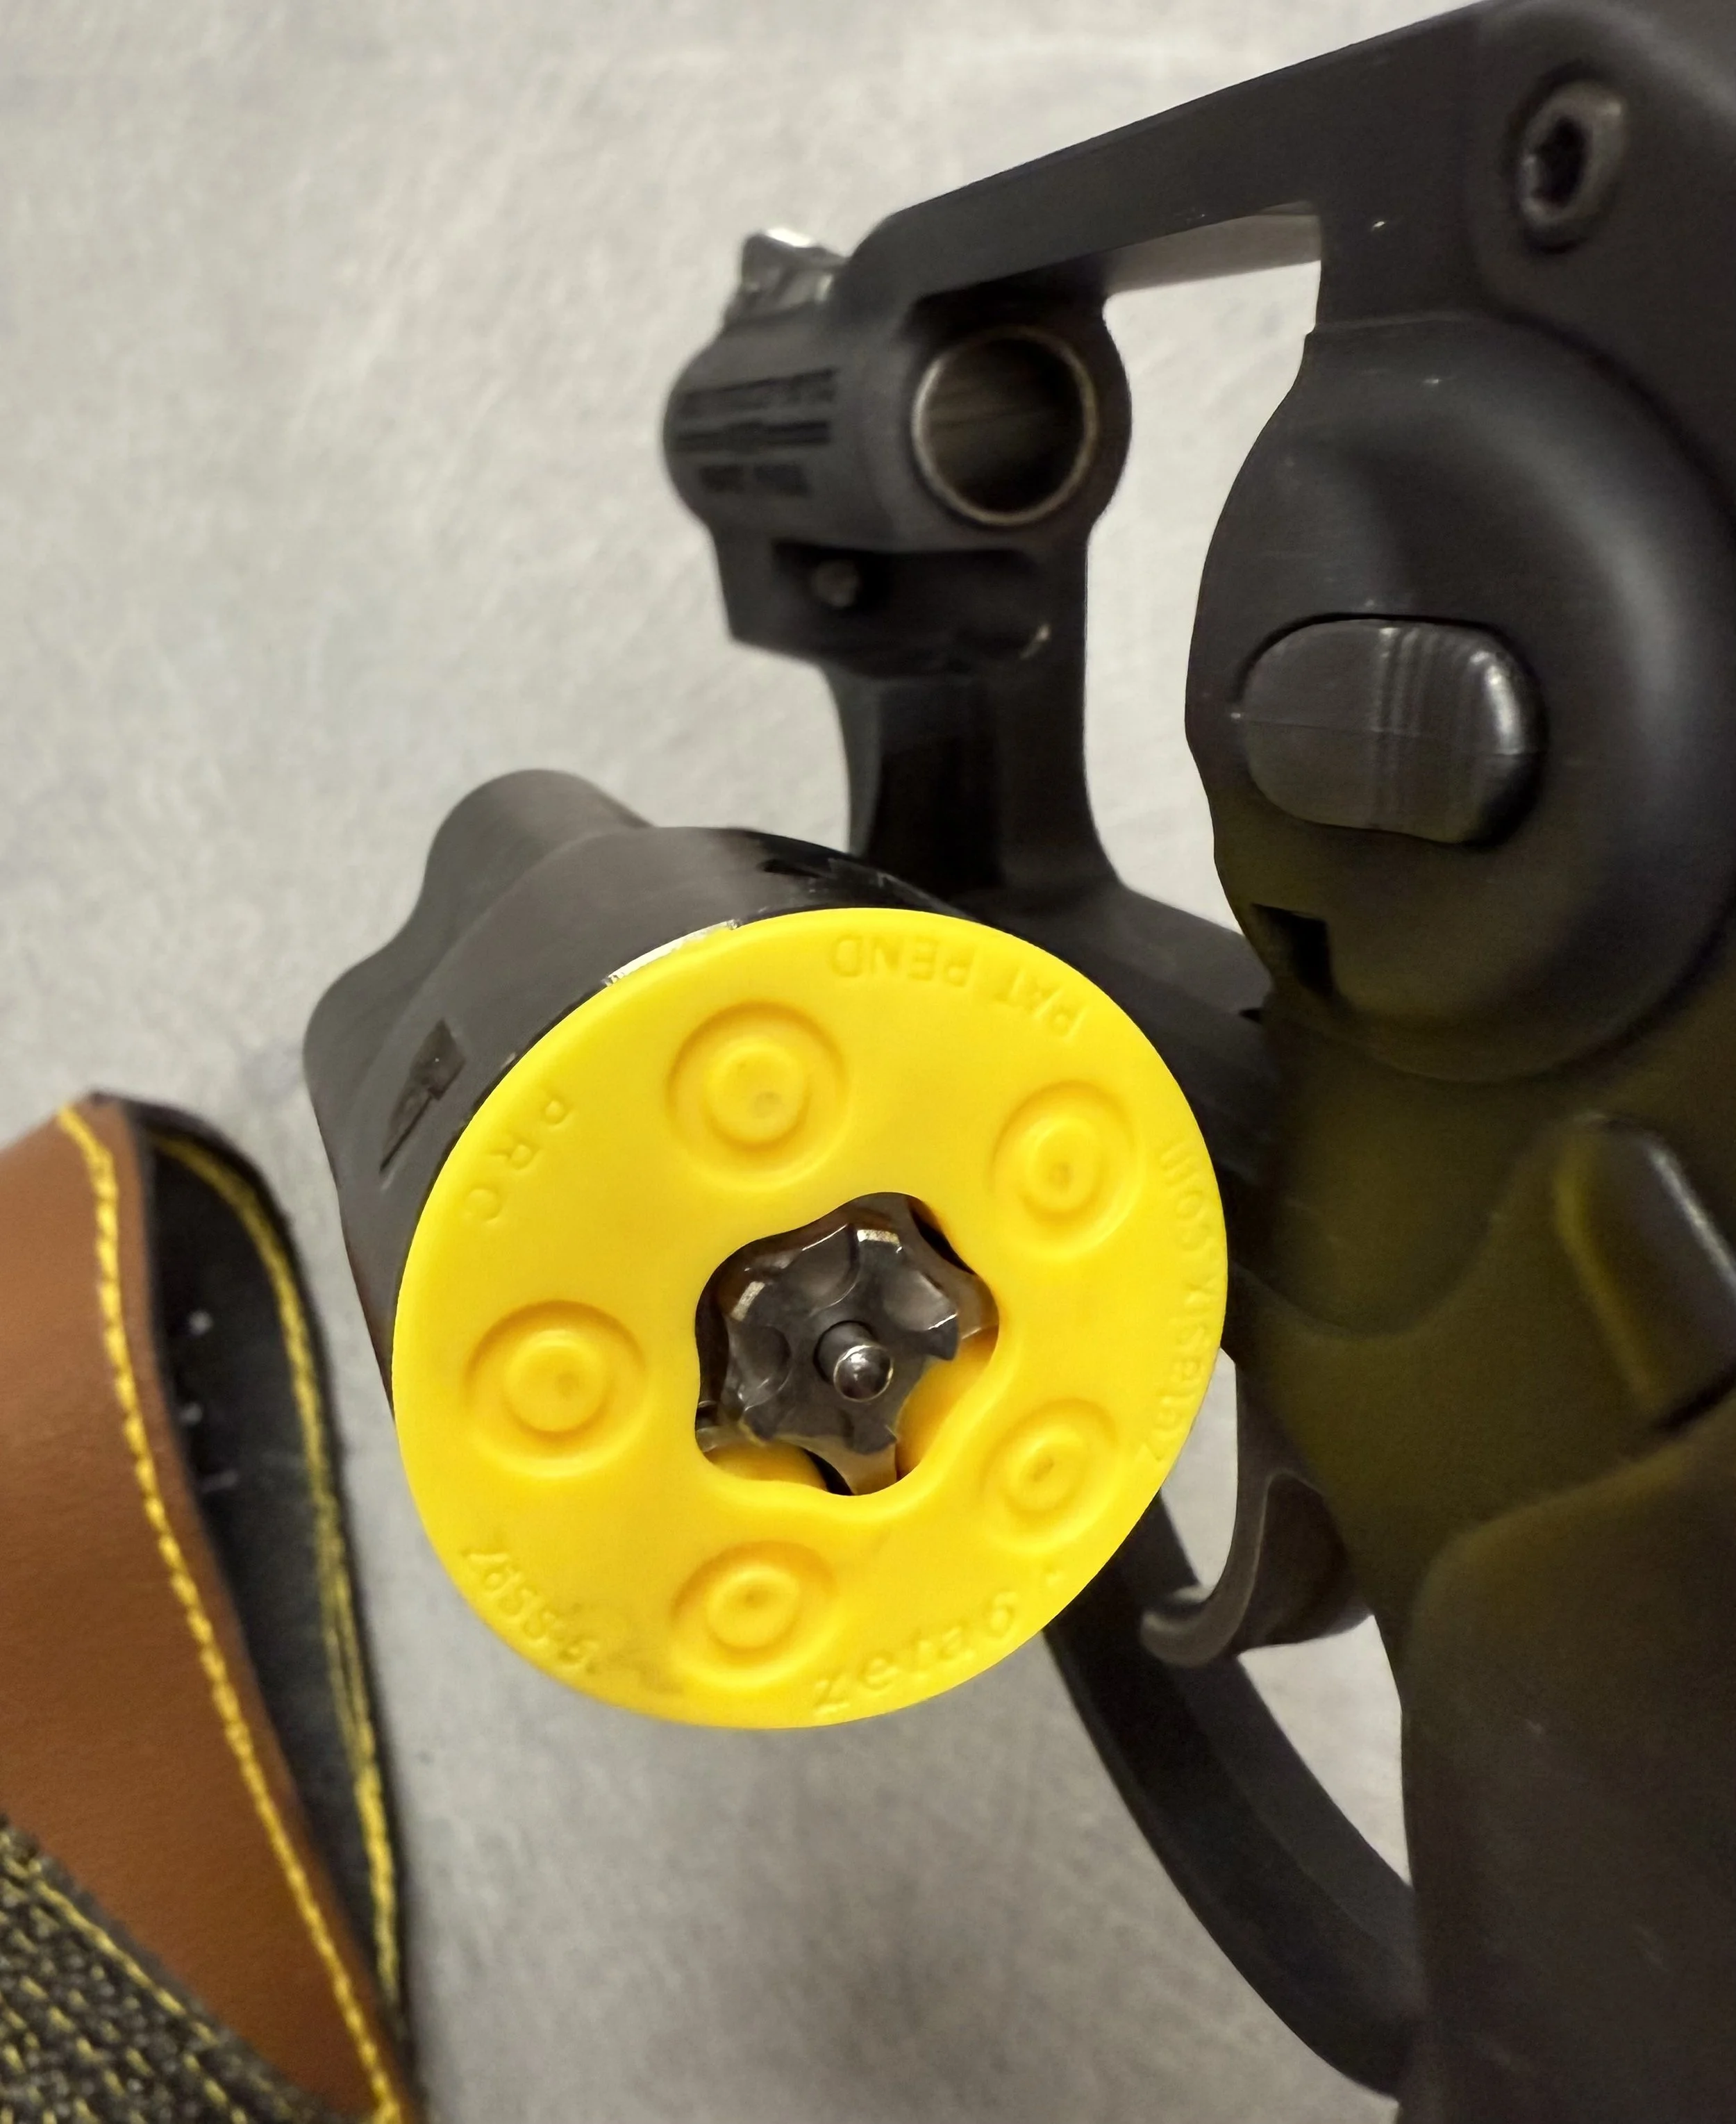
The Zeta6 SafeSnap in my Ruger LCR.
Next up is laser training devices. There are a couple different types of laser training devices: ones that you insert into your firearm (or laser training cartridges) and replica guns. We’ll start with ones you insert into your gun.
If you are going to choose a laser training cartridge, I highly recommend going with the MantisX Laser Academy. While you can find cheaper ones on Amazon, the MantisX system is much better. In addition to the laser cartridge, it comes with a lifetime membership to an app on your phone that is filled with all kinds of drills and standards that you can use in your practice sessions. It also comes with some pre-made targets and some removable stickies for pasting them on your wall. Lastly, it comes with a tripod. The tripod is used in conjunction with the app and your phone’s camera to track your hits on the targets. And all of it comes in a nice zippered case for easy storage and transport. Overall, the MantisX Laser Academy is an incredibly useful tool.
When it comes to replica guns, the SIRT from Next Level Training is top notch. They have several versions that mimic Glock, Sig Sauer, and Smith & Wesson M&P pistols. As an added bonus, the trigger resets without having to cycle the slide (SIRT stands for Shot Indicating Resetting Trigger). These are kind of pricey in comparison to a laser cartridge, but it can be handy to have an inert training pistol that replicates your carry pistol.
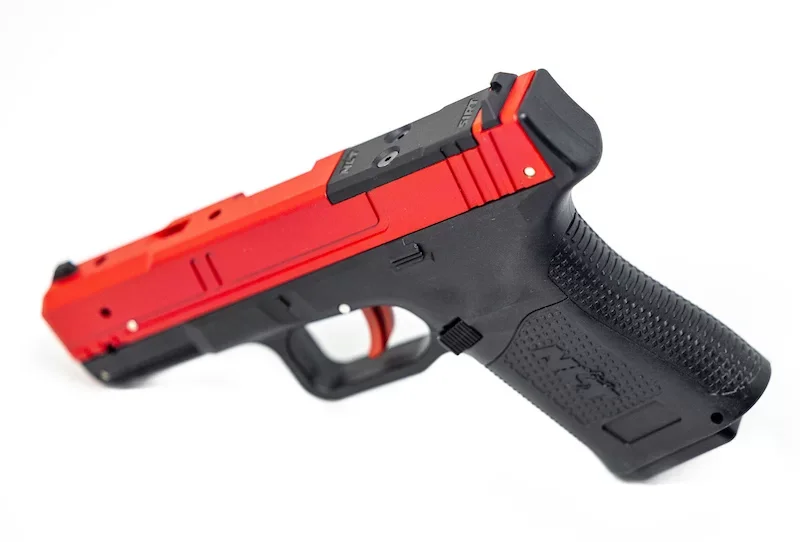
The SIRT pistol is one of my favorites for dry practice. This one mimics a Gen 5 Glock 19 and fits in the same holsters. You can even mount an optic to it. Although it costs almost as much as an actual Glock 19, you can save 10% with discount code affordable-armory10 at checkout.
Another way to get a resetting trigger is with the Dry Fire Mag. The Dry Fire Mag is a much less expensive way to get the feel of a resetting trigger while doing dry practice. Simply insert it into your handgun and get to work. It’s available for various Glock, Sig Sauer, Smith & Wesson, and Springfield pistols. The downside with the Dry Fire Mag is it will not work with a laser cartridge unless you buy their more expensive proprietary Smart model. It is less expensive than a SIRT, but requires you to use your handgun.
I mentioned earlier that there are solutions for simulating recoil. There are two really good ones that I’m aware of. The first is a laser cartridge and the second is a replica gun.
The Cool Fire Trainer is a device that you insert into your gun. However, instead of inserting it into the chamber, it replaces your barrel and recoil spring with an inert barrel. The laser threads onto the end of the barrel. You fill the barrel with CO2 from commonly available SodaMaker tanks. When you press the trigger, that gas is expelled causing the slide to cycle and the trigger to reset. Although it’s not quite the same as real recoil when live-firing the gun, it’s something and can be useful for follow-up shots.
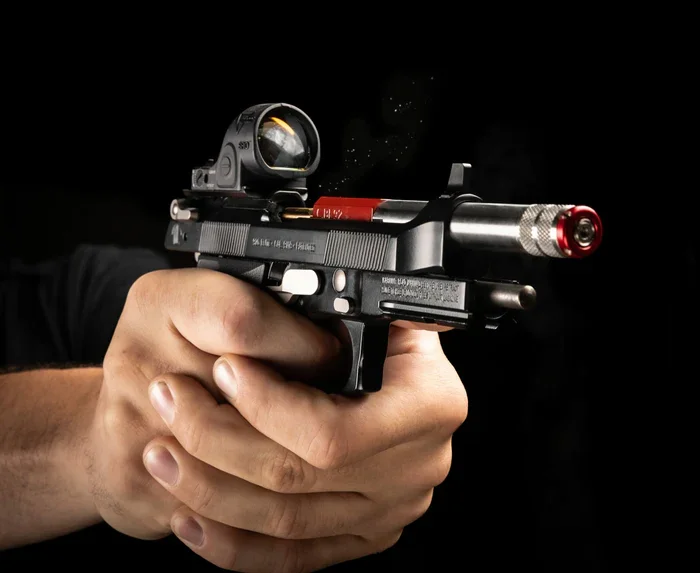
From the CoolFire website, an example of the system in a Beretta handgun. Note the laser module at the end of the barrel and the red-painted chamber, indicating it is an inert training barrel.
The other way is a replica gun made by LaserAmmo. A replica gun is a great way to ensure there is no way you are using live ammunition, as it cannot be loaded. LaserAmmo makes several versions that are identical to handguns from Glock, CZ, Smith & Wesson, Sig Sauer, Beretta, and more. Like the CoolFire, there is a laser threaded onto the end of the barrel. The recoil comes from its use of commonly available Green Gas.

The LaserAmmo replica gun is the only one of these I do not personally own. I have played with it at trade shows, and it seems to be a viable system. Like the SIRT, it fits into holsters for the same make and model.
Lastly, there are tons of laser targets available. These are great for shooting at multiple targets or building your own shoothouse at home by placing them all over the house.
This is not an all-inclusive list of dry fire tools. There are many other options out there. But it is a list of tools I have tried and used in my own dry practice sessions. If it’s listed here, it’s because I have found value in it, and hopefully you will too. Now go practice!
Five Tips to Improve Your Shooting Skills
If you’re happy just going to the range every once in a while and making “expensive noise”, as an instructor once told me, then this article is not for you. If, on the other hand, you truly want to improve your skills, no matter what level you’re currently at, then hopefully this article will provide some helpful tips for you. Let’s dive in.
Master Instructor Chuck Haggard demonstrates a concept in front of students at the Tactical Anatomy Summit in Nashville, Tennessee
Get training. I don’t care how good you think you are. “I was in the military.” “I’ve been shooting my whole life.” “My uncle was a Navy SEAL and he taught me everything I need to know.” “I train all the time; I go to the range every week.” These are just some of the many excuses that are heard over and over again.
Here’s the truth: If you truly want to improve your skills, you’re going to need to swallow your pride and take a class from a professional firearms instructor. Professional firearms instructors know the safety rules inside and out and can not only explain them to you, but ensure that you actually understand them. And believe me, there’s a difference between knowing and understanding. They also know the fundamentals of shooting inside and out. They will be able to diagnose and correct problems on the spot. And they will be able to identify your bad habits that are either unsafe or preventing your progress.
Lastly, there are classes for all levels of skill. Some of my favorite classes are “beginner” classes; I learn something new every time. If you don’t know who to train with or what class to take, feel free to reach out via my Contact page; I’d be happy to lead you in the right direction. Or review my About page for an extensive list of classes and instructors I have personally trained with.
Plan your practice sessions. Create a plan for your range session. Know exactly what you are going to work on. Write it down and take it with you to the range. Shoot the drills you pre-planned and record your results. If you need help finding drills to do, Greg Ellifritz has shared many on his website (Or better yet, if you subscribe to his Patreon, he sends out a Weekend Shooting Drills every Saturday). Other great resources include Pistol Training and Tom Givens’ monthly Rangemaster Newsletter (which you should definitely read!).
Don’t get me wrong, it can be fun to just go to the range and blast away. But understand that is neither training nor practice. If you are serious about improving your skills, you need a plan.
Space out your practice sessions. This may seem counterintuitive, but allow me to explain. If you practice every single day, you will see improvement. You will also fight a lot of frustration which may inevitably lead to thinking “I’m not getting any better.” The reason for this is incremental progress versus significant progress, a concept I first learned about from a blog post by Cecil Burch.
With incremental progress, you are chipping away at goals in micro-increments. For example, you may do a drill one day in x amount of time, and the next day you shave .04 seconds off of your time, and then the next day you shave another .02 seconds off of your time. Does that seem like a lot of progress if your goal is to shave a full second off of your time? This is what leads to frustration. “I’m never going to be able to…”
Spacing out your practice sessions allows your brain to rest and recover. You will still see the incremental progress; and, you will be much less frustrated about it.
Dry fire (or dry practice). You may have heard this one before, but regular dry practice will lead to the most significant improvement. Again, it doesn’t matter what level you’re at. I have assigned dry fire homework to brand new students who were still figuring out how to hold a handgun. For them it was 1. Pick up the gun. 2. Build the grip. 3. State out loud, “This is how I hold my gun.” 4. Set it down and do it again ten times.
And the best shooters in the world do regular dry practice. It might be working on the draw stroke; it might be vision drills; it might be movement stuff. Sure, they shoot thousands and thousands of rounds a year in live fire. But the true progress comes from dry practice sessions, which can be done much more frequently and with less expense to the wallet.
How much dry practice should you do? That depends on your goals, your lifestyle, and how much time you’re willing to sacrifice. For me, three 5-10 minute focused sessions a week seems to work well. Your mileage may vary. You could also look at it as a ratio of dry/live fire sessions. For example, if you do three dry practice sessions per week and live fire once every two weeks, you’re at a 6:1 ratio. Five times a week and you’re at 10:1. Etc.
Record your sessions. This is sort of a double entendre. If you can, literally record yourself practicing. It’s 2025; I’m betting you have a smart phone. I’m betting you have it with you right now. And I’m betting it has a camera. Take it out, press record and then forget it’s there while you do your practice. Save the video so you can review it later and analyze it; or show it to an instructor who can provide you with good feedback and tips for improvement. You may find having a small, portable tripod helps with this.
The other meaning here is to write it down. Studies have shown there are benefits to physically putting pen to paper versus typing or using an app. I’m not a neuroscientist, but there is something about the act of writing things down that aids in memory retention and goal-setting and achievement.
BONUS: I have created a tool for you to do just that. It’s a specially designed notebook for recording your practice sessions.

The Dry Fire Journal is a specially designed notebook for logging your practice sessions (and it can also be used for recording your live fire sessions).
There you go; five tips to improve your shooting skills. Get training to learn the skills and identify what you need to practice. Plan out your practice sessions so you know exactly what you’re working on. Spread your practice sessions out so you don’t get overloaded or frustrated. Do more dry practice than live fire. And write it all down so you can set goals and track your progress.
What Type of Ear Protection is Right for You?
If you shoot firearms, you need ear protection. If you do so frequently, you should probably invest in good quality ear protection. Here are some of the most popular options, with pros and cons for each.
First up is “foamies”. I don’t know if that’s the official name, but that’s what everyone calls them. Foam ear plugs offer a high noise reduction rating (NRR). They work by conforming to the shape of your ear canal, forming a seal that acts as a protection barrier. I usually keep a jar of these in my range bag as an emergency backup or to give to friends.
Pros: High NRR; inexpensive; disposable
Cons: Difficult to hear conversations/surrounding environment
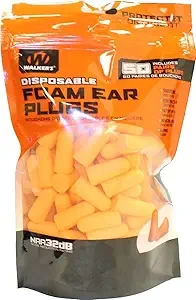
Walkers Foam Ear Plugs in bulk
Next up is passive over-the-ears, or ear muffs. As the name implies, these consist of two over-the-ear cups that form a seal against the head. They are connected by a band that wraps over the top of the head. The quality of the band is important, both for comfort as well as getting a good seal to protect your ears.
Pros: High NRR; inexpensive
Cons: Can be uncomfortable over extended periods; may be difficult to use with long guns
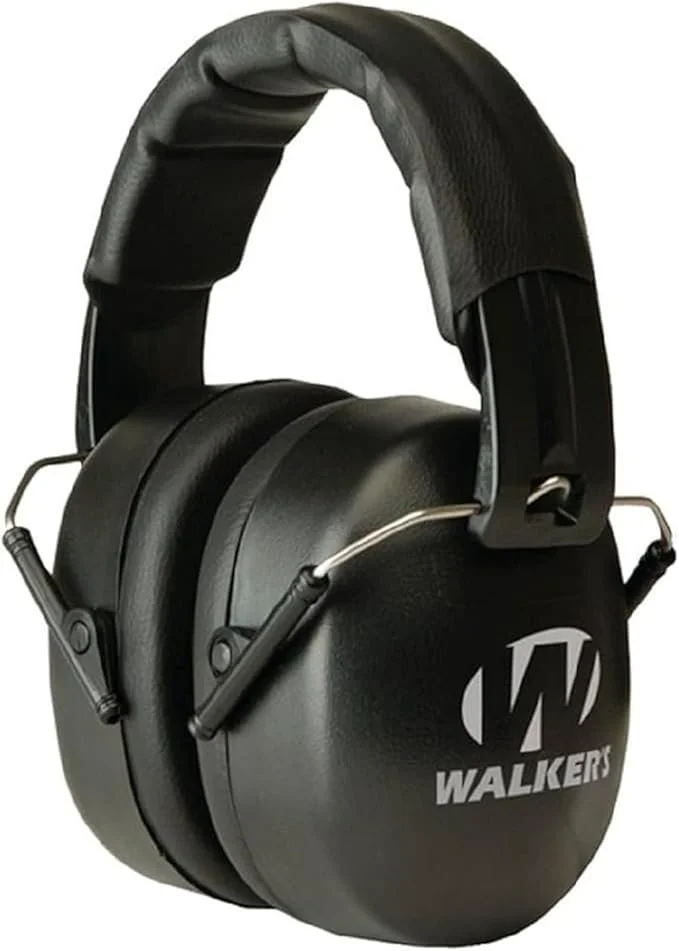
An inexpensive set of Walker’s Over-the-Ear muffs
A step above over-the-ears is active or electronic over-the-ears ear protection. Active over-the-ears have the same form factor as passive with the addition of external microphones and internal speakers. The microphones detect loud noises and reduce the sound to tolerable levels. The speakers allow you to hear things like range commands from an instructor or what the couple four stalls over is arguing about.
Pros: Medium NRR; increased awareness of general surroundings
Cons: At least twice the cost of passive ear pro (and on up!); can be uncomfortable for extended periods; may be difficult to use with long guns
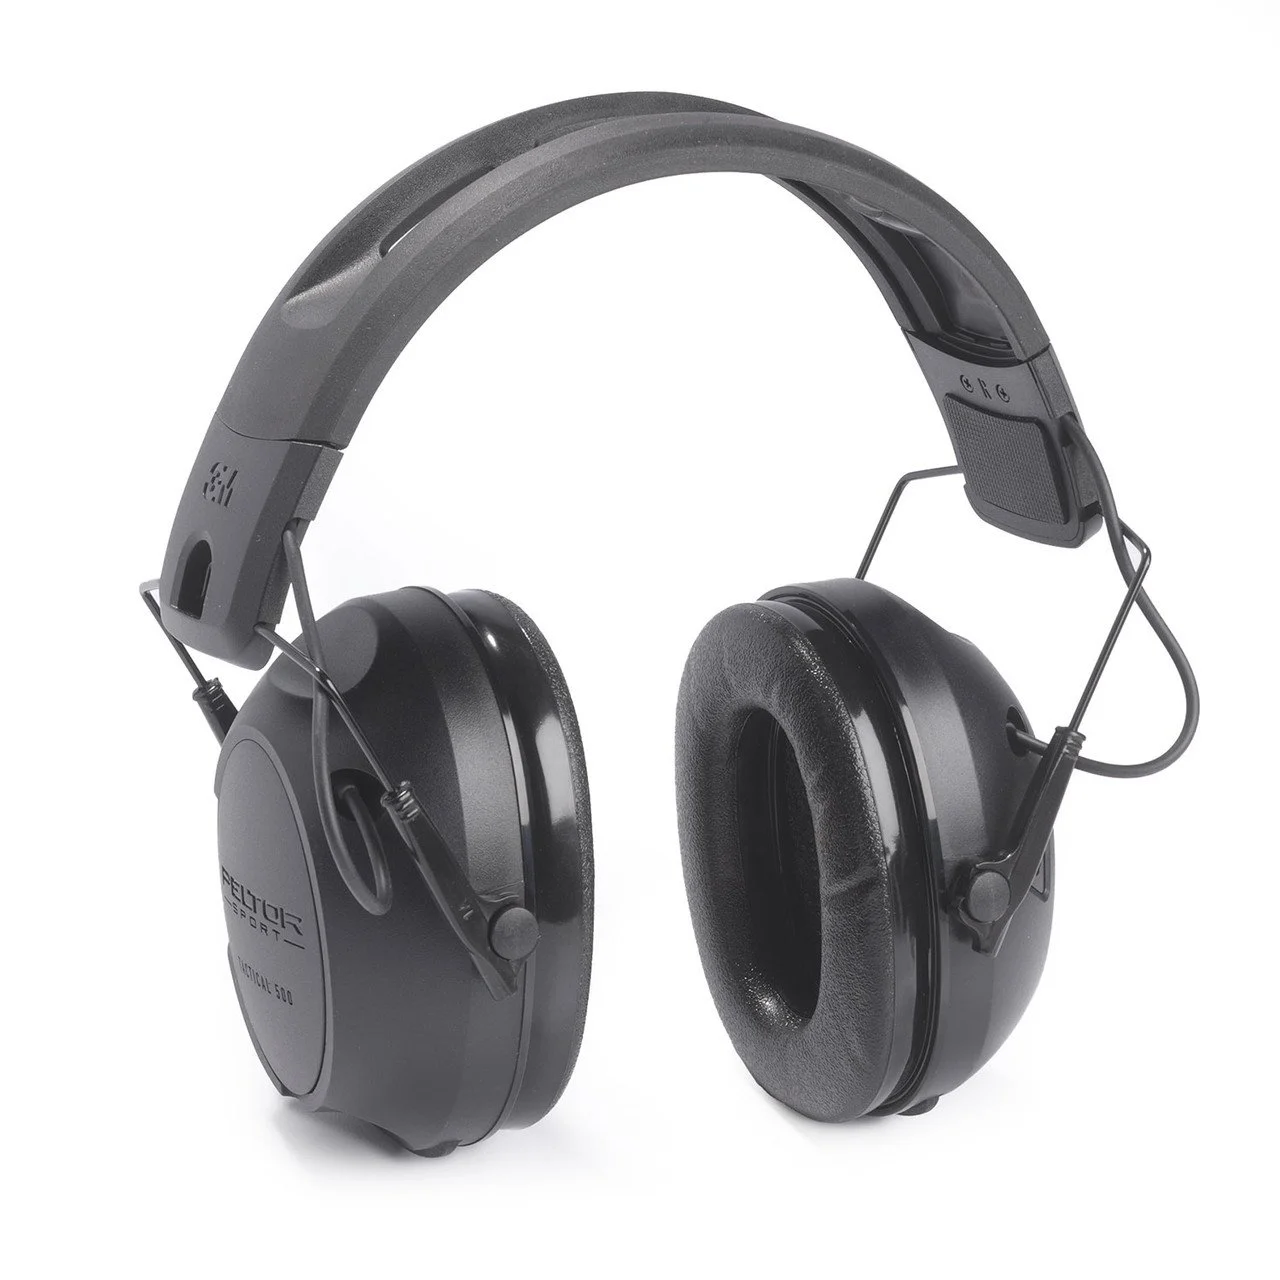
I have owned and used the Peltor Sport Tactical 500 electronic over-the-ear muffs for many years. They are worth every penny.
Lastly, we have active or electronic in-ear ear protection. Electronic in-ear protection offers the comfort of foamies with the benefits of electronic over-the-ear protection. It’s kind of the “best of both worlds”. They sit in the ear, more like ear buds than plugs, which creates a tighter seal, thus providing higher NRR than over-the-ears. And the electronics shut down loud noises while allowing you to hear normal sounds in your environment.
Pros: NRR close to foamies; comfortable
Cons: Can be expensive; must be fitted properly

These Pro Ears Stealth 28 HTs are my current go-to ear protection. They are very comfortable, the controls are simple, and they fit in your pocket.
Speaking of ear buds, DON’T use ear buds as ear protection. They are not designed to be used in that manner and do not provide a proper seal of the ear canal to protect your ears. Don’t get me wrong; I love my AirPods and have them in as I’m typing this. But they are not for use at the gun range.
There you go. An introduction to the different types of ear protection available, with ones I have used and recommend. Grab a couple different types and toss them in your range bag. Happy shooting!
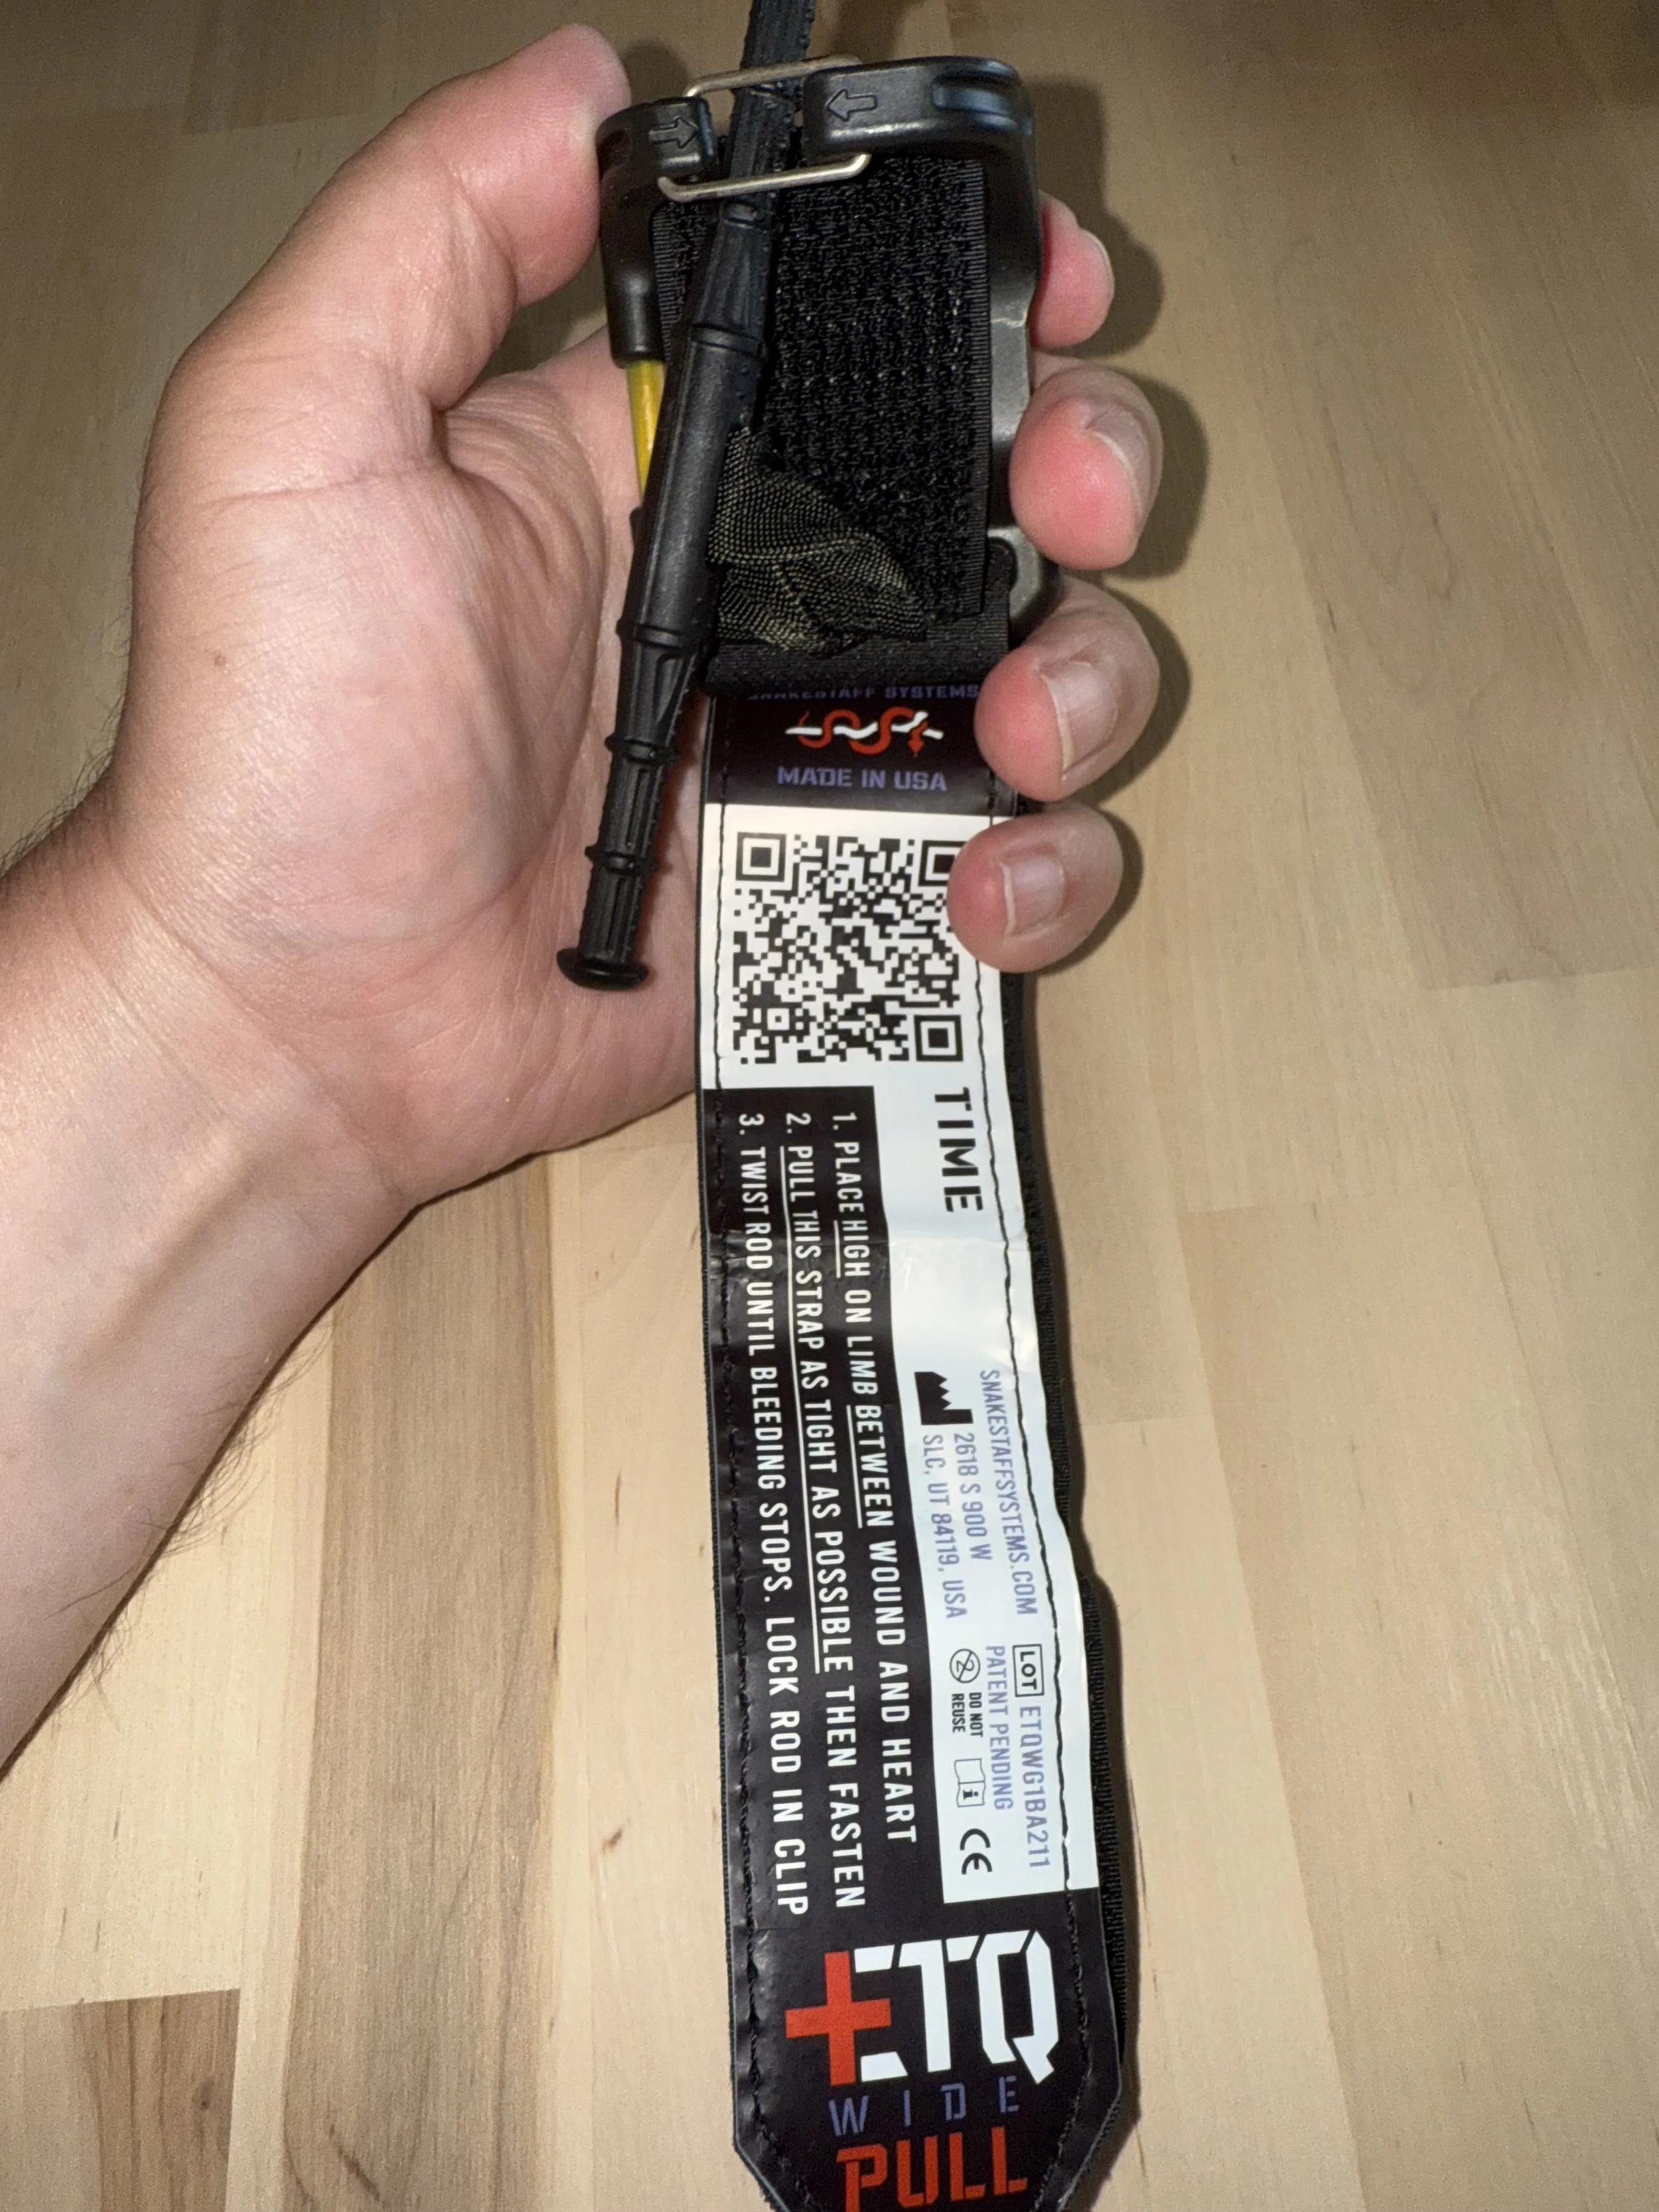
How to Stage the Snakestaff Systems ETQ Wide
If you’ve taken a “Stop The Bleed” class or some other emergency medicine or traumatic injuries treatment class, you’re likely familiar with the CAT-7 (previously CAT-5) or SOF-T tourniquets. You also likely learned how to stage it, or set it up for quick access so that it’s ready for use.
In recent years, a new tourniquet has become pretty popular, the ETQ (Everyday Tourniquet) from Snakestaff Systems. Although it’s not approved by the Committee on Tactical Combat Casualty Care (CoTCCC), it has gained popularity due to its small form factor and ease of carry. It fits in a standard handgun magazine pouch, and Snakestaff even makes a sleeve for it, allowing it to slide into a pocket easily. It should also be noted that the ETQ is available in two form factors, regular (1” diameter) and wide (1.5” diameter). If you get one, go with the wide, as it will facilitate occlusion of blood flow much better.
I have a few of the ETQs, some I purchased and one I was gifted by Steve Moses at the Tactical Anatomy Summit (they very graciously donated one to every student). One problem I have found is that if you try and stage the ETQ or the ETQ Wide in the same manner as a CAT tourniquet or a flat-packed SOF-T, you end up with a messy pile of velcro, which can be problematic and time consuming to untangle.
After playing with it for a bit, I have come up with what I believe to be a workable way to EDC the ETQ Wide tourniquet.
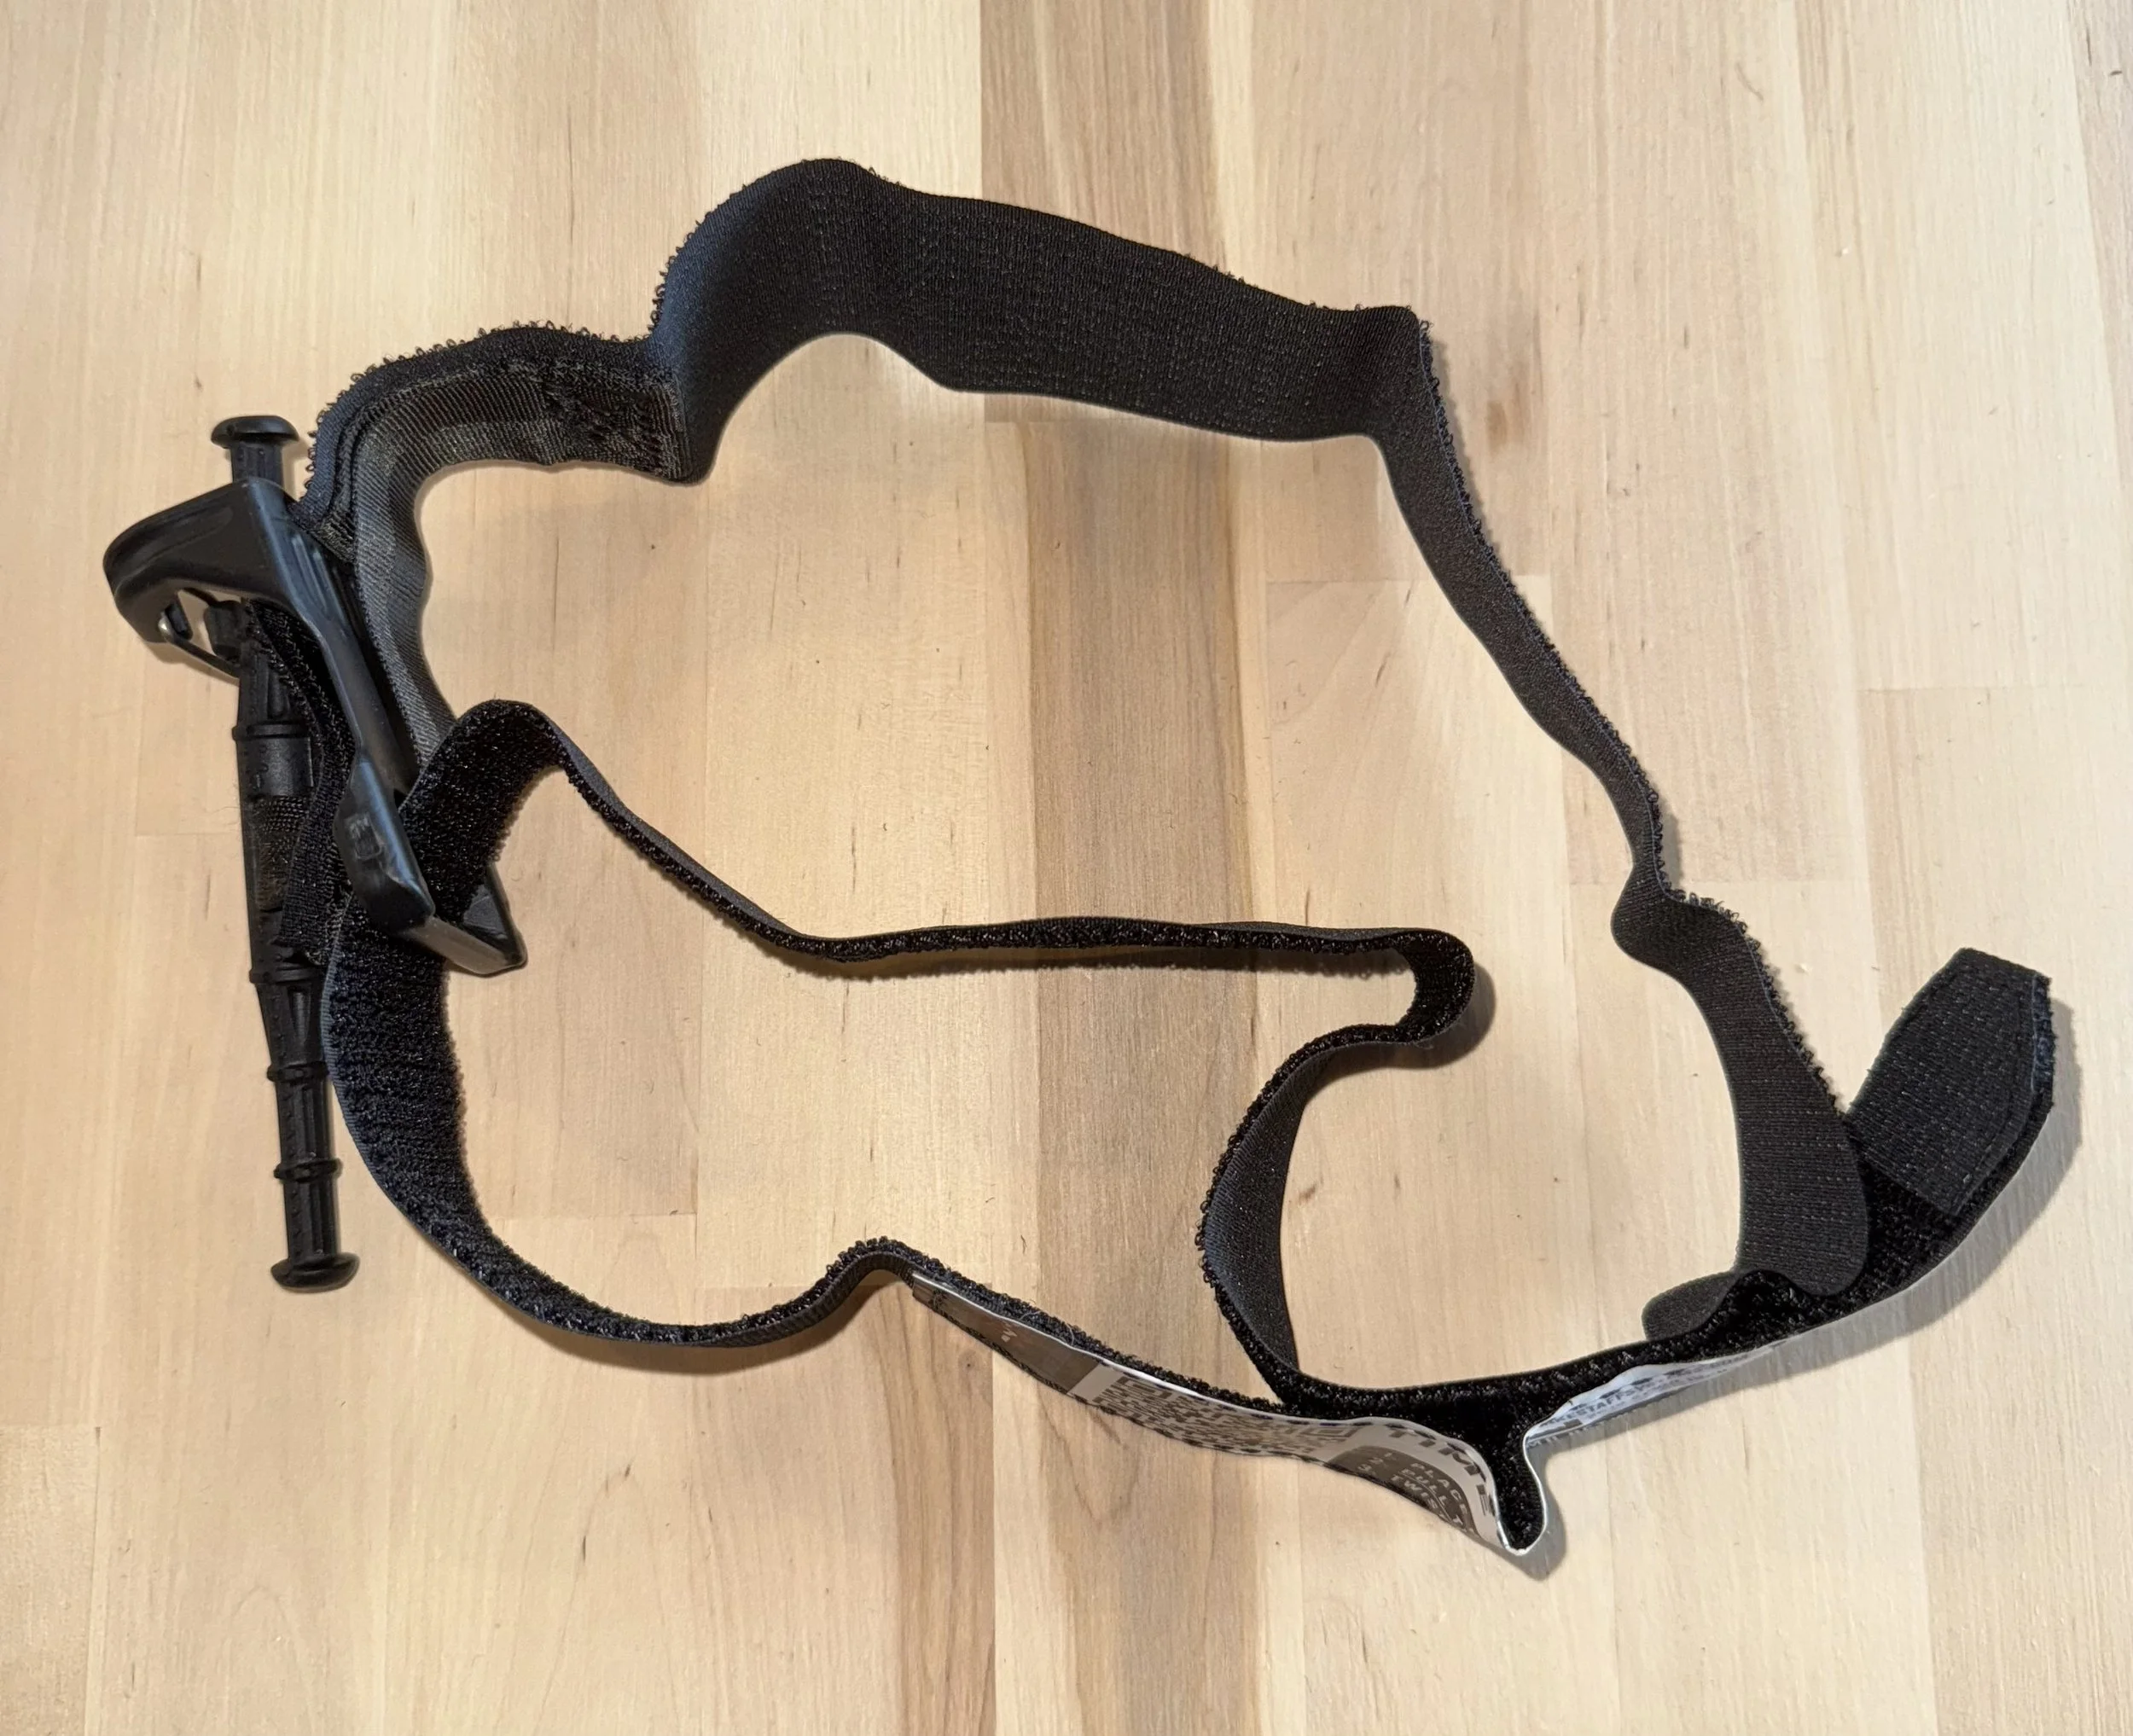
The ETQ Wide in its messy, tangled up velcro state after opening it up.
First, arrange the tourniquet so that you have a loop on one side and a tag end on the other.
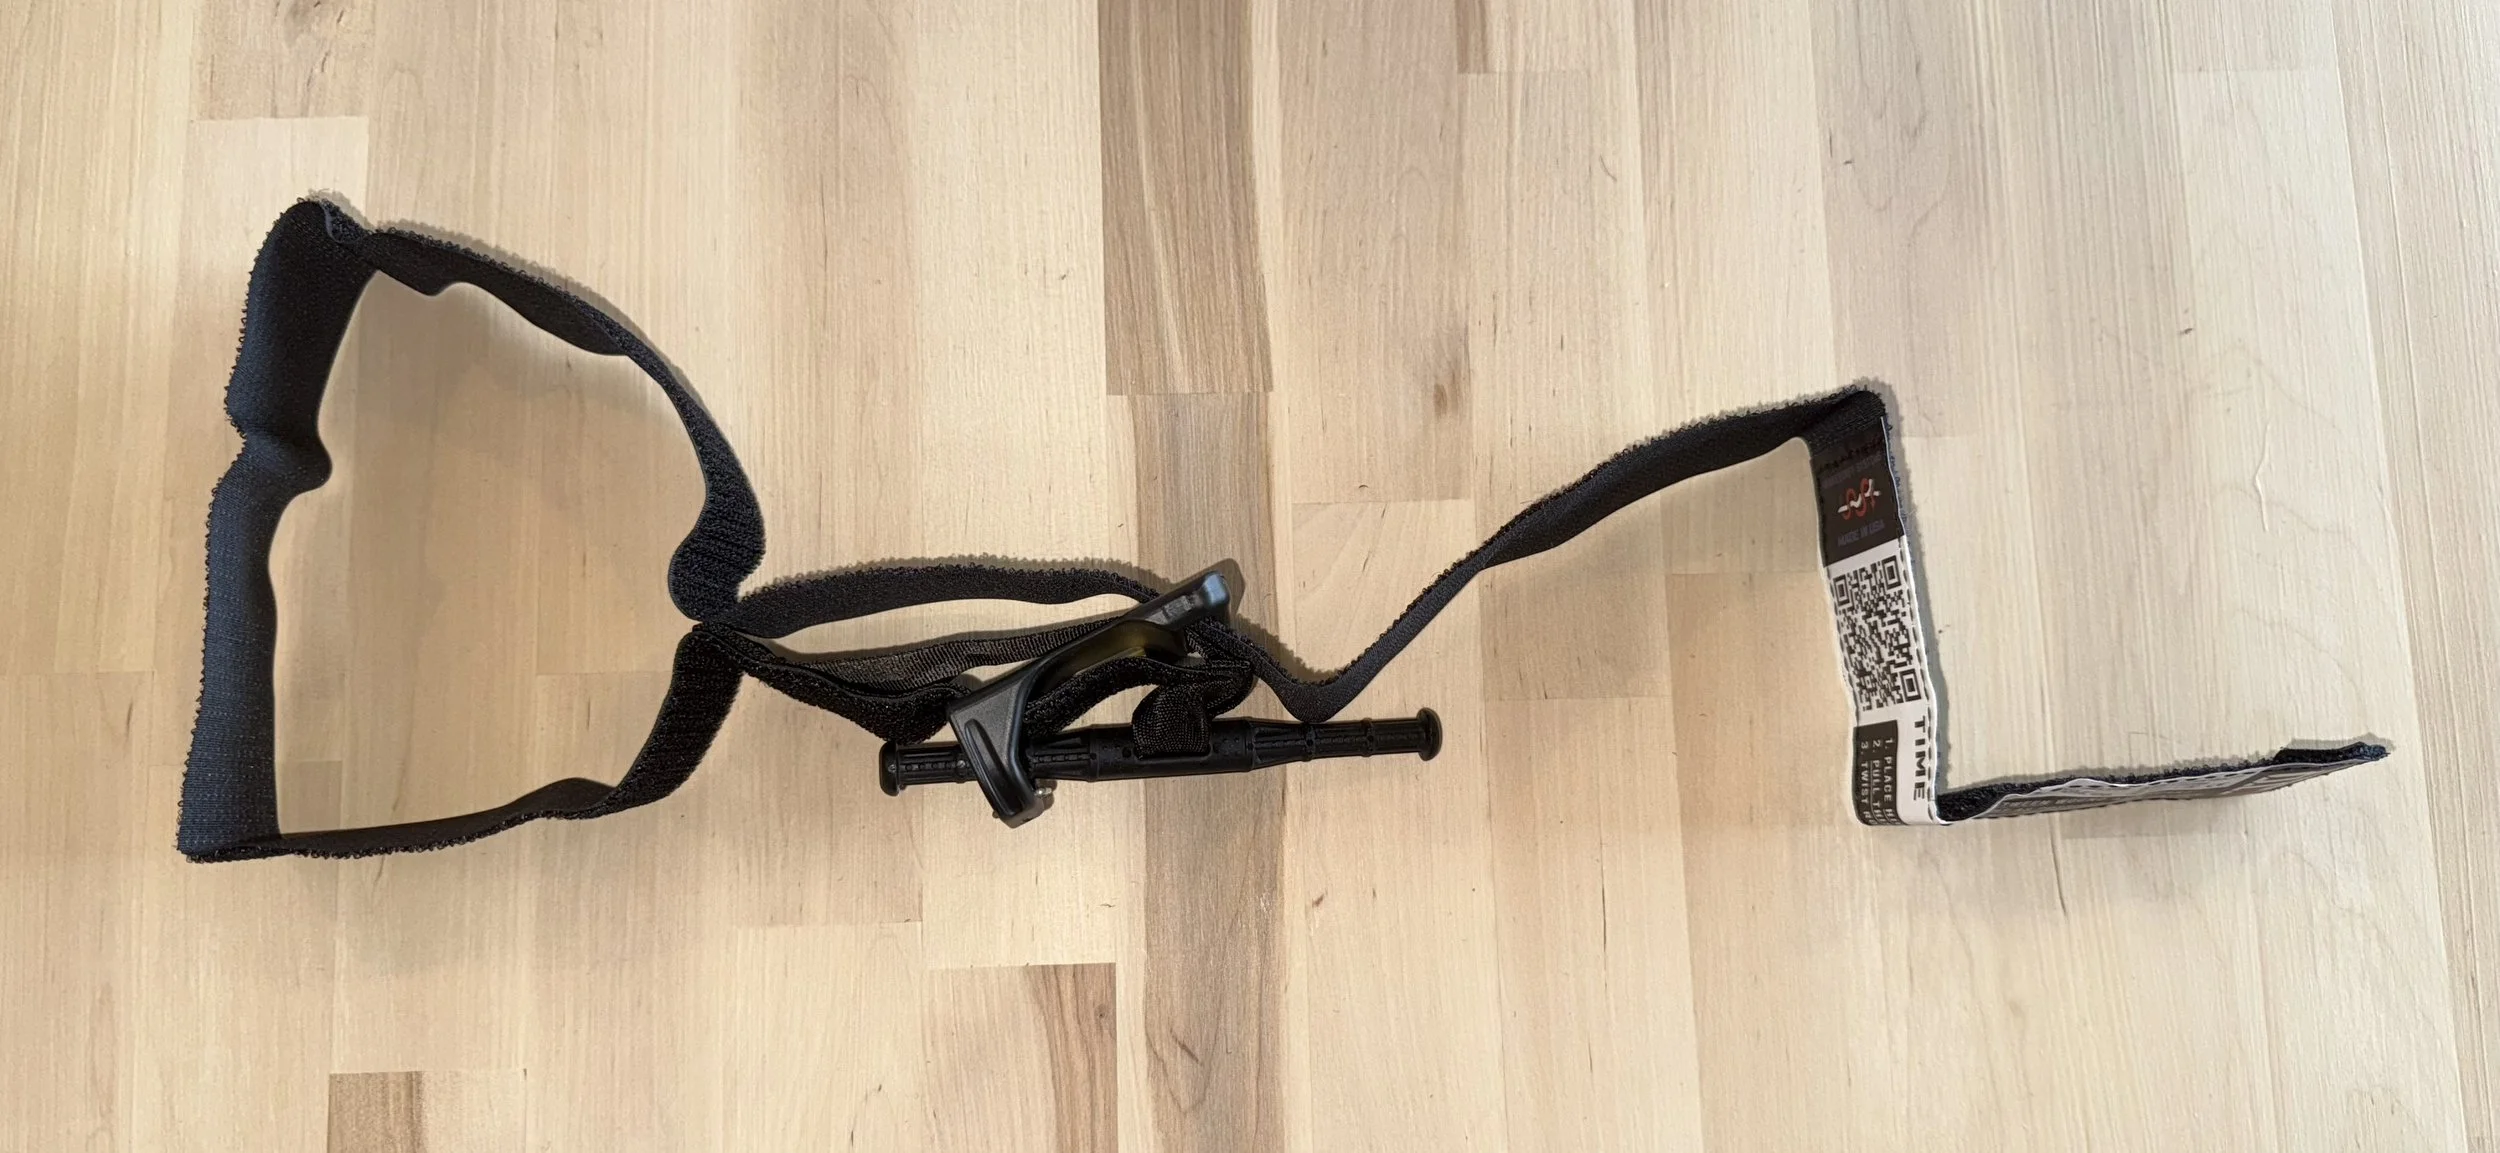
Loop on one side, tag end on the other, with the windlass in the middle.
Next, fold the tag end over towards the loop end. This should be done on the underside of the tourniquet. But, don’t allow them to velcro together just yet.
Before you flatten it out, do your best to make sure the loop and the tag end are as close to the same length as possible. This part can be a bit tricky. If you hold tension on it by grabbing the hard plastic piece (where the windlass is), you can use your other hand to simultaneously size the loop and tag end.
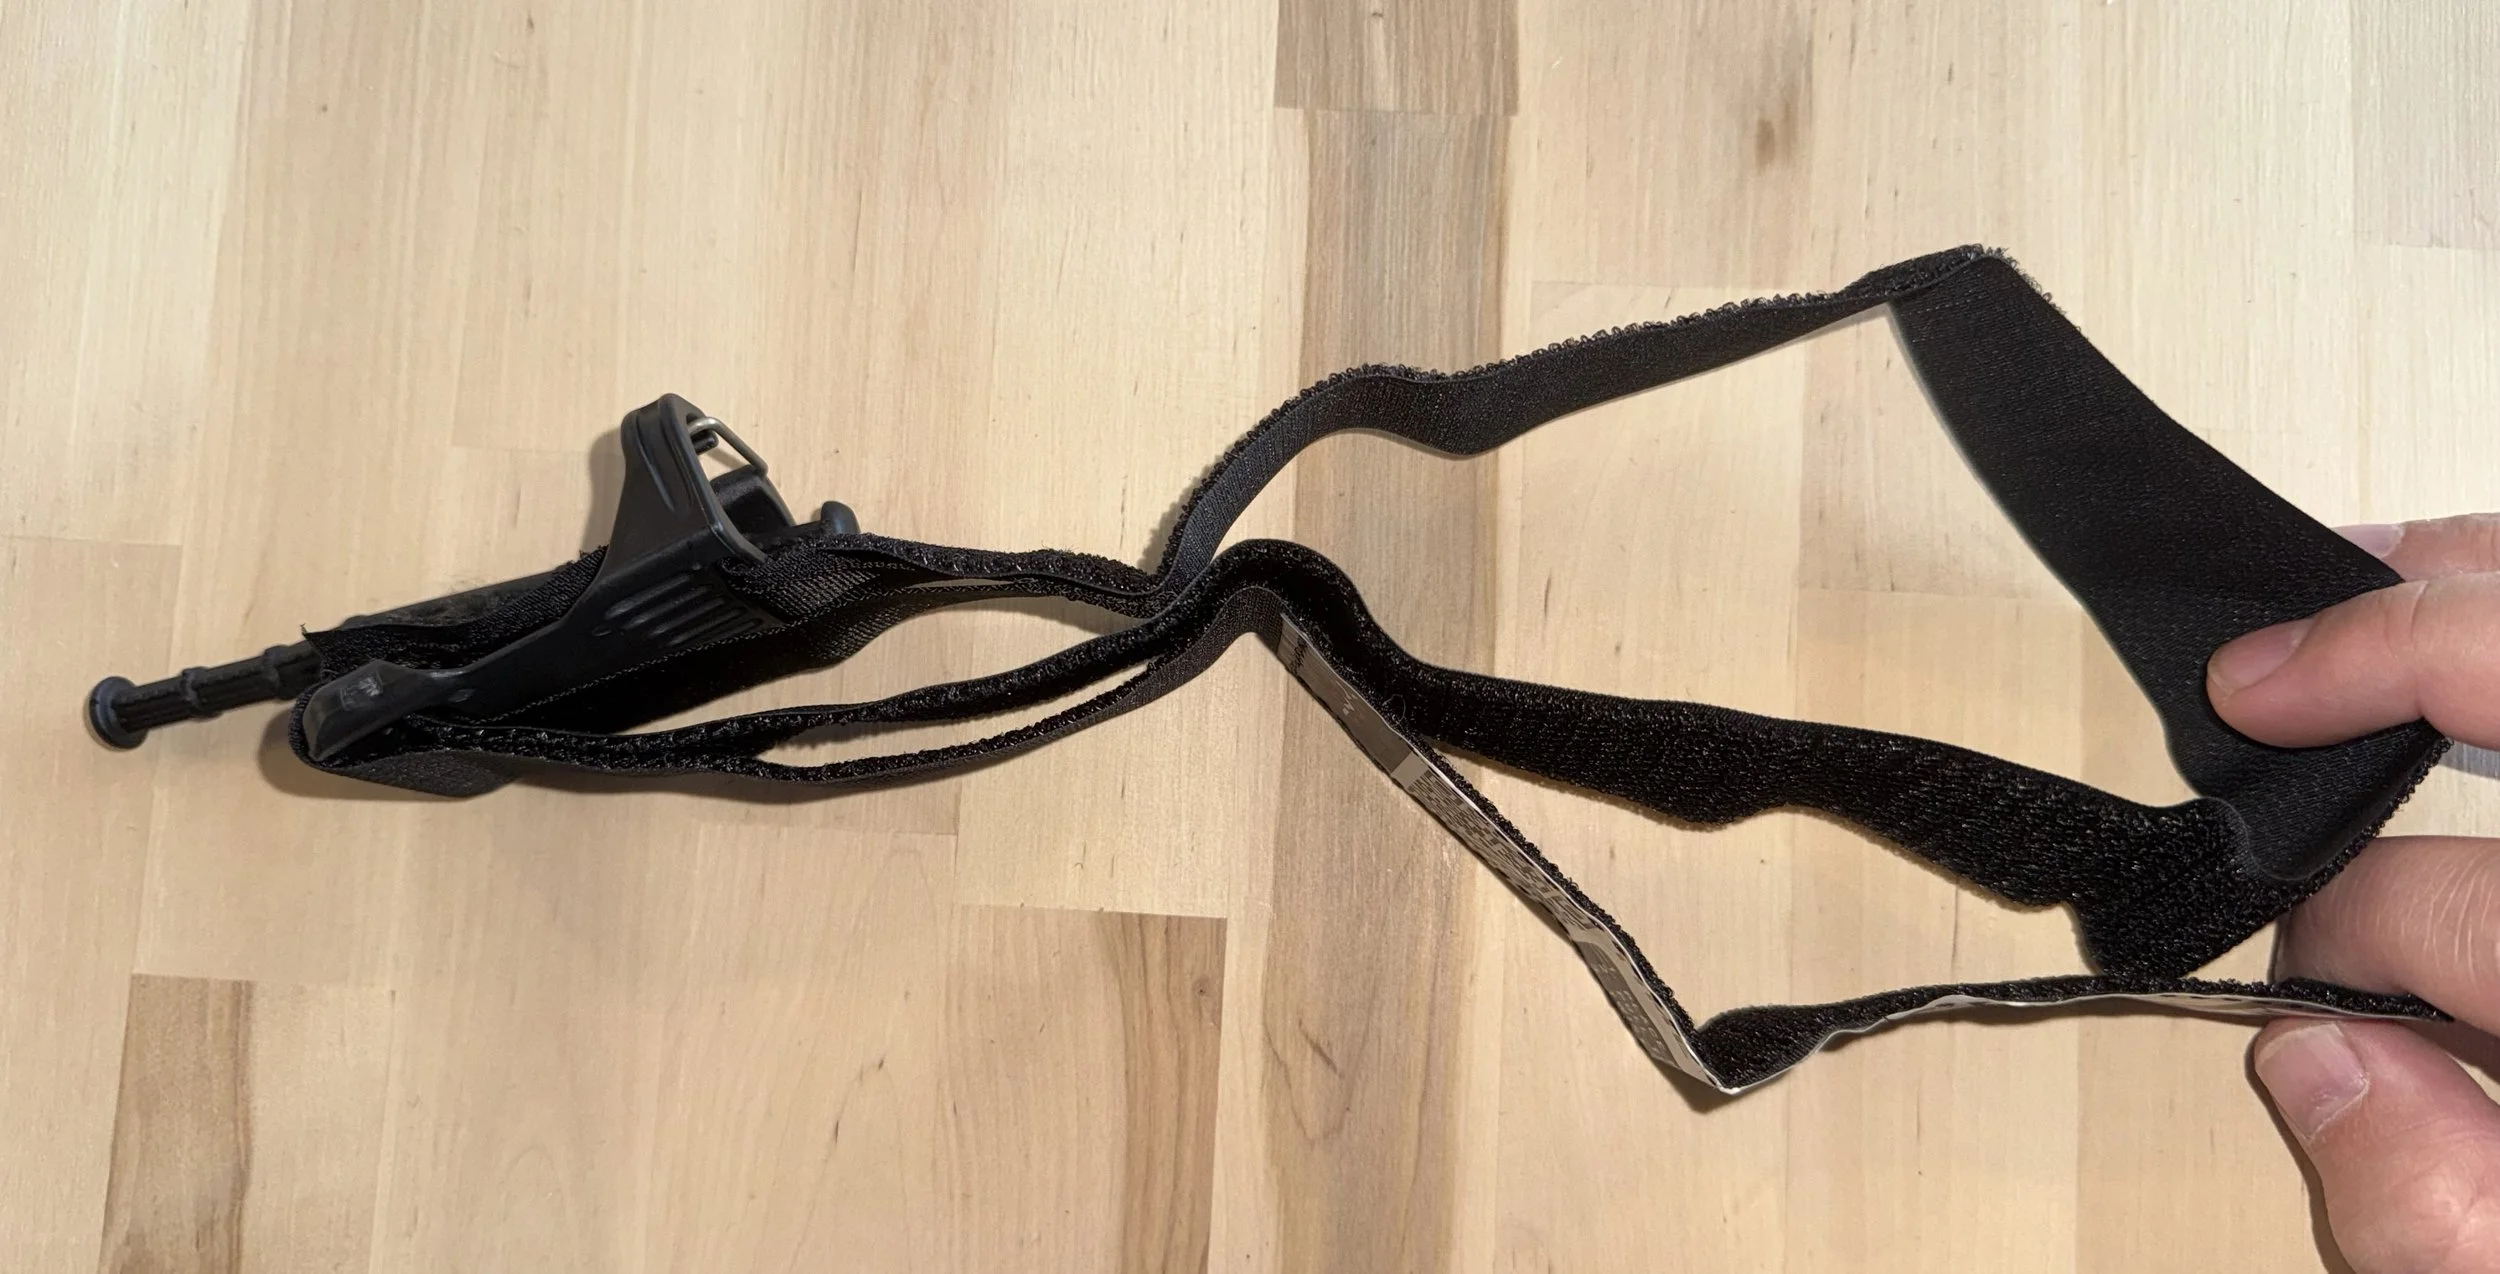
This step is tricky. Use a middle or ring finger inside the loop to hold tension while the thumb and index finger pull the tag end for proper sizing.
Once you have the loop and tag ends sized the way you want them, carefully connect the two sides of the velcro and flatten it out.
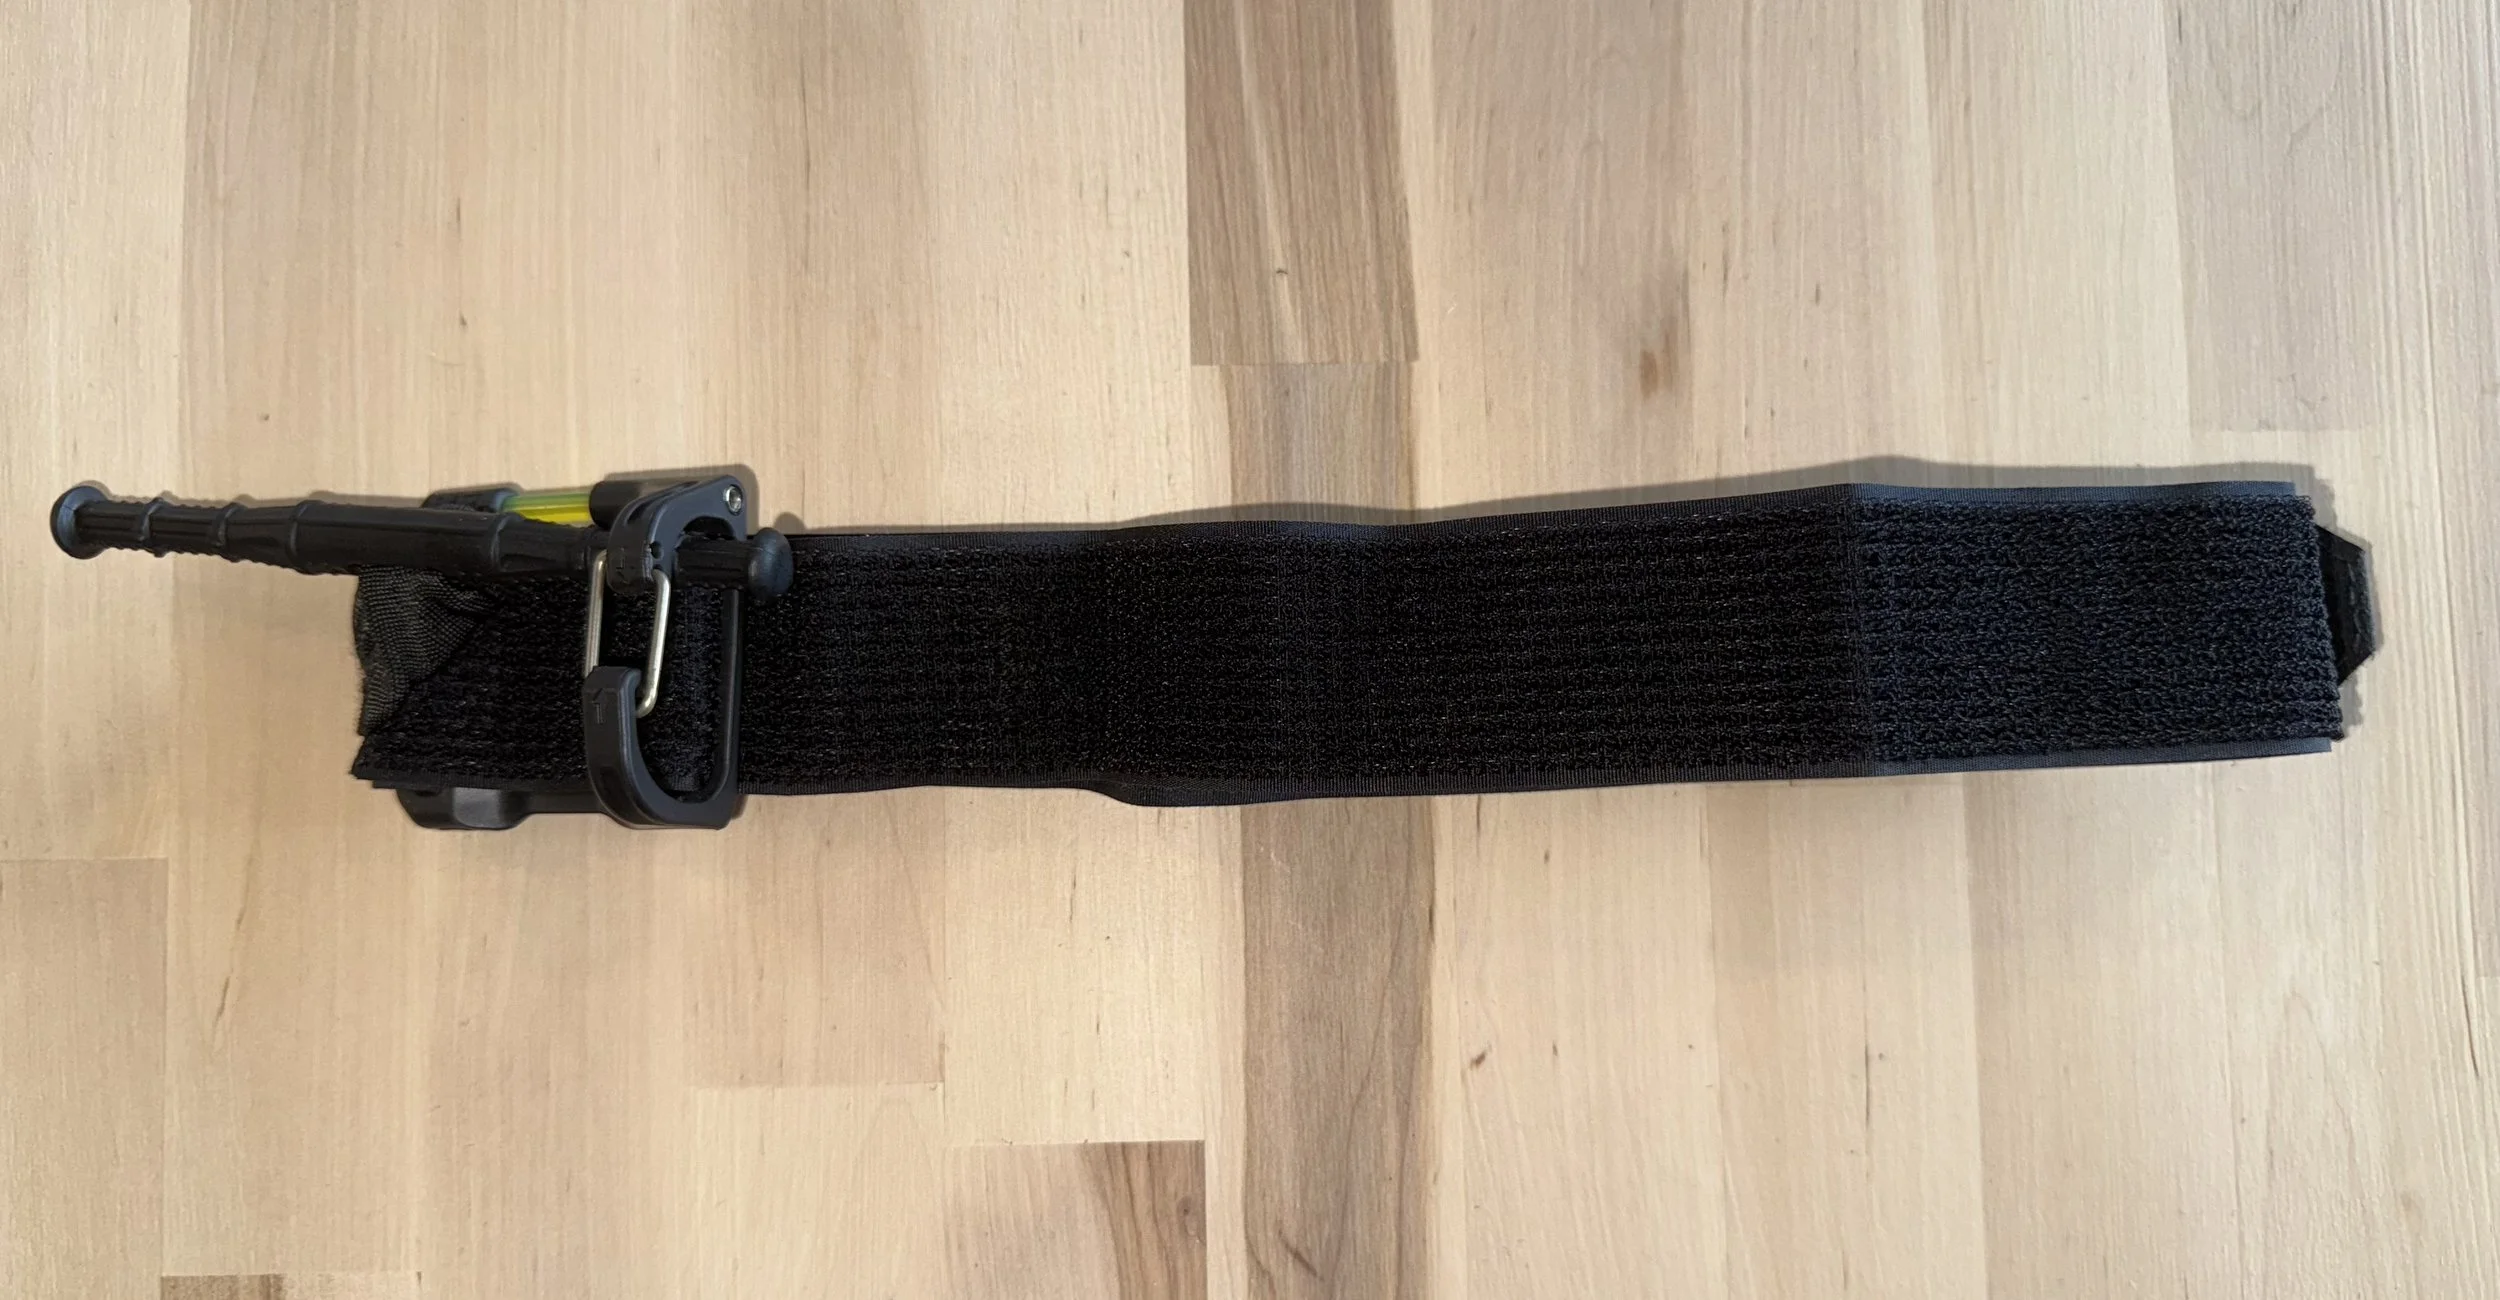
The flattened out ETQ Wide, almost ready to be staged.

The other side of the flattened ETQ Wide tourniquet.
We’re almost done! Now that we’ve eliminated the possibility of a velcro mess, we simply roll it up. Fold the tag end back over itself near the top of the tourniquet. Make sure to pinch that in place while you make the next fold.

Pinching the first fold to hold it all together while we finish things up.
Lastly, simply fold the tag end again and lay it over the top of the plastic piece. Do your best to even it up so that the pull tab lines up with the top of the plastic piece. You can then tuck the tag end underneath the buckle to keep it in place.
If it doesn’t line up the way you want, you can alway go back and resize your loop. If you’re the “neat and tidy” type, it may take you a few tries to get it right.
Preparing for the final fold.
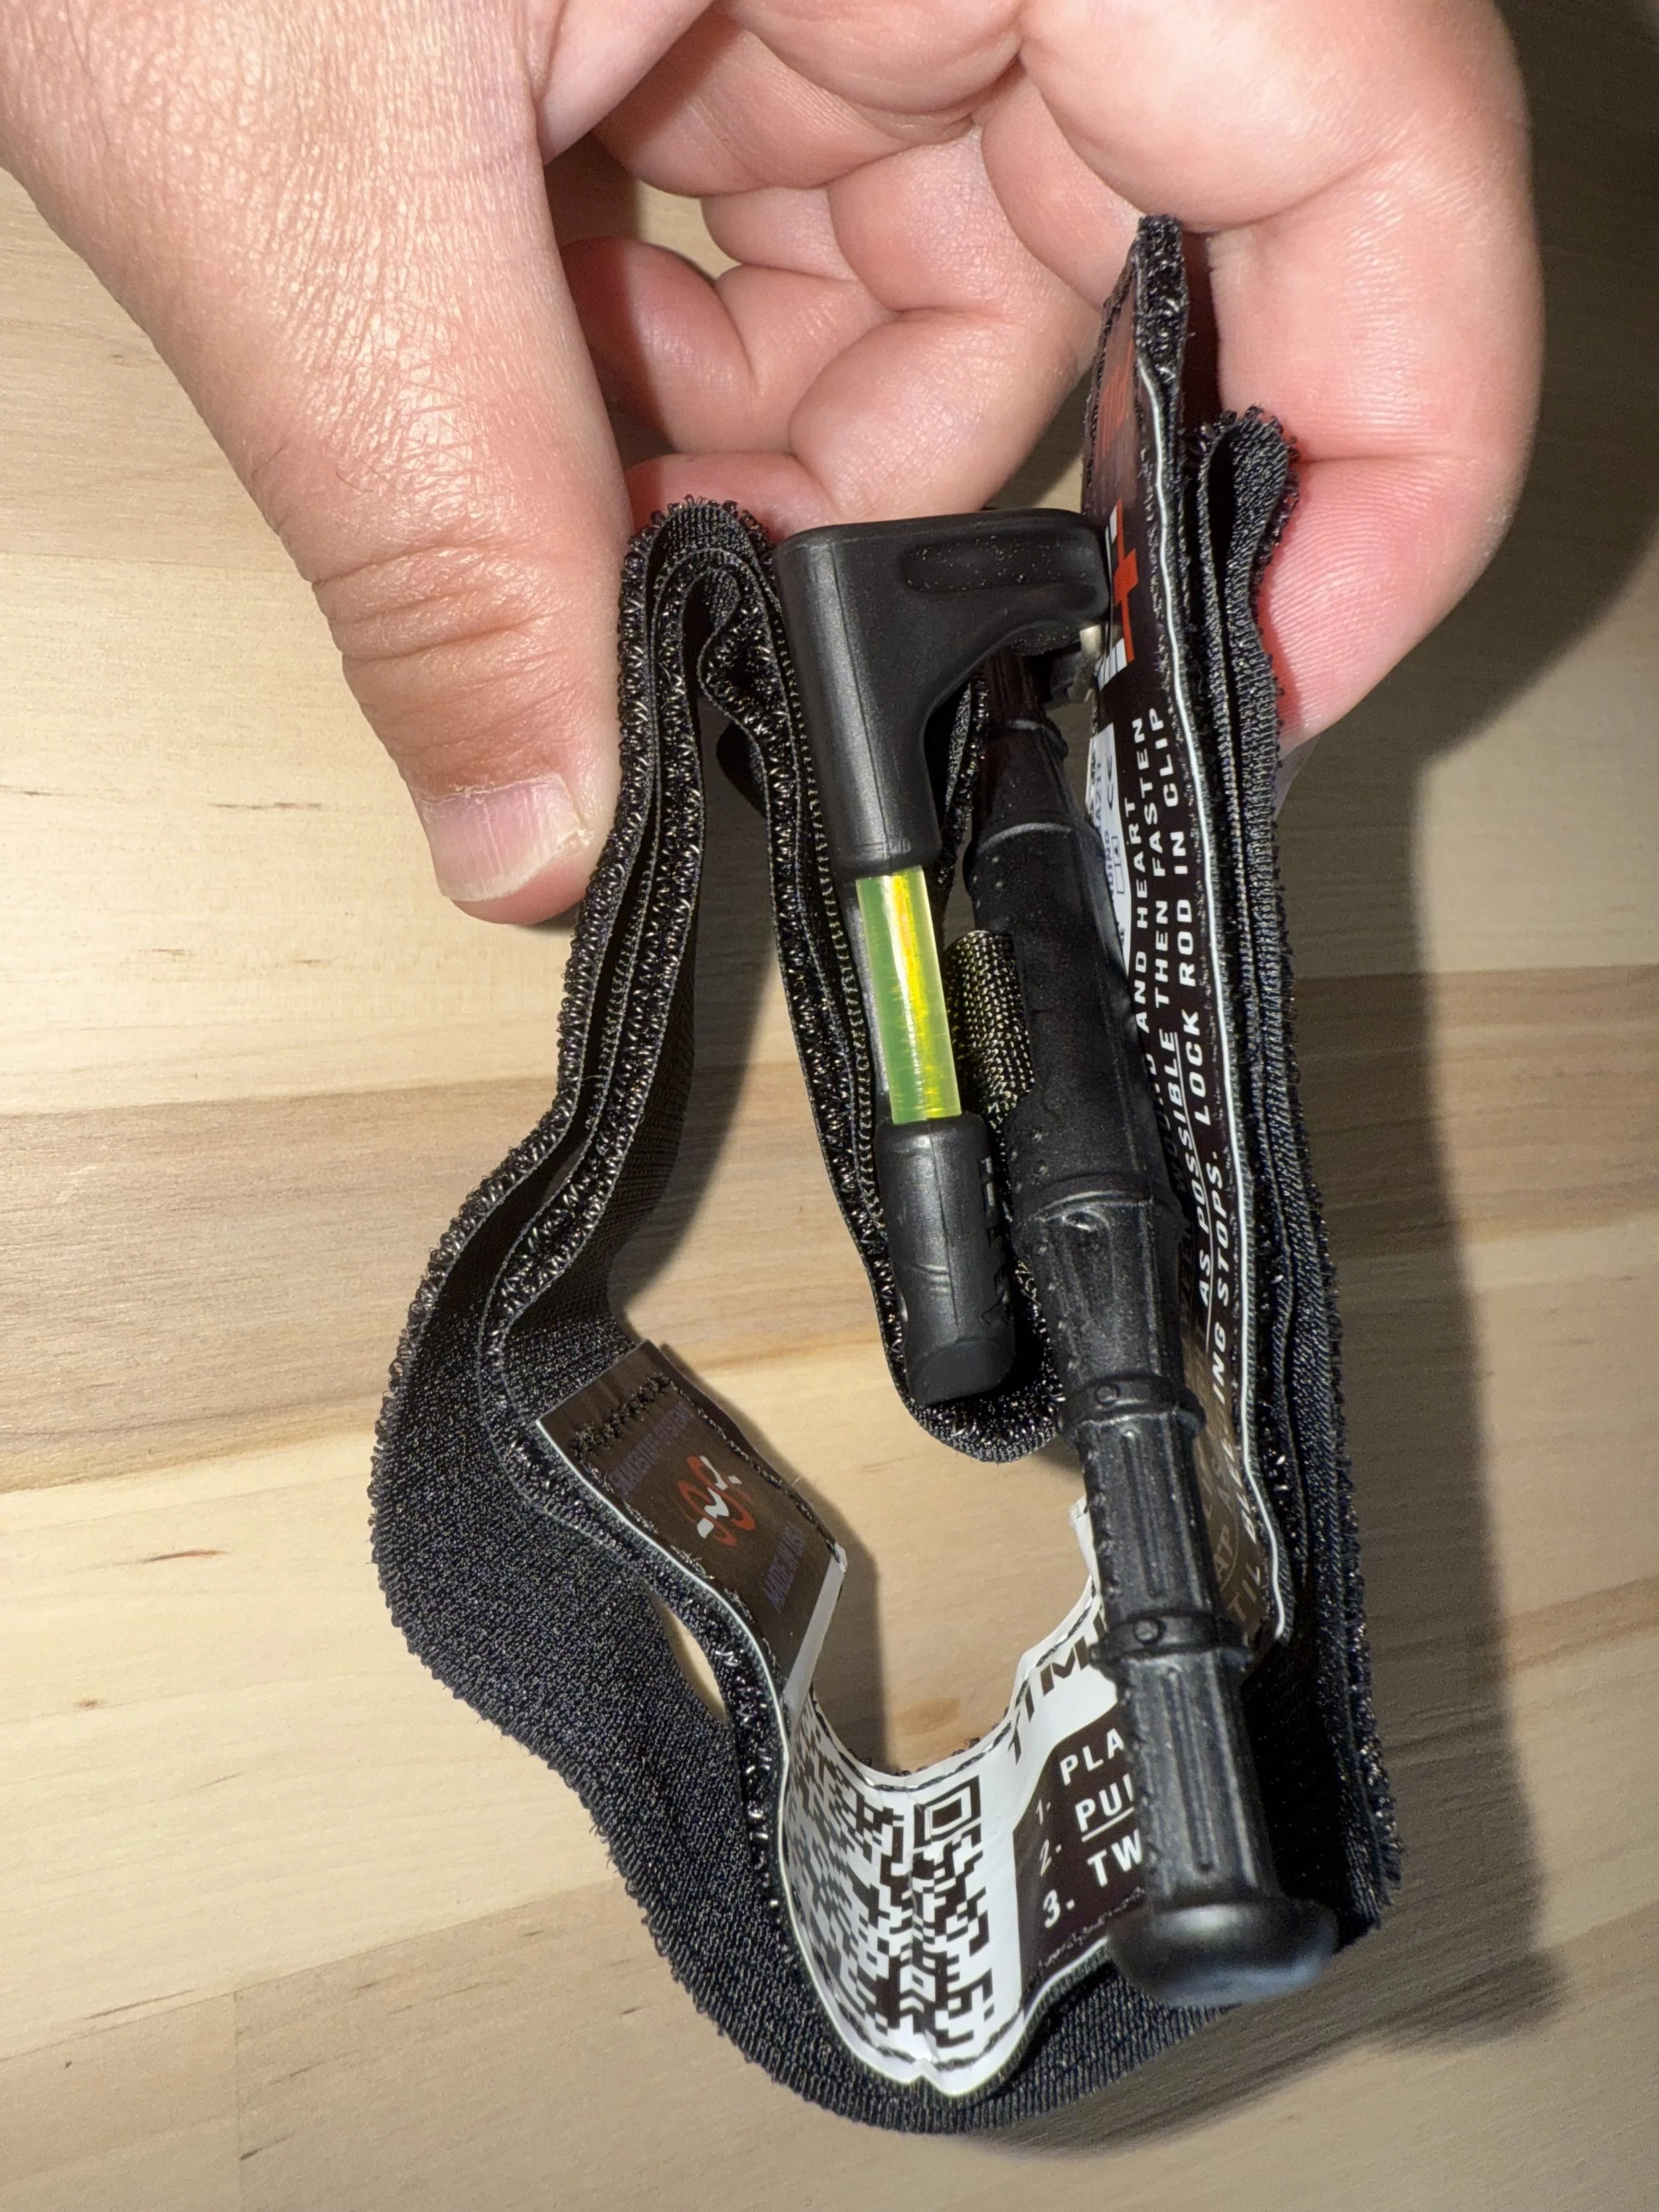
Here is what it looks like after the last fold.

The finished product, ready to go in a pocket.

Finished product again, shown here pinched between the fingers to demonstrate how inserting it into a pocket will inevitably compress it.
If you want to clean it up, you can put a rubber band (or ranger band) around one end to keep it tight. Or, there is always the previously mentioned sleeve, which Snakestaff sells. I tend to just slip it into the pocket, as is, and allow the tension of the pocket to compress it down.
There you go. An easy way to stage your Snakestaff Systems ETQ-Wide for EDC.
How Much EDC is Too Much EDC?

Everyday Carry, or EDC as it’s called, is a common topic in the self-defense community, firearms community, and prepper community. There are thousands of articles and videos on the topic (I’ve even made a few myself over on the YouTube channel). Here is my take on the subject.
First, let’s examine some of the common problems I see with EDC articles and videos.
Making it about the gun. One of the most common problems I’ve seen with EDC articles/videos is focusing on the gun. It tends to turn into a show-and-tell of the person’s gun collection. “On Tuesdays, I carry THIS gun in THIS holster, but on Wednesdays, I switch to THIS gun in THIS holster because…” 47 guns later, we haven’t learned anything about EDC except how much the author loves handguns.
Making it about the knife. This is the exact same problem as with the gun. It turns into a showcase of the author’s knife collection rather than why he or she carries a knife and why he or she chose that particular knife.
Medical gear. This one runs the gamut from carrying a tourniquet at minimum to ankle kits, pocket first aid kits, or full on IFAKs. The problem here is focusing on the gear itself and not knowing how to use it. Jonathan Willis recently wrote a great article on his blog that addresses this issue. (He also recently released a nice pocket kit that I will be ordering and trying.)
Making it about the flashlight. See problems 1 & 2 above.
Showcasing a product and trying to justifiy its use. I see this one a lot, especially with the new fanny pack trend, but also EDC bags in general (that’s right, we need an entire bag for EDC now). Sling bags, over-the-shoulder bags, messenger bags, pocket organizers, etc. Buy it and fill it with stuff. That’s the message that’s conveyed.
We can sum this up by saying gear, gear, gear. It’s all about the gear. You need a Batman belt full of widgets and gizmos and an EDC bag to carry extra widgets and gizmos. Or so it would seem. Newsflash: it’s not about the gear.

Does your EDC look like this? If you work in construction, great. If not, you may want to make some changes.
Here is what I believe to be a better approach to EDC. Ask yourself these three questions.
What is your mission?
What would you not leave home without?
What problems are you likely to face?
Question one may seem odd, but I think it’s essential that we first establish what we’re trying to accomplish. This allows us to frame our mindset, which is EDC tool number one. Your mission could be going to the grocery store, going to work, going to a friend’s house, etc. With that in mind, do you need your Batman belt to accomplish the mission? Not likely.
Daryl Bolke has spoken about a similar concept that he calls the “Mouse Gun Mindset”. He talks about choosing the gun you carry based on lifestyle choices and breaks it down into “get into trouble” guns versus “get out of trouble” guns. You should go train with him to hear more about it.
Question two is where the real EDC gear starts. Here are the things I would not leave home without: wallet, car/house keys, cell phone. That’s it. Pretty boring, right? Everything else is an optional accessory and a lifestyle choice.
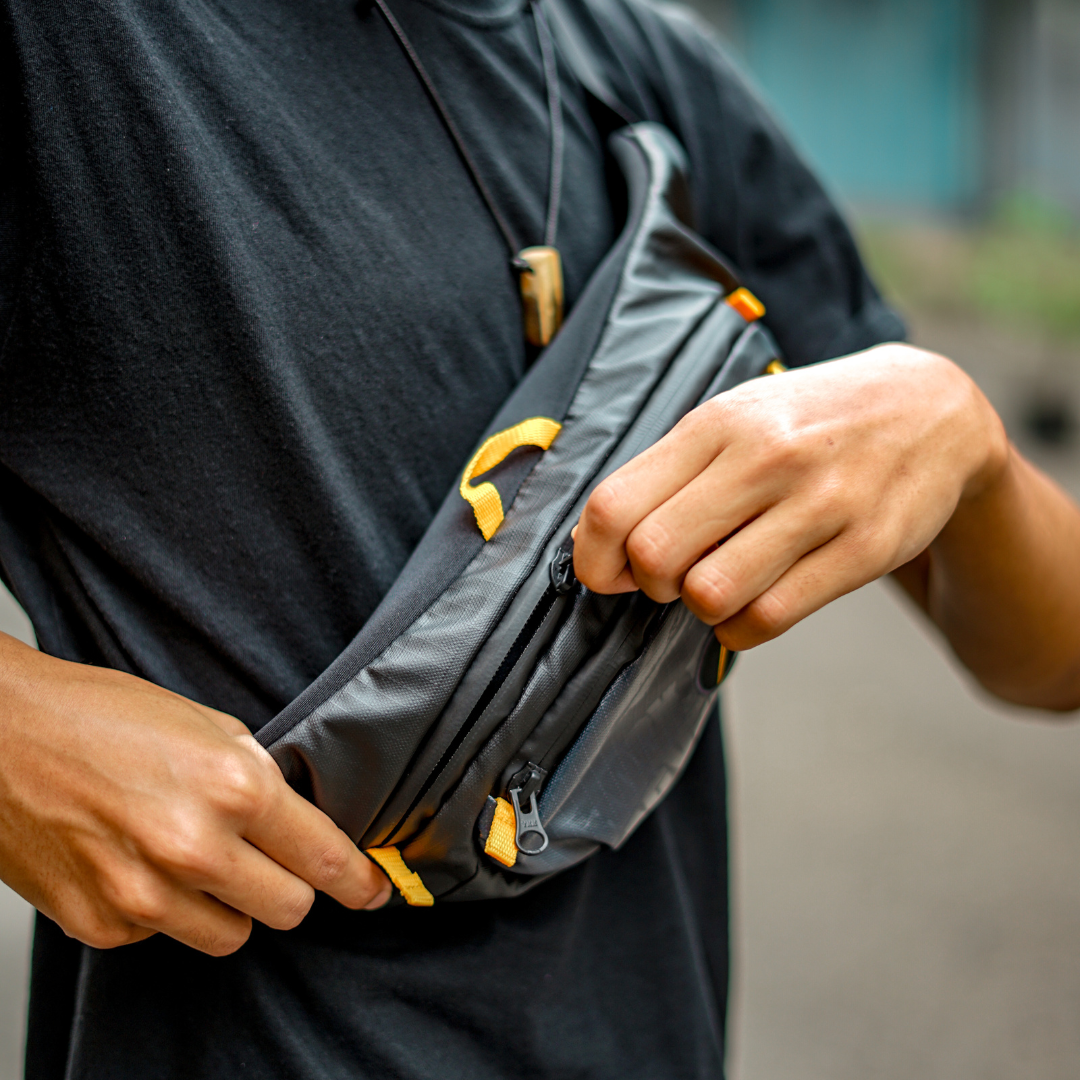
Fanny packs (or cross-body bags, in this case) are all the rage these days. But do you NEED one for EDC?
Now please don’t get me wrong here. If you see me out in public, I likely have more items on my person than wallet, keys, and phone. I’m simply saying those are the bare minimum, and everything else is addressed in the third question.
The last question is where you get to decide things like should I carry a gun? Which gun? Do I need a knife? Do I need TWO knives? Should I carry medical gear (if you don’t know how to put on a tourniquet or use a chest seal, the answer is get training first!)? And how you address this will be determined by you and your lifestyle.
Here are a couple examples:
Mission: Check the mail; mailbox is located across a long parking lot on the other side of the apartment complex. Do you need your Batman belt for this or can it be accomplished in sweatpants or athletic shorts? Solution: Keys in-hand, wallet and phone in one pocket, j-frame in another pocket. Maybe some pepper spray clipped IWB. No need for the knives, IFAK, fire starting kit, etc.
Mission: Going to the grocery store; grocery store is in a nice part of town with a low crime rate and it’s the middle of the day. Would the sweatpants from the first scenario still work? Maybe, but if you’re a grown man (or woman), you’ll likely put some real pants on. Wallet, keys, phone are now easier to carry with more pockets. Added support from a belt allows for a larger concealed carry firearm along the waist. Here is where I would add in a pocket knife and pepper spray as possible needed additions. A pocket IFAK (again, if you have the training) might be added as well.
To sum things up, EDC should be about the mission, not the gear. Do a thorough examination of the problems you are likely to face in your day-today activities. Then scale the gear selection to solving those problems.